How to Build a Melting Snowman Yard Decoration
Do you remember the Mr. Skelly drinking toxic waste project I did at Halloween? Well, I was ready to make something fun for Christmas with the same spray foam and decided to recreate a melting snowman yard decoration I had seen. The best part of this is that I can keep it out all winter, because it is not just a Christmas decoration! And the neighborhood kids are already loving it! Follow along with this step-by-step guide to make your own Frosty.
Note: This post contains affiliate links. I may earn a commission at no extra cost to you. Thanks for supporting my content! 🙂
Melting Snowman Yard Decoration Supplies:
Melting Snowman Yard Decoration Step #1: Add Lights
First, take the laundry basket and place it upside down. String the lights around and through the laundry basket. Honestly, the lights part is optional, but I think it gives it that extra flair that I love! Because what melting snowman doesn’t shine at night?
Step #2: Cover the Basket with Spray Foam
For this step, you want to cover the lights and basket with the spray foam. Make the part on the ground, the “melted part,” whatever size you want. Cover the entire basket, the ground, and the lights. You may need to do a couple of layers of foam to make sure it is nice and covered.
Step #3: Make the Head
Take the two foam half rounds and glue them together. This will be the head of your melting snowman.
Use the spray foam to attach the head to the “body,” AKA the basket. Then cover the head with spray foam. Again, you may need to do a couple of layers. Just spray until you feel like it is perfect!
Step #4: Paint & Add Snow
I felt like the foam was a little too yellow, so I painted it white. Once it was painted, I used spray adhesive to attach artificial snow to the snowman. This made it look a little more like real snow. Then, I sealed it with frosted glass spray paint.
Step #5: Add the Finishing Touches to Your Melting Snowman Yard Decoration
I got a kit to make Frosty’s face that comes with sticks, so you can just push everything into place. For the arms, I got branches off the trees in my yard. If you do not have trees in your yard, you can take a quick day trip up a canyon and snag some, or you can get some from a craft store!
And there you have it, your very own melting snowman! I love him so much! However, once I got him outside, I realized it needed something else…
Another Melting Snowman!
I made the second snowman like a normal snowman (not melting). I used a large beachball for the bottom, a smaller beachball for the middle, and the same foam half rounds for the head. Then I covered it in spray foam, painted it, added artificial snow, and sealed it with the frosted glass. Finally, I added accessories, and one other fun touch… do you see it?
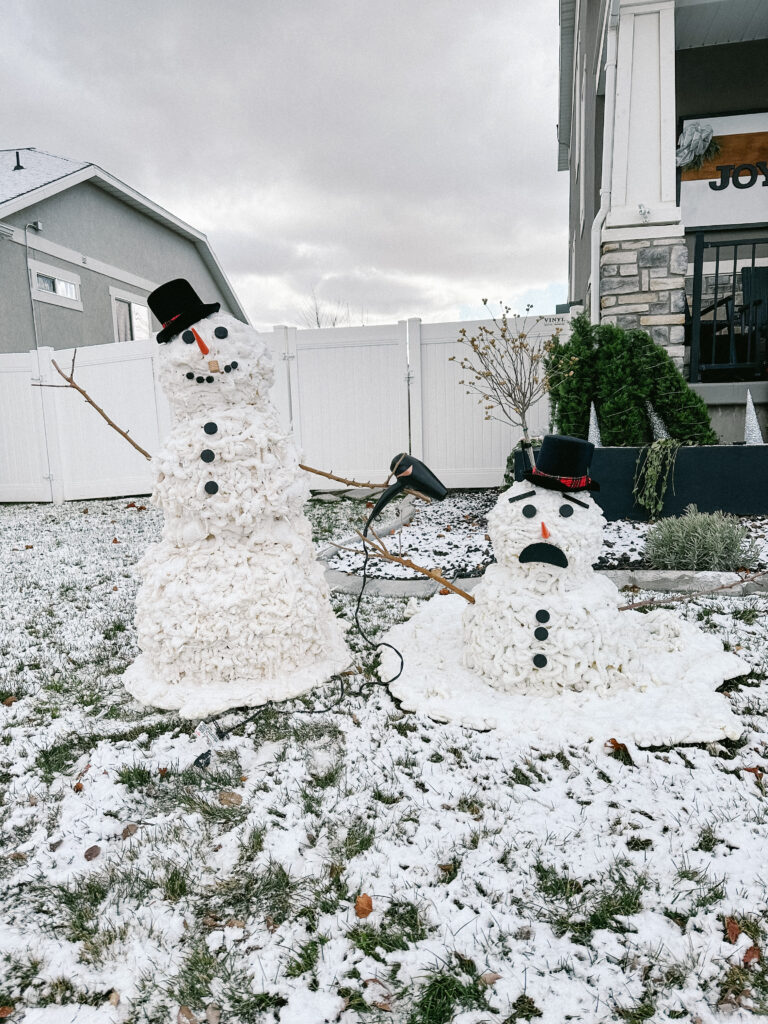
My kids and all the neighbor kids love our snowmen. It has been so fun to have. If you make one, let me know how it turns out!
Follow along for more DIYs and fun at…