
Peel, Stick, WOW! Crafting the Perfect Peel-and-Stick Accent Wall
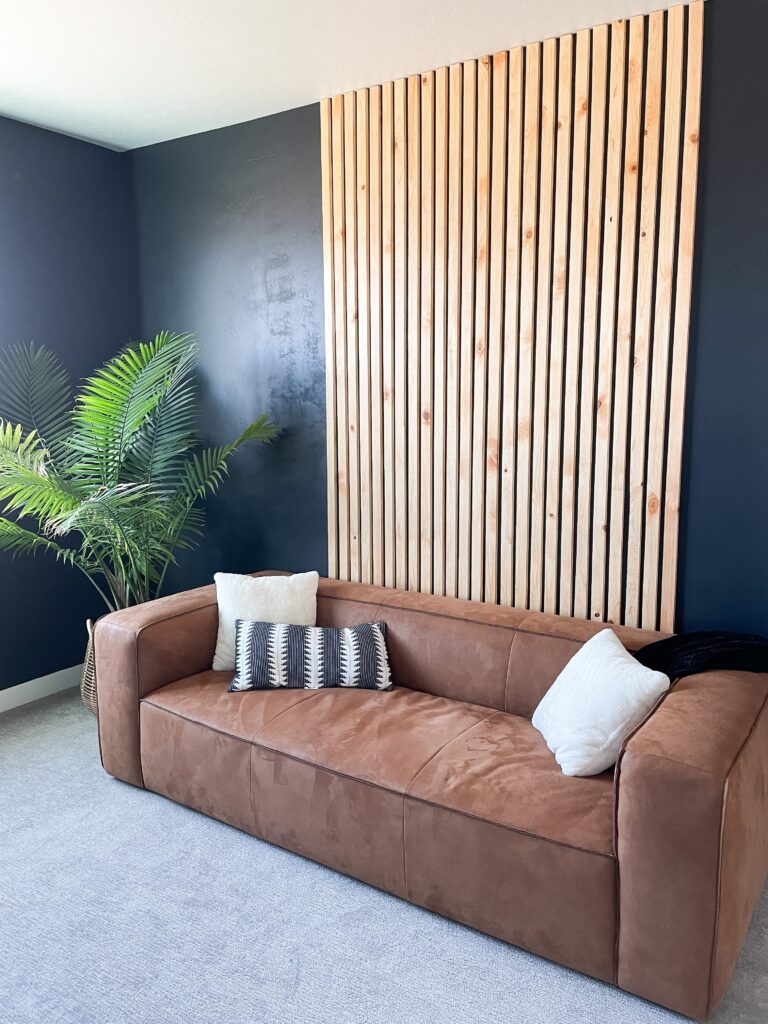
I have this space in my room between my bedroom and the ensuite bathroom. The builder called it a “vestibule”. I called it a wasted space that lacked purpose and needed some attention! So today, we are giving that space a little character. This was by far the easiest project I’ve encountered. Anyone can do it, and it truly levels up the space! Plus, you really only need one tool: a razor blade. I used three tools, but you do not have to. Are you ready to see how simple this peel-and-stick accent wall is?! Let’s go!
Note: This post contains affiliate links. I may earn a commission at no extra cost to you. Thanks for supporting my content!
Step #1: Select the Perfect Peel-and-Stick Wallpaper or Tile

I found peel-and-stick vinyl tiles designed specifically for walls and chose a wood-look style. My kids were even confused and kept asking why I put flooring on the wall. Once I explained that the tiles were actually meant for walls, they decided it looked beautiful, and honestly, I had to agree, haha!
The company I purchased the tiles from offers an incredible variety of styles, shapes, and textures. Whether you’re designing a baby nursery or a formal dining room, you’re bound to find an option you’ll love.
Peel-and-Stick Accent Wall Step #2: Cut & Install
Because the tiles are vinyl, all you need to cut them is a box cutter and a straight edge. Speaking of a straight edge, the second tool I used was this carpenter’s square. But you can use anything—a book, ruler, frame, cutting board, or anything that has a 90-degree corner and is long enough to extend the width of the tile.
Place the straight edge wherever you need to cut, use the box cutter, and cut the top of the tile along the straight edge. You will probably not be able to go all the way through with just one pass, so just flip it over and cut the underside in the same spot. Fold it in the spot you cut and snap it.
Then, simply peel off the back and adhere it to the wall. I recommend starting wherever it is most visible. I started at the bottom of the wall and worked my way up. When placing the tiles, be mindful of the pattern you want to make and apply the tiles appropriately.
Peel-and-Stick Accent Wall Step #3: Add the Finishing Touches
To finish off applying this tile, I added little trim pieces to the corners where the vinyl tiles met the side walls. This gave the wall a clean finish by covering the ends that were not cut perfectly. The third tool I used was my nail gun to attach the corner trim pieces. But if you do not have a nail gun, you can glue it, or use regular finish nails and a hammer.
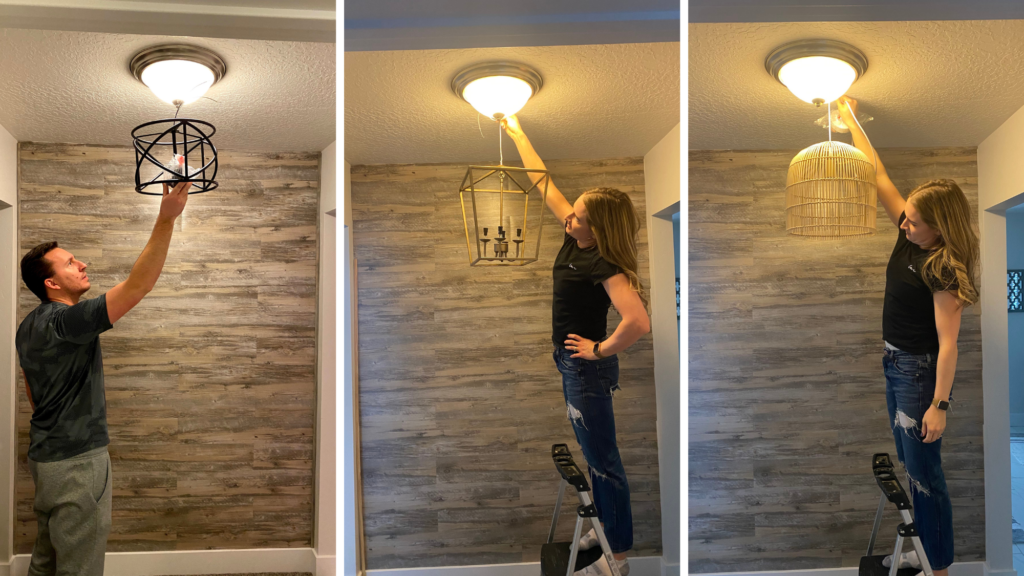
Of course, I could not stop there; I had to replace the builder-grade lights. I tested out other light fixtures to find the perfect light for this space, and finally landed on a gorgeous woven one (similar linked here!). Remember to always turn off the power first anytime you replace a light fixture!
Finally, to finish off my peel-and-stick accent wall, I hung a frame with some photos in it. You could always add DIY framed canvas art, too!
That’s it! It’s a simple one to two-day project, depending on the size of your space. Is this something you would try? I would love to know.
Follow along for more DIY’s and fun at…


One Comment