Spook-tacular DIY: How to Create a Skeleton Yard Display
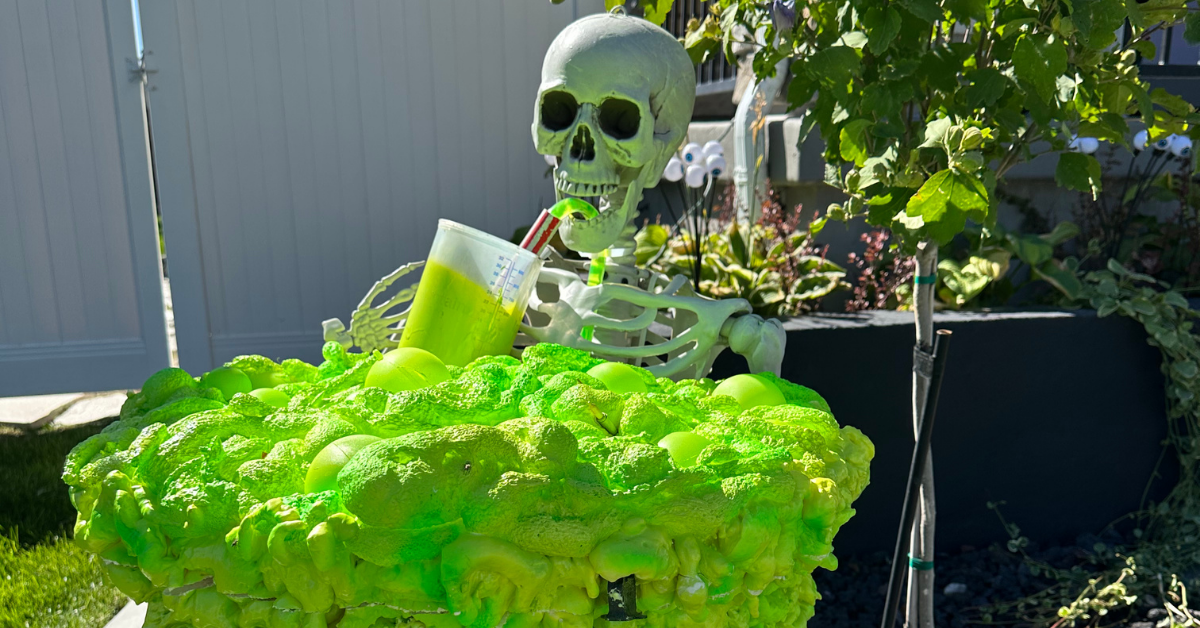
I saw a decoration where a skeleton was throwing up toxic waste and knew I needed it, but in true Stephanie fashion, I needed to change it up a bit. Instead of throwing up, I was going to make my skeleton sit in toxic waste and drink it! This is how I created my custom skeleton yard display.
Skeleton Yard Display Supplies:
- 32-Gallon Garbage Can
- Skeleton
- Zip Ties
- Clear Tubing
- Spray Foam
- Spray Paint
- 5-Gallon Bucket
- Pump
- Vinyl Letters
- Large Cup – I used the cup I got from the hospital, but something like this could also work!
- Small Piece of PVC Pipe
- Black Lights
- Clear Christmas Bulbs
- Orange and Purple Lights
- Thin Painters’ Tape
- Yellow Highlighters
Step #1: Attach the Hose to Mr. Skeleton
Take your clear tubing and feed it through Mr. Skeleton’s body, from the pelvis, through the chest cavity, and out of his mouth. Leave plenty of slack on both ends; we can trim it later. I used zip ties to secure the tubing to his spine.
Step #2: Attach the Pump
Each pump is different, so simply follow the instructions on your pump to install it. I used this pump.
Step #3: Place Mr. Skeleton in the Can & Secure Him

Place the 5-gallon bucket at the bottom of the garbage can, right-side up. Mr. Skelly will sit on the edge of the bucket. Using zip ties, secure him to the side of the garbage can.
Step #4: Make the Cup & Dry Fit It
Drill out a hole on the bottom of the cup large enough for the clear tubing to fit through. Feed the clear tubing through the PVC pipe, then through the cup. Don’t secure anything yet, but play with it to decide how you want it to look.
Step #5: Add Words to the Garbage Can
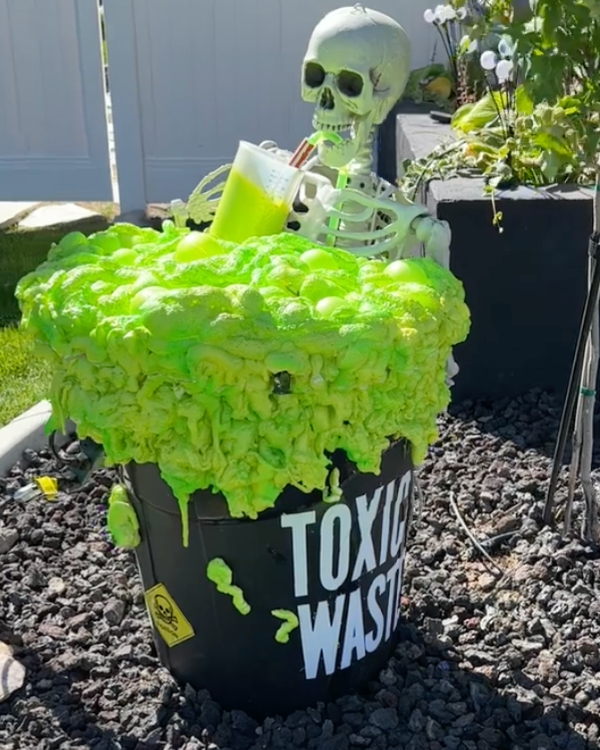
I got vinyl letters and added them to the can to say “Toxic Waste” and “Danger”.
Step #6: Make the Toxic Waste
Next, I used the lid of the garbage can. I turned it upside down and cut out a section of the lid where Mr. Skelly sits, so it fits around him. Then, I sprayed one layer of foam over the lid, placed a layer of lights, then another layer of foam and lights, and one more layer of foam. At this point, I started layering foam and the Christmas bulbs to look like bubbles. Keep repeating these steps until you have a nice heaping pile.
I also wanted to put foam on the sides of the garbage can, so it looked like it was flowing over. The first layer struggled to stick, but the second and third stuck much better. I combined the foam on the side with the foam on the lid, so it flows together nicely. We will cut it to separate the lid from the can later.
I then sprayed some foam in a box in random shapes and sizes, so I could glue them on the sides to exaggerate the dripping.
Step 7: Paint
Time to paint the toxic waste. I used neon yellow and neon green spray paint, and sprayed it in sections to give it a tie-dye/textured look. I used painters’ tape around the bottom of the foam, then added a piece of cardboard to protect the rest of the can. Don’t forget to also paint the random drippings.
Using the same-colored paint, I painted the bottom ½- ¾ of the cup to look like it was full.
Time to paint the straw. I started by painting the entire straw white. Once that was dry, I used thin painters’ tape and taped off vertical stripes. I then painted the exposed parts red. It looked just like a straw and was so dang cute!
Step #8: Cut Off the Lid
Using a knife, I simply cut between the lid and the can. If you just cut one clean line, the lid and sides will match up and will hardly be noticeable, but will give you access to the pump, bucket, and water.
Step #9: Add Water, Make It Yellow, & Connect the Pump
Next, add water to the bucket. I took apart yellow highlighters and put the ink in the water to make it yellow. It worked PERFECTLY! Make sure the pump is installed.
Step #10: Put It All Together & Plug It In
Last step! Glue all the random pieces on the sides to finish the dripping. I also got stickers and randomly placed them all over the can.
To secure the cup in place, I used a zip tie at the base of the cup, around the clear tubing. Make sure the straw is in his mouth. Put Mr. Skelly’s hand on the cup, so it looks like he is holding it.
I also added these black lights so you can see the display at night in all its fluorescent glory. Mr. Skeleton deserves his own spotlight. 😉
Plug it all in, stand back, and be amazed at the awesome friend you made!
Here is the finished look at my skeleton yard display! I was so excited that it all worked and looked as good as it does. What should I make next with spray foam?
Follow along for more DIYs and fun at…


2 Comments