Revamp Your Room with a Geometric Accent Wall
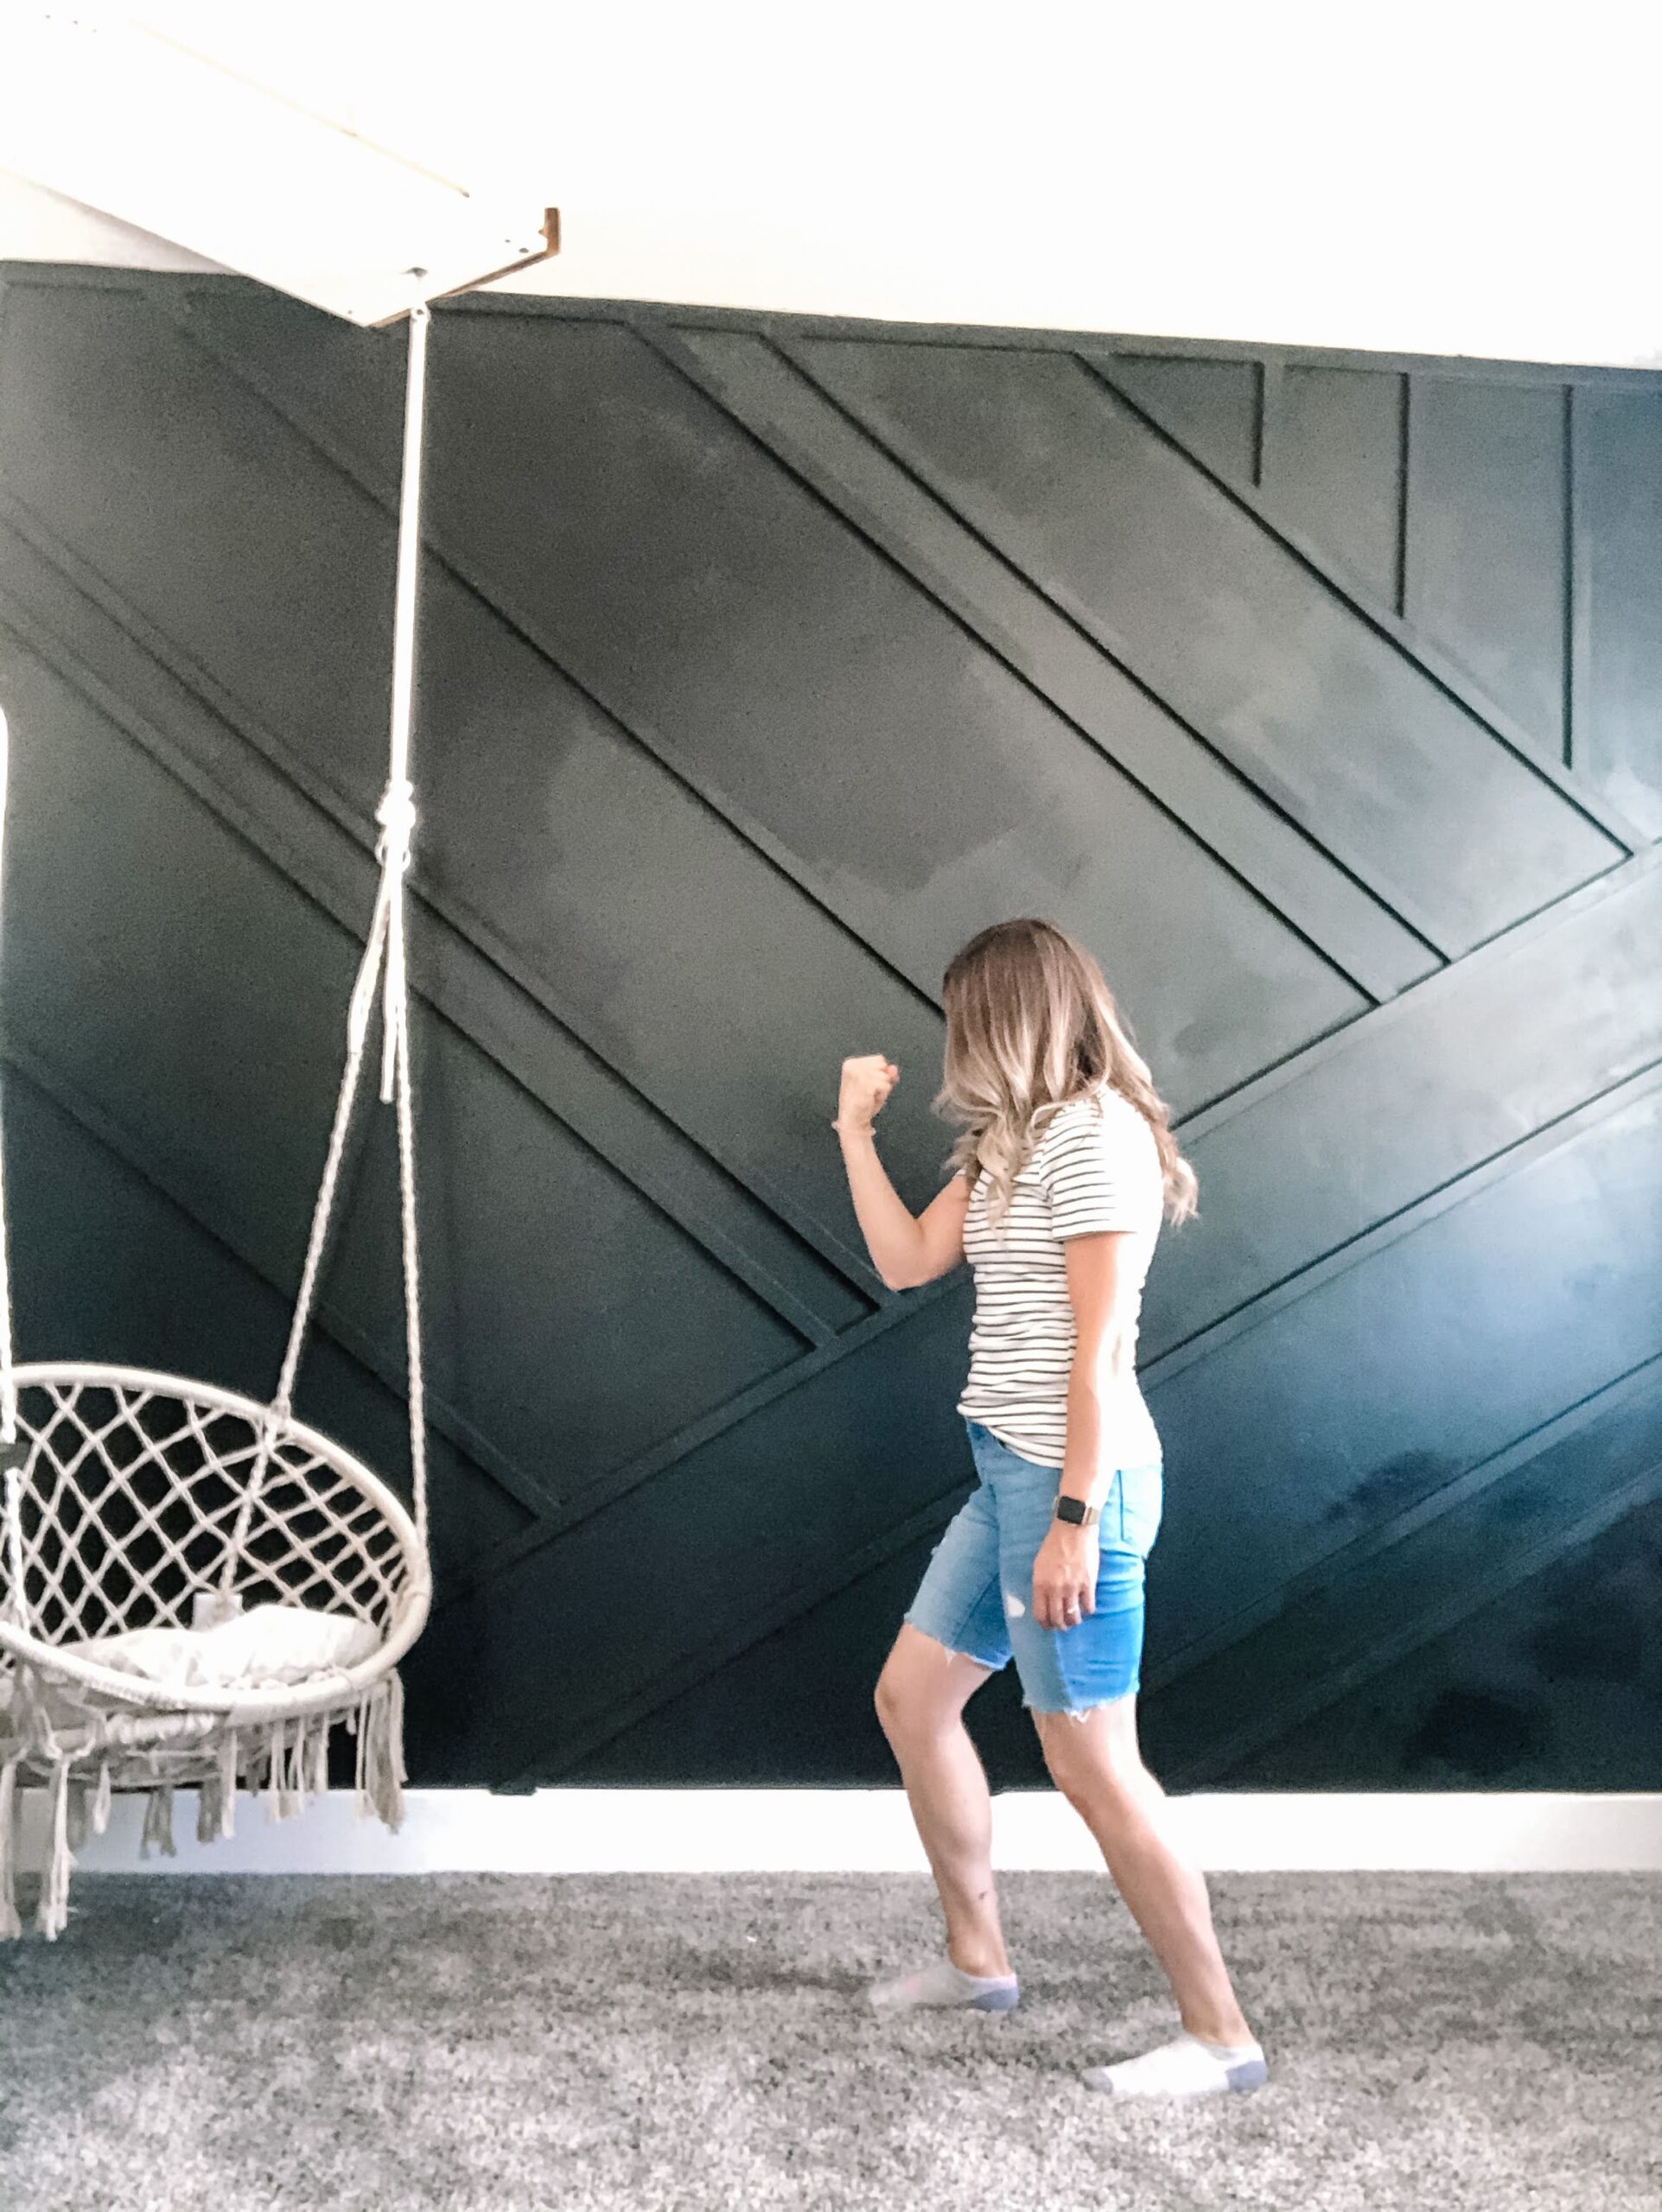
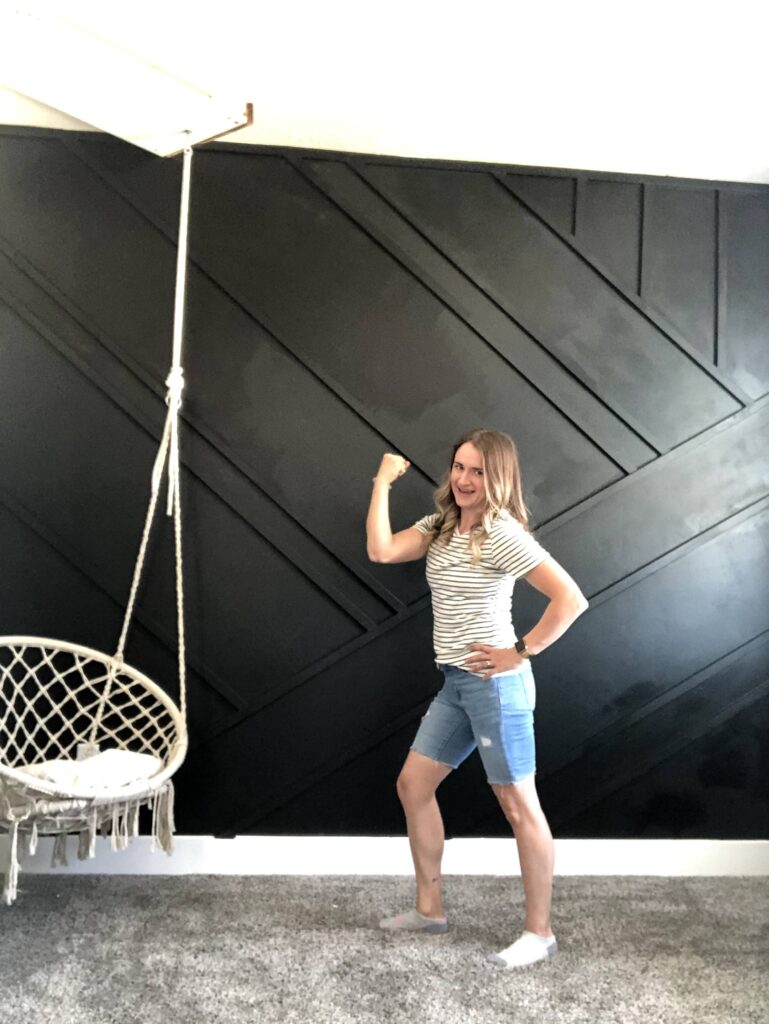
This geometric accent wall is one of the first projects I posted about on Instagram, and I still love it! It’s fairly simple, and the pattern is completely customizable. It can be as easy or difficult as you want it to be. Plus, you barely need any equipment to create it! This wood accent wall is a very beginner-friendly project, and can be done in any room.
If you prefer a grid-patterned accent wall, check out this post for a tutorial!
Note: This post contains affiliate links. I may earn a commission at no extra cost to you. Thanks for supporting my content! 🙂
Geometric Accent Wall Supplies & Tools
- Trim
- Nails
- Circular Saw
- Wood Filler
- Caulk
- Primer
- Your Paint of Choice (I went with black)
- Paint Rollers
- The Best Painter’s Tape of All Time
- Level
- Angle Ruler
- Nail Gun
Note about tools and supplies…
- If you do not have a nail gun, you can use a hammer and standard nails. However, I will say a brad nail gun is so incredibly convenient to have on hand if you plan to do DIY. It’s relatively inexpensive and can be used for so many projects. There are inexpensive/entry-level type nail guns, and there are higher-end nail guns. Regardless of your budget, I always suggest getting a cordless, airless nail gun. It’s totally worth it! You can find more of my DIY tool tips here.
- I used this trim. However, depending on the look you are going for, how much you want to spend, and what your local lumber store has, you can really use any kind of trim!
- Technically, you can skip the caulking step, but I do not recommend it. Caulking takes the project from ok to WOW! However, if you skip caulking the spots no one will see, no one will ever know. 😉
- You can also get away without using a level or angle ruler, but I think they just make the process so much easier.
Geometric Accent Wall Step #1: Tape Out Your Design
First, I recommend you figure out what design you want. I like to take a picture of the wall, then use the editor on my phone to draw lines on the wall and decide on a pattern that works well. If there will be furniture, or in my case a swing, on or in front of the wall, make sure they are in your picture, so you can take that into consideration when planning your layout. After you’ve chosen your design, tape it out on the wall so you know exactly where to put the boards. Which brings us to the next step:
Step #2: Cut & Hang the Trim
Once you have the layout in mind, it’s time to cut the trim. After your cuts are finished, you can hang it in the pattern you chose. I’ll be honest, the angles got a little confusing to me. To make it clearer, I put the board on the wall and marked where/how I needed to cut it. It was not perfect, and I did not get them all right, but that’s where wood filler comes in!
In order to get the lines straight, I used a level for the vertical boards. And for the angled boards, I used an angle ruler. Check out the video to see how I used it! Measuring and eyeballing it was not easy, and it made it so much more difficult. The angle ruler was totally worth it!
Also, because this is an accent wall, do not use wood glue. Typically, we change our minds after a few years and want to change our accent walls, and wood glue will destroy the drywall. It’s also a big hassle to fix. Just use a few nails in each board instead.
Step #3: Don’t Skip the Finish Work!
After everything was on the wall, it was time for the finishing work. It’s a tedious step, but it is one that you want to do. It really brings the project up to the next level and is totally worth it. Wood fill all the nail holes and gaps in the boards, and caulk where the boards meet the walls.
Pro Tip:
When caulking, apply the caulk to the wall, then run your finger along the caulk line to smooth it out. Then go back over it with a baby wipe.
When filling wood (especially the nail holes), use THIS wood filler. You do not have to sand it! Just use the baby wipe to wipe off the excess, and it’s ready to paint! So much easier and cleaner than sanding.
Step #4: Prime & Paint
Time to prime. If your trim is raw wood, you will for sure want to prime the boards. If it is a pre-primed wood, you can skip that step and move on to painting. These are my favorite paint rollers.
Pro Tip:
If you are painting the accent wall a different color than the ceiling or adjoining walls, USE FROG TAPE! Yes, it is more expensive, but it is so much better! Apply the tape, then run a baby wipe along the tape line where you will be painting. This will allow the tape to adhere to the wall better, so there is no leaking.
If you will be painting your wall and trim in different colors, paint the wall and trim separately FIRST, then hang the trim. All you have left to do is touch up! No need to mess with taping all the trim. Also, if you do this, you do not need to caulk the trim. But definitely still wood fill anything that needs to be covered or fixed.
Geometric Accent Wall Step #5: Add Decor
If you have any decorations or art to hang, do that and then step back and admire your work!
What do you think? If you try this, I would love to see what you did and how it turned out!
Follow along for more DIYs and fun at…


One Comment