Elevate Your Outdoors: Craft the Ultimate DIY Porch Sign
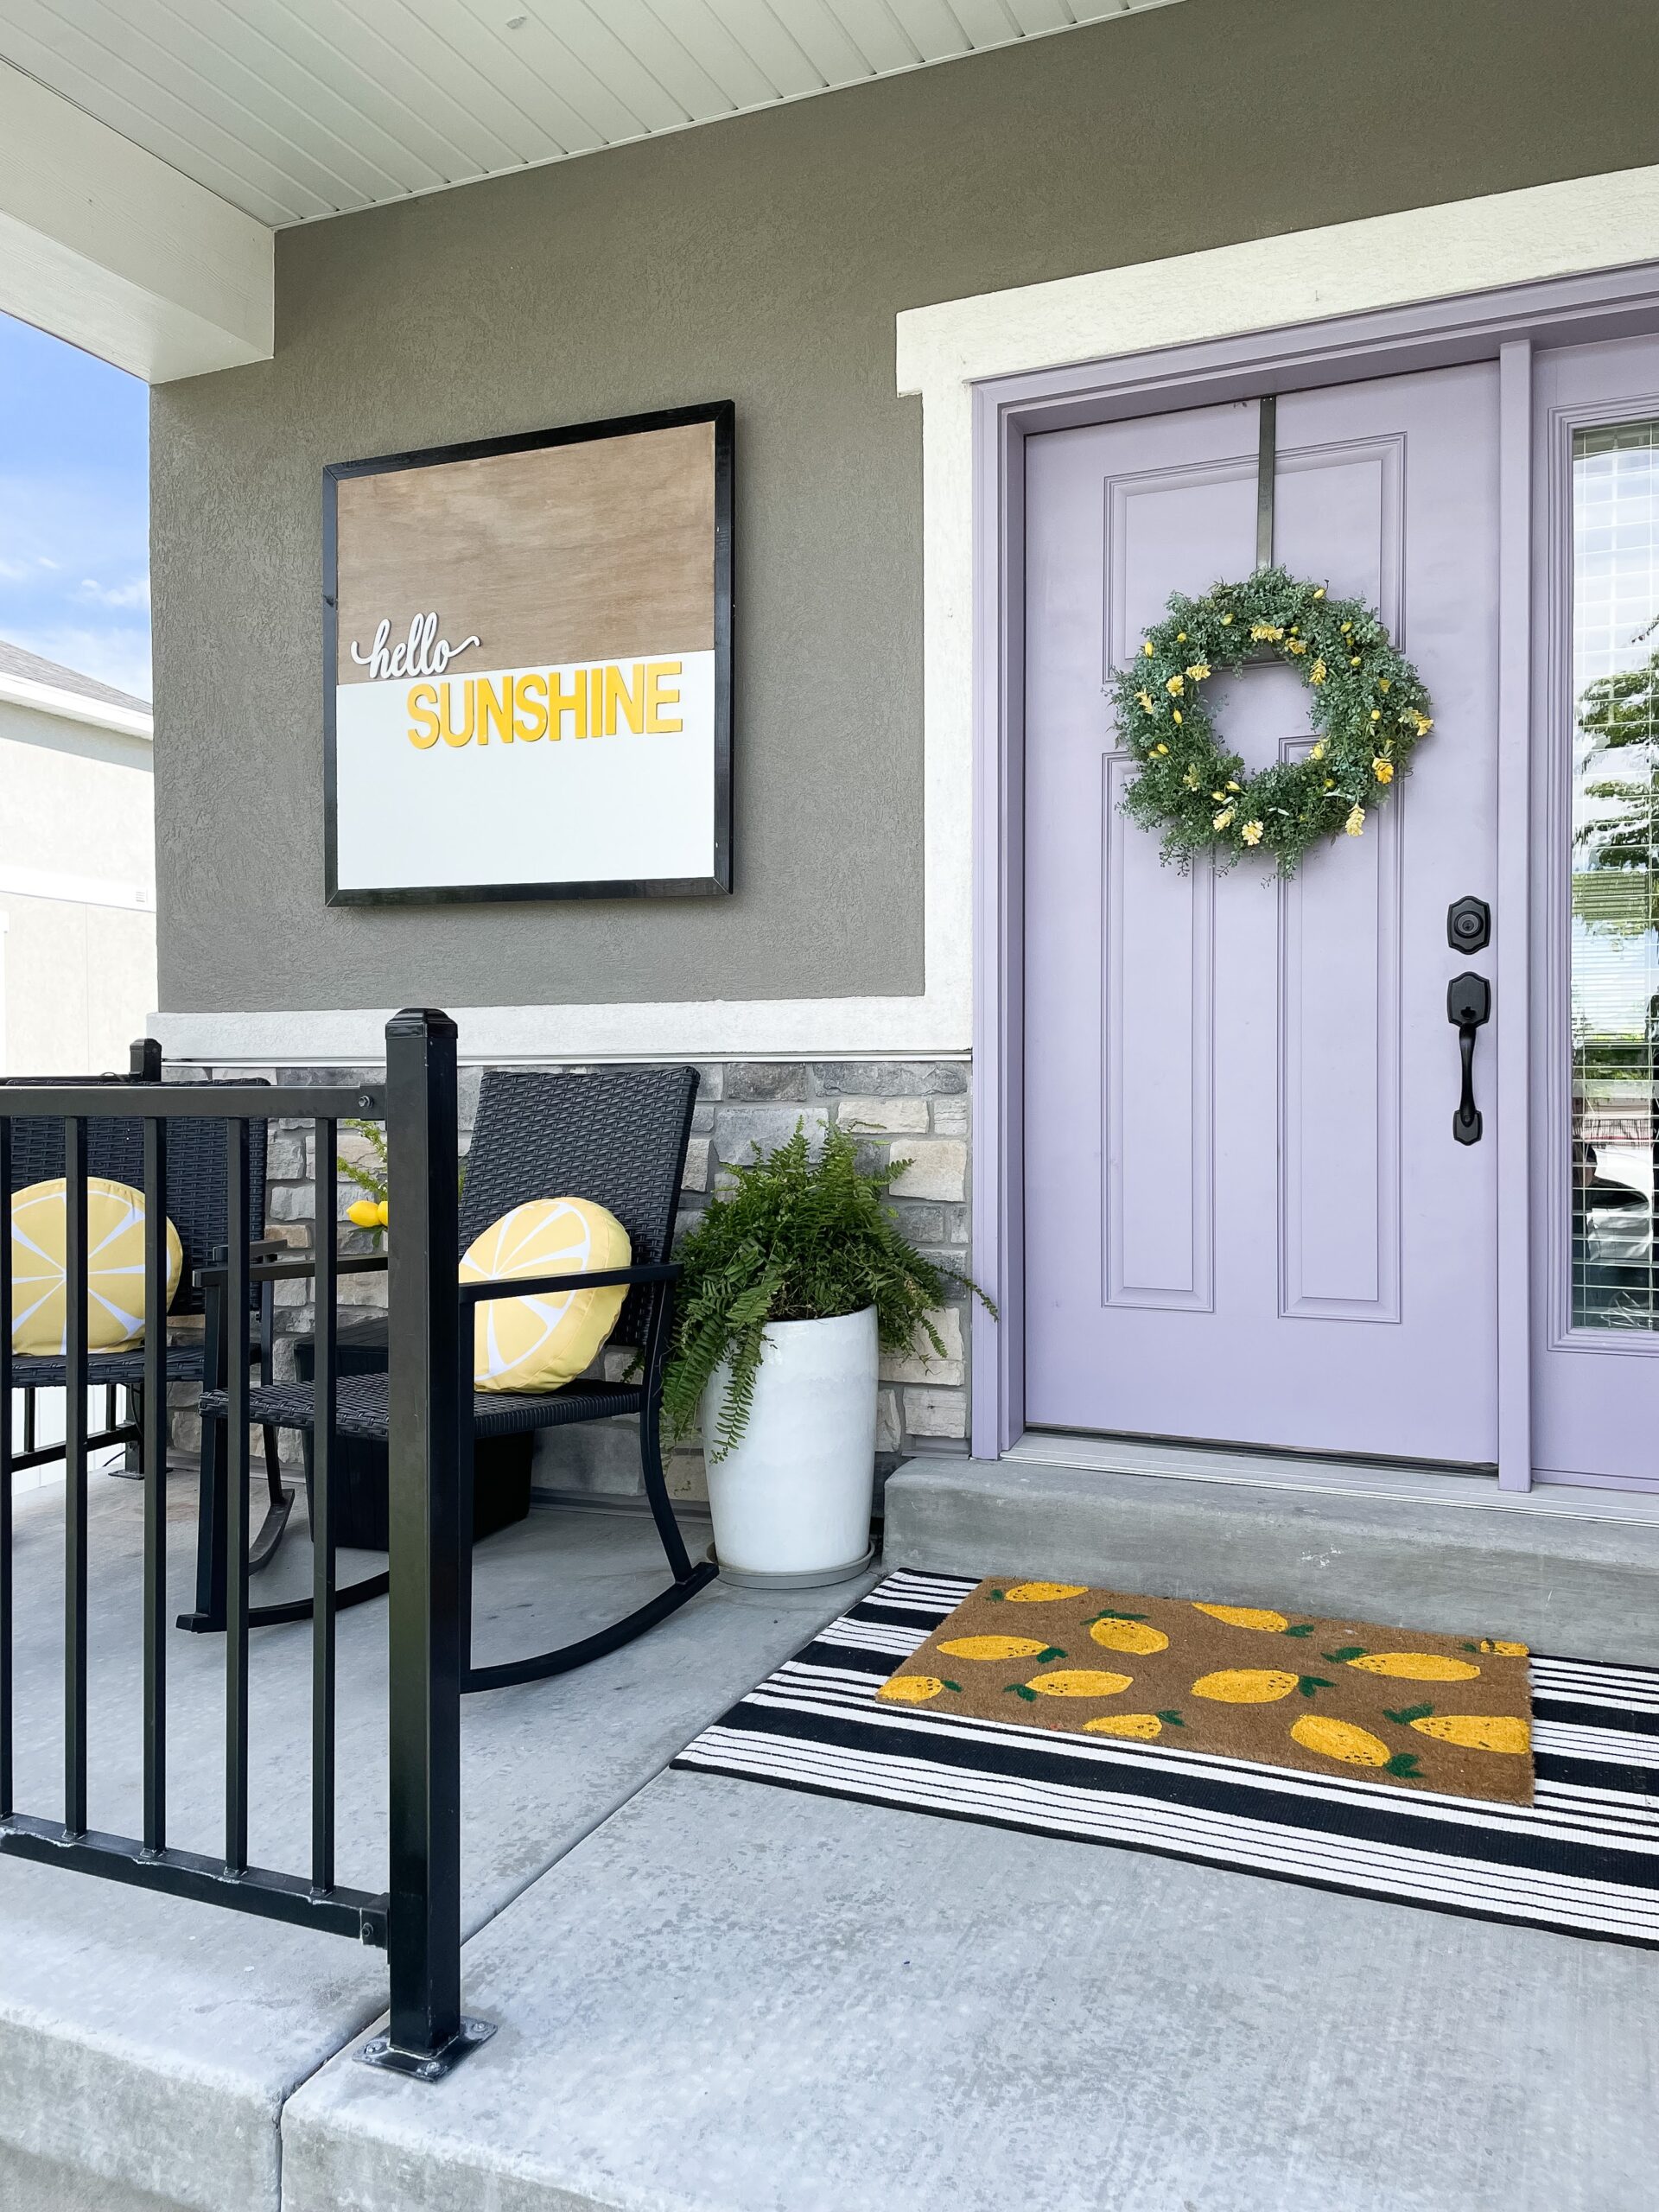
Summer was quickly approaching, and I wanted to give my front porch a summer refresh. The best thing about this DIY porch sign project is that you can follow these same steps, but make it work for any season or any holiday. Here is how I refreshed my porch at the beginning of summer. I did a LEMON theme! Check out this post to see how I made the adorable Lemon Door Mat!
Note: This post contains affiliate links. I may earn a commission at no extra cost to you. Thanks for supporting my content!
Step #1: Gather Your DIY Porch Sign Supplies
- Plywood: I used wood I already had for the main part of this sign, but you can get any kind of sheet plywood. This is what I would recommend.
- Letters/Words: You can choose any words you want. I went with “Hello Sunshine”.
- Frame: I used 1×2’s. Feel free to use any trim you want.
- Paint and Stain: Choose whatever paint and stain you want.
- Spray Paint
- Pocket Hole Jig
- Pocket Hole Screws
Step #2: Cut it All Down to Size
Start with the plywood. This sign is two pieces of plywood screwed together to make one large sign. The first thing you need to do is determine the dimensions you want the finished sign to be. Then cut two pieces that you can stack to make the base of the sign. Mine was 24in x 24in. Using those dimensions, you will need to cut two pieces 12in x 24in.
Next, we need to drill a few pocket holes in the back side of the plywood so we can connect the two later. Drill 4-5 pocket holes along the back of one long side of one of the 12×24 pieces you just cut.
Now, cut down your frame. I suggest cutting the ends at 45-degree angles. When measuring, measure the length of where the frame will go, and that is the measurement you want the frame to be on the shorter ends of the 45-degree angles.
Step #3: Paint the DIY Porch Sign Before Assembling
I painted one of the plywood pieces white, and the other I stained. I also painted the 1×2’s black, and I spray-painted the letters yellow and white. Then I waited for everything to dry.
Step #4: Put it All Together
Finally, it was time to assemble everything. Start by screwing the two pieces of plywood together with pocket hole screws. Then, nail the frame directly to the plywood. You can nail or glue the letters on the sign. Lastly, add a hook on the back so you have something to hang it up with.
I think it looks incredible, and I love how it turned out! This would be so easy to recreate for any season or holiday – like this one I made for Christmas. If you make one, I would love to see how it turns out!
Follow along for more DIYs and fun at…


One Comment