Guest Bedroom Bliss: Unlock The Charm Of Your Space

Have you ever walked into a room and felt the weight of its unfulfilled potential? That is exactly how I felt every time I stepped into my neglected guest bedroom – a space that had been empty and sad for far too long. With a vision in my mind and tools in hand, I was determined to turn this space into a haven for our guests to enjoy.
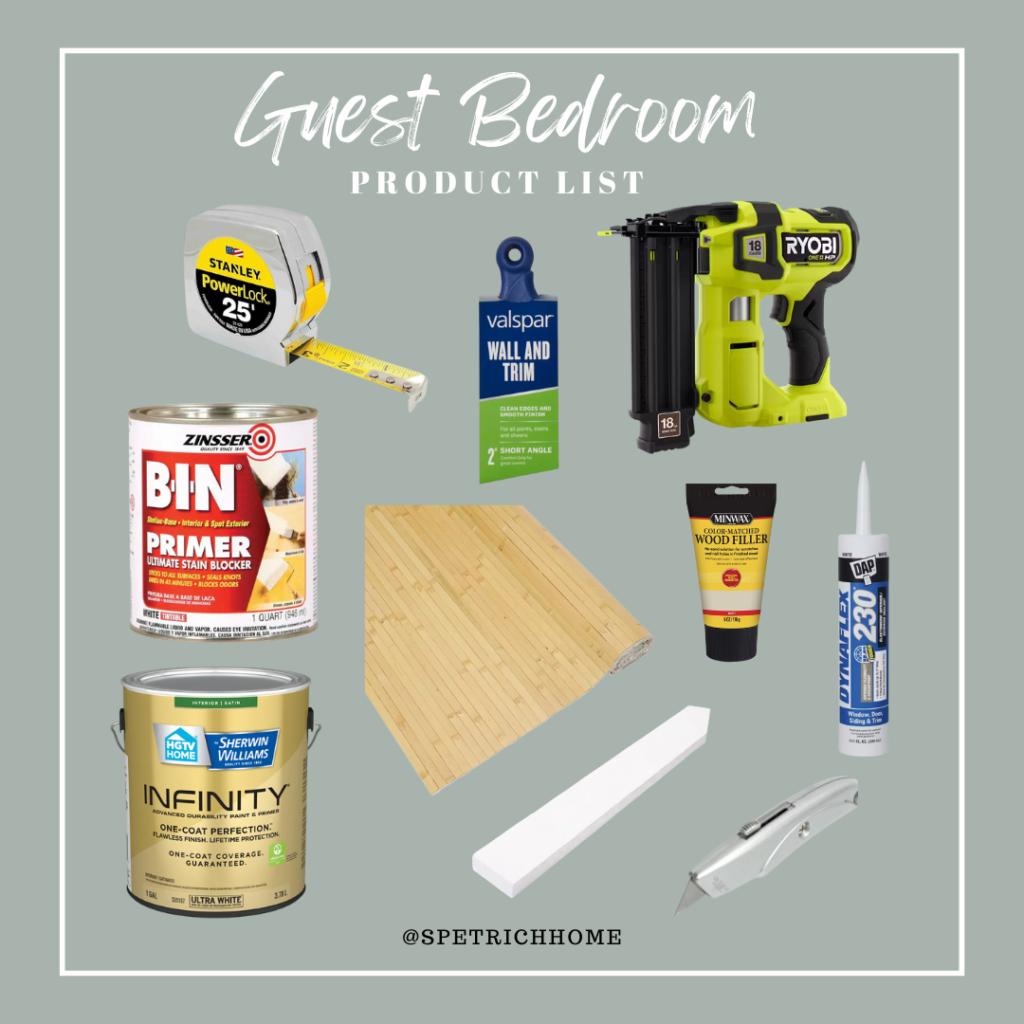
Supplies:
My Favorite Measuring Tape
My Favorite Paint Brush
Nailer
Primer
Wood Filler
Caulk
Bamboo Paneling
Paint
Trim
Razor Blade
Let’s jump in. First up, the accent wall!
Let me explain the plan here. We will be installing trim pieces in a grid pattern over the entire wall, we will then put bamboo paneling in each of the grids.
Step 1: Math
The most complicated step is figuring out where the trim pieces should go. Get your paper and pencil out… We are doing Algebra! Don’t worry, it’s not as hard as it looks! I swear!
First measure your walls. Get the following measurements…
- Inches from one wall to the other = A
- Inches from baseboard to ceiling = B
- Width of boards = C
- # of boards that you want from side to side = D
- # of boards that you want from top to bottom = E
Now plug and chug!
A-DxC/D = side to side square inches
B-ExC/E = top to bottom square inches
Here is my math…
139in – 6 x 1.5in / 6 = 25.2inches – side to side
109in – 5 x 1.5in / 5 = 25.75inches – top to bottom
Once you have your measurements take inexpensive painters tape and tape out where everything will go. This is a very easy, inexpensive way to make sure it all looks balanced, before you go putting a bunch of nail holes in your wall.
Step 2: The Grid
Now that you know where the boards should go, it’s easy sailing. Measure, cut, nail, repeat… I start with the vertical boards, extending from floor to ceiling, then go back in with the smaller horizontal boards.
Step 3: Bamboo in the Guest Bedroom
Time to keep moving on this guest bedroom, but now we are using bamboo! This bamboo paneling is similar to pole wrap, but it is made of bamboo and has a more natural texture and movement. Once it is painted, it will look beautiful!
This paneling is so easy to cut! Simply score it between the strips with a razor blade, and then roll it up and cut it with a miter saw. Easy!
Typically, I do not use glue on accent walls, but I did use glue and brad nails here to ensure the paneling does not fall off.
Step 4: Fill holes and caulk
This is quite possibly the most tedious part of the project, but just do it! Turn on your favorite podcast, or binge watch your favorite show and just caulk and wood fill your life away! Your future self will thank you!
Step 5: Primer and Paint
It is super important to always prime raw wood. I used BIN oil-based primer on the bamboo. Oil based primer helps with adhesion to ensure the paint does not peel off later.
For paint, I went with Coastal Plains by Sherwin Williams. It is the perfect sage green! To get in all the cracks and grooves, I used a brush for the first coat. Once the first coat was done, I was able to roll the other coats. Oh it looks so beautiful!
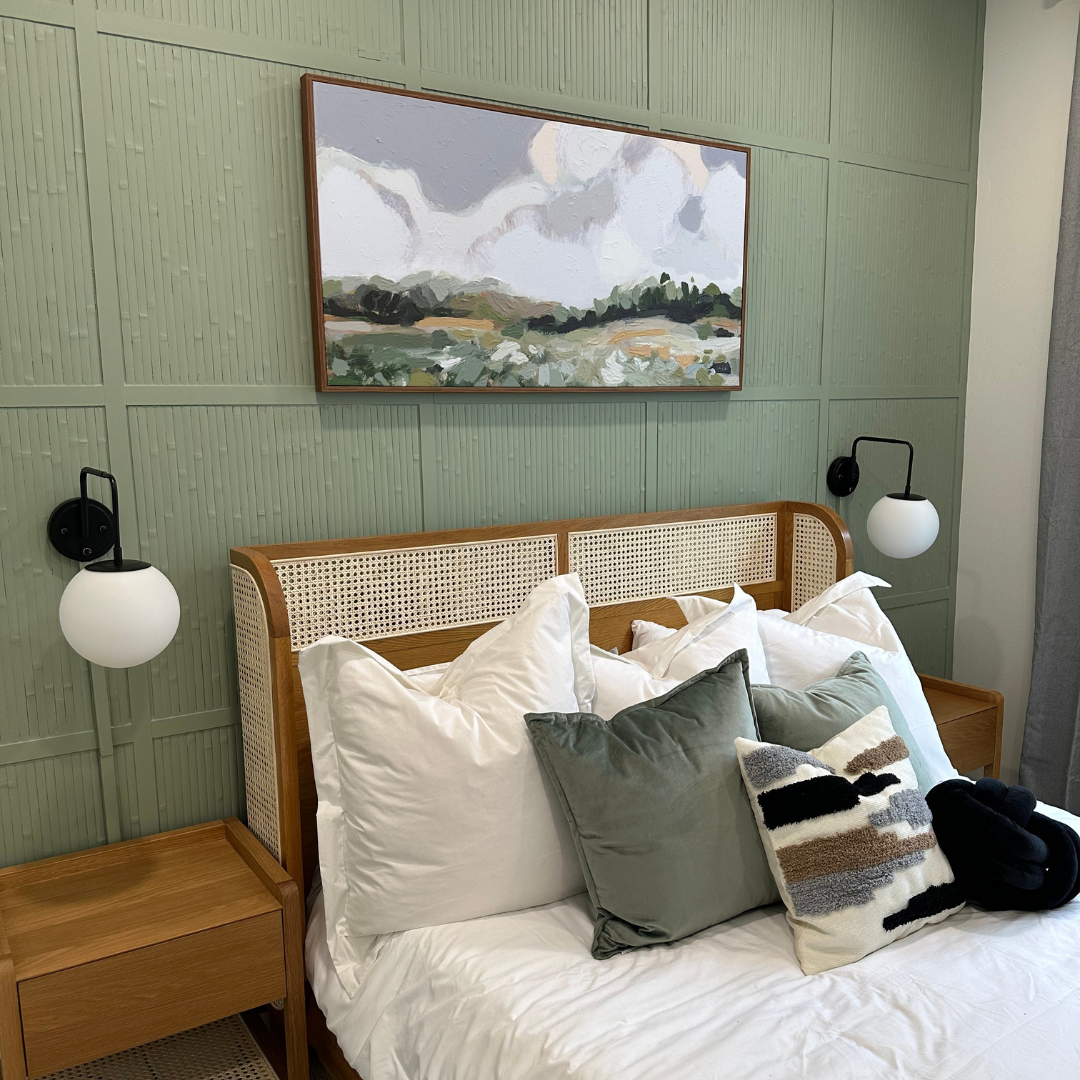
Step 6: Put your Guest Bedroom back together!
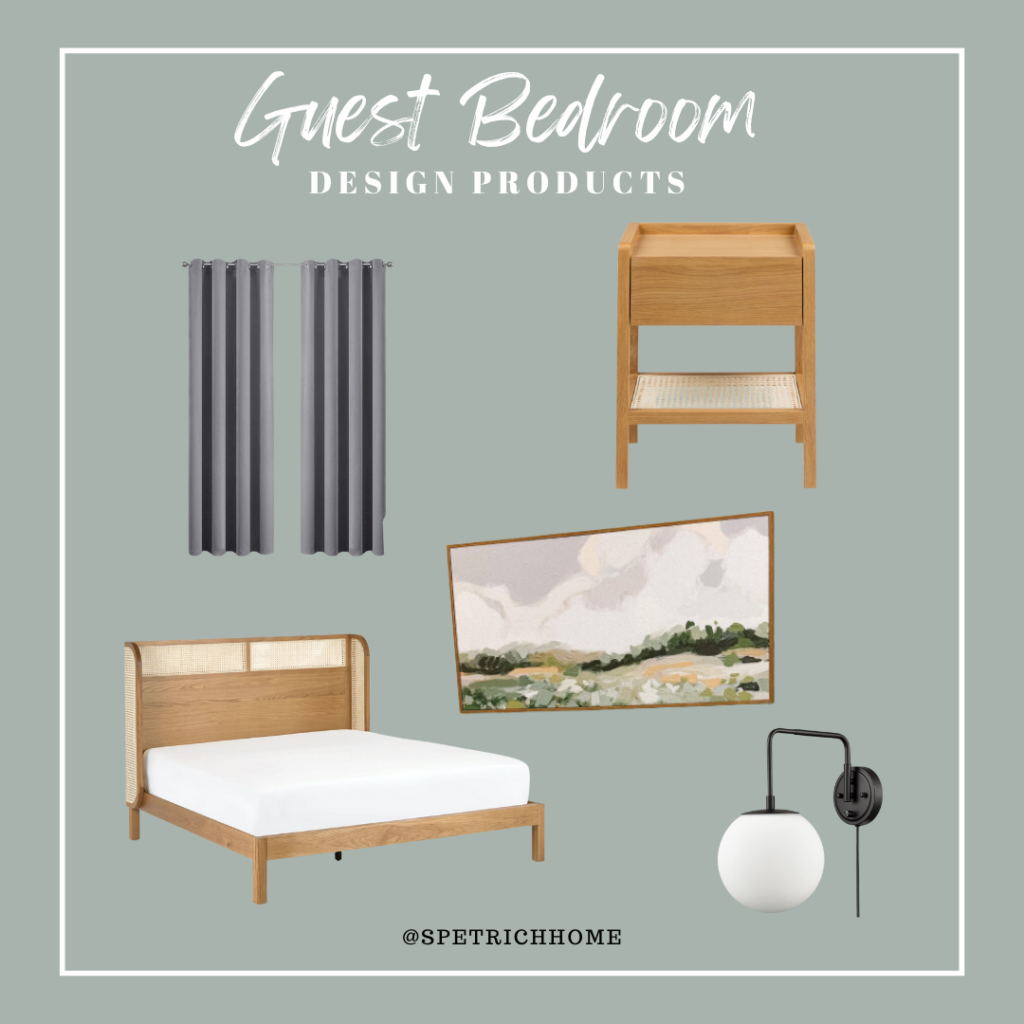
It’s the time to work a little magic and put all the things back in place and make the room really come to life! We need to take a moment to appreciate this gorgeous bed from Article! It’s been a fan favorite and fits the vibe of this room so well!
Matching nightstands (also from Article).
Lights over the nightstands, with paintable cord covers.
Curtains! Always remember, hang curtains high and wide to make the room look bigger!
And, finally, Artwork! I got this beautiful artwork from the new ArtFX collection at Fine Art Canvas. It’s Tactile, 3D, and has a modern floating frame! It was the perfect addition, completely pulling the room together!

And with that, you have the most cozy and inviting guest room with all the texture you could ever want! If you were to create this textured grid wall, what color would you paint it?
Follow along for more DIY’s and fun at…