Crafting the Perfect Art Closet (+ A Sliding Barn Door!)
Let’s just say this art closet has lived many lives. First, there was a simple facelift with a Sharpie stencil. The second time, I used peel-and-stick vinyl tiles and installed built-in cabinets to add more storage. And while I absolutely love the way it looked, the peel-and-stick vinyl did not last, due to how hot and cold this room gets. Which brings us here! But good news: this is my favorite art closet makeover yet. Here’s how I did it!
Art Closet Supplies:
- Liquid Nails
- Scraper
- Stencils (The ones I used are out of stock, but I linked another option I like!)
- Frames
- Frog Tape
- Level
- Barn Door
- Bondo
Before I could start on the art closet,
I had to demo the existing peel-and-stick vinyl. However, I had two problems…
- I used Liquid Nails on a few of the pieces, and removing Liquid Nails is a huge pain, plus it creates a lot of damage when removing it.
- When the builder built our home, they did not prime our walls, so the paint peels easily. When removing the peel-and-stick vinyl, it took the paint off with it, and I was left with incredibly damaged walls. I could either cover it up again or take it down to the drywall and start over. I chose option two.
So before I could start with this project, I had to scrape the paint off the entire closet, which took FOUR DAYS! But I am 100% glad I did it! I will admit, these videos are pretty satisfying.
Once the paint was all peeled, it was time to do what the builder should have done: prime the walls, then paint them.
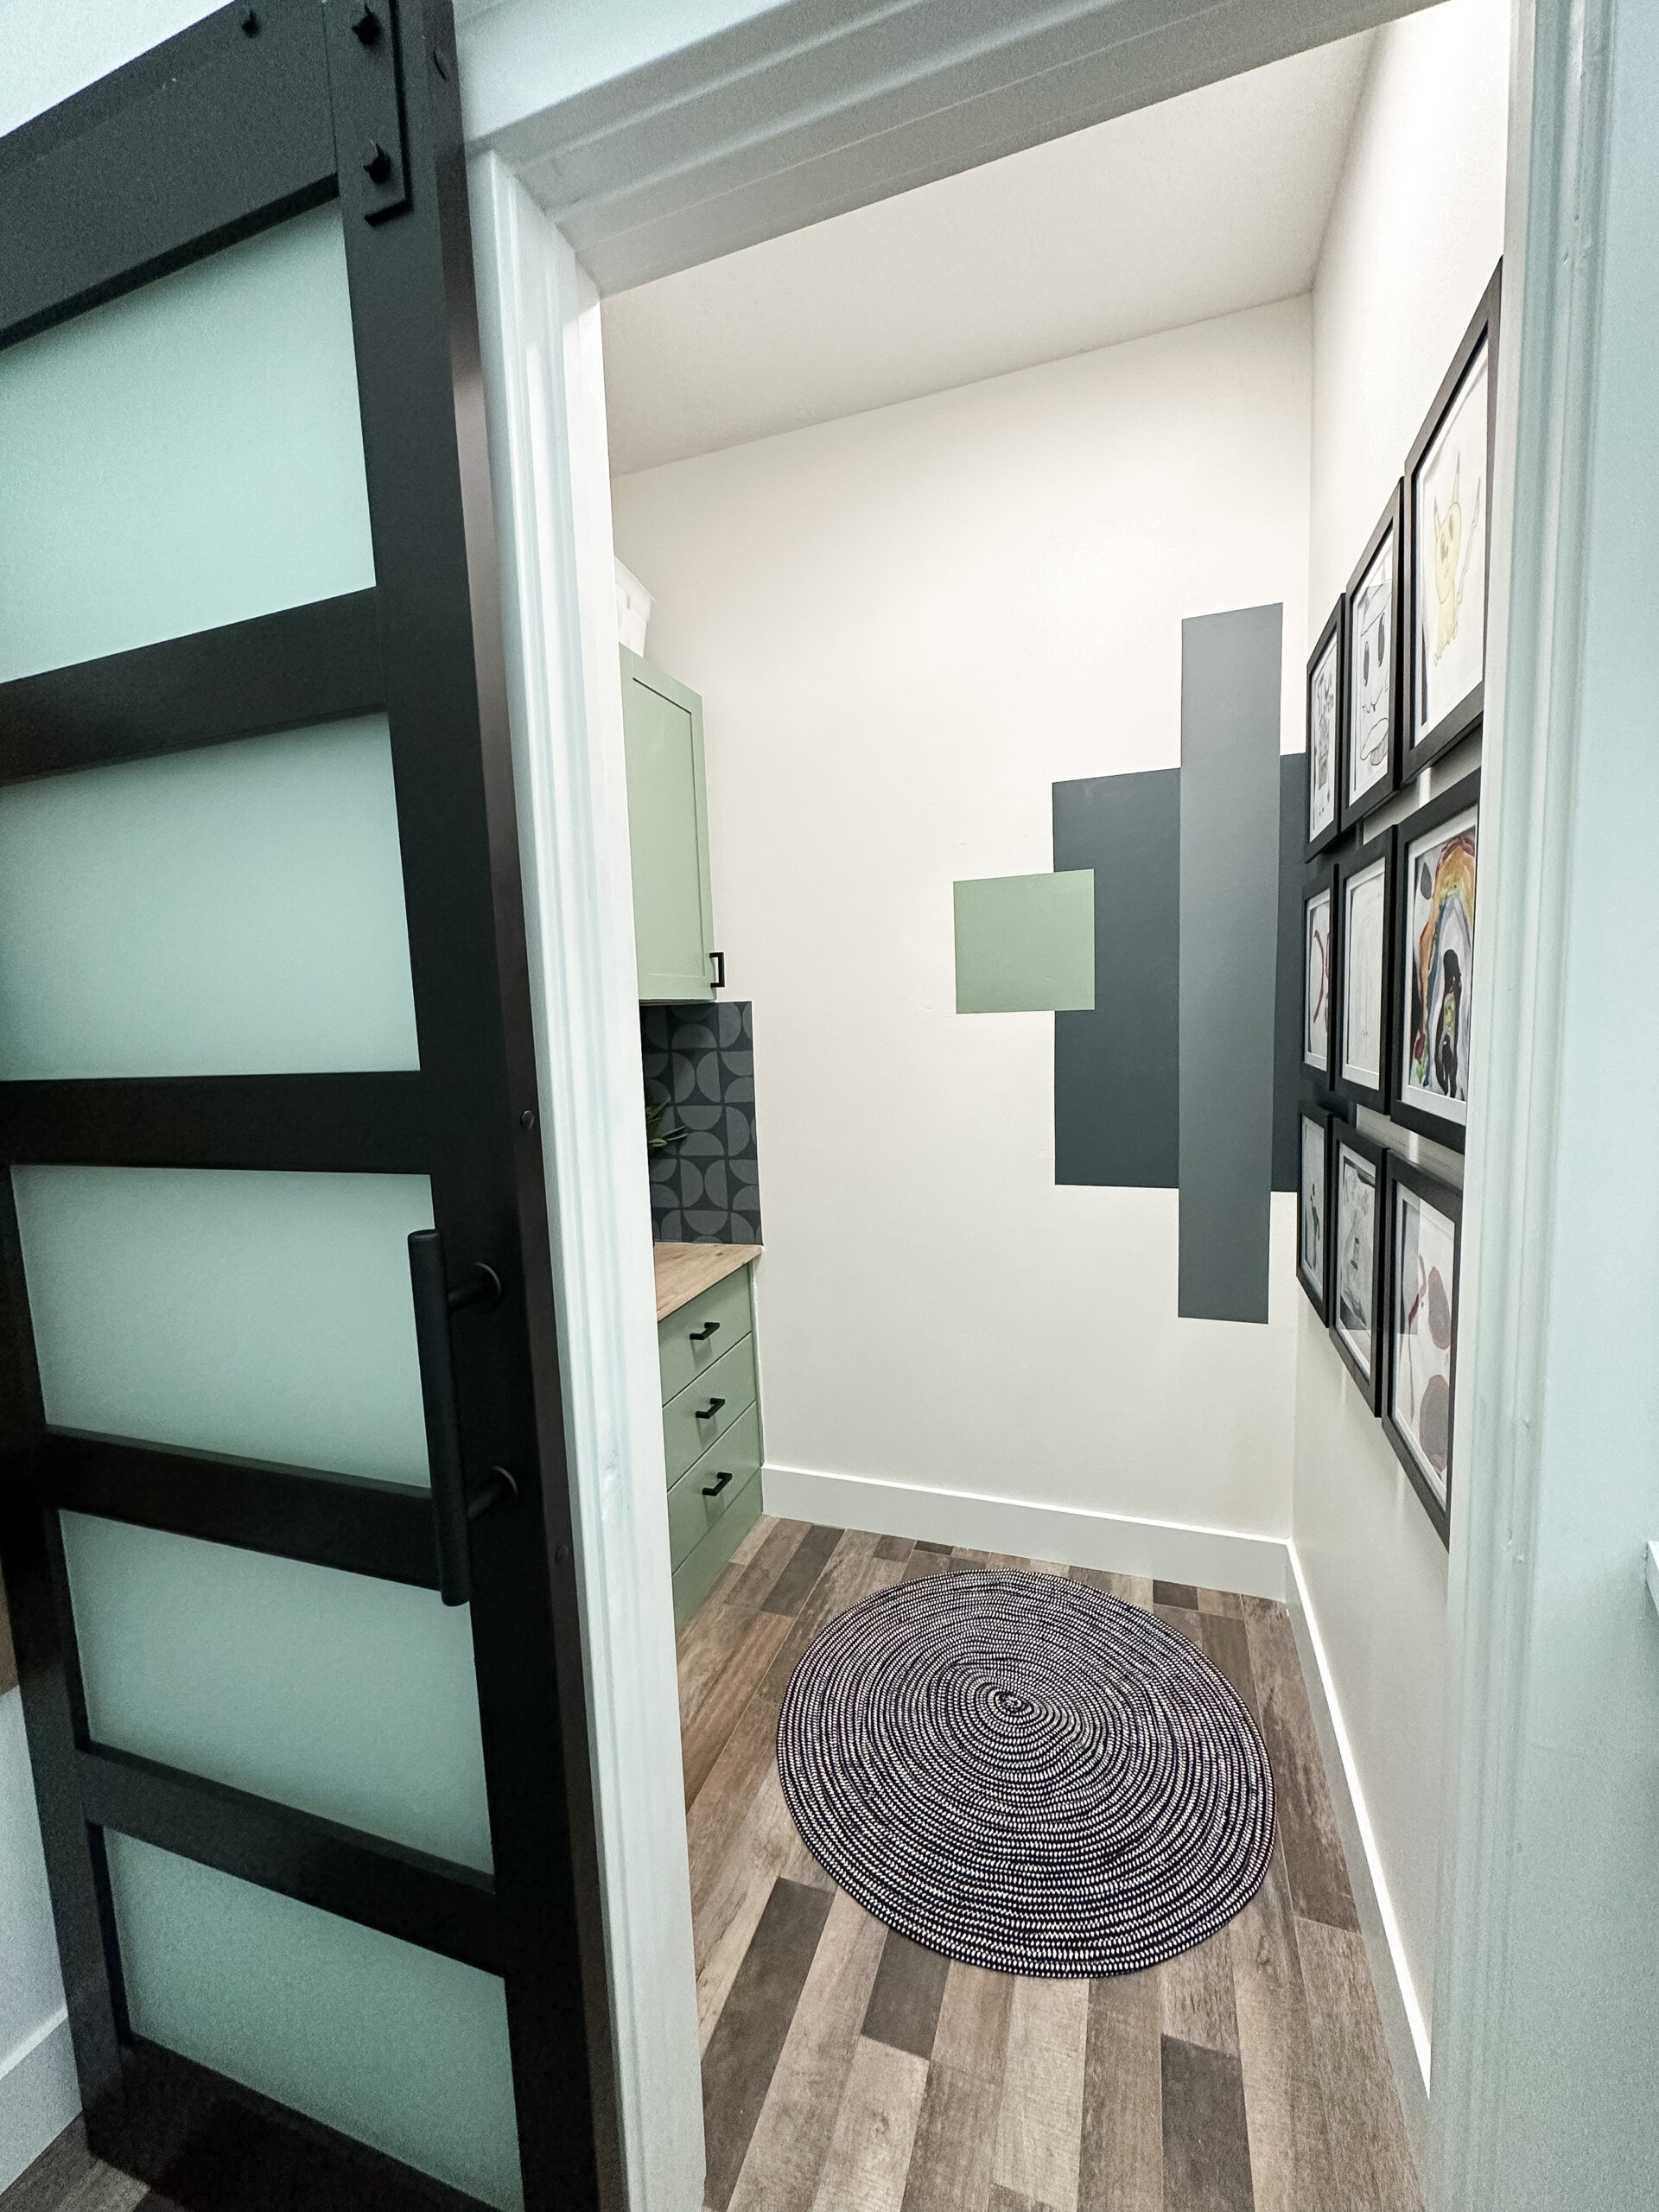
Now that I had a blank slate, the fun could start! This project was broken into three parts: art desk, stencil wall, and barn door. Let’s start with the stencil wall!
Step #1: Create a Stencil Backsplash
I have a love/hate relationship with stencils, but I decided to give them another try when creating the backsplash. The process is simple (but time-consuming depending on the amount of space you’re working with): I traced the stencil with a pencil, then filled it in freehand with paint.
And what art room would be complete without all the art supplies? I filled the desk and cabinets with all the markers, crayons, and paints a kid could want.
Step #2: Add a Display Wall
I found these frames that I knew were perfect for this room. My kids can display their “masterpieces” in them instead of all over my fridge.
I wanted a little more color in this corner, so I made some abstract artwork of my own. The key here is getting perfectly crisp paint lines. First, use the green frog tape. It is hands down the best tape. PERIOD! Second, place your tape where you want it, then run a baby wipe along the edge of the tape, let it dry, and then paint. Finally, remove the tape while the paint is still wet to expose the most beautifully crisp lines.
I used a level to make sure everything was straight and used the same technique as above to paint. I love the way this little art wall ended up.
Step #3: Install a Barn Door
The last section of this project was the door. I had a feeling that adding a barn door here would make this space feel like an extension of the house instead of a closed-off, forgotten nook that never gets used. And boy was I right! Adding the barn door was the best decision of the entire project!
I got this door from Amazon and painted it black. Hanging it was not too difficult, and the kit included everything to install it.
Because there was a standard door here before, I needed to make the hinge cutouts and holes disappear. I used Bondo to fill them in, then sanded it down and painted it. It’s like the original door never even existed.
This art closet project was so fun to do. I cannot wait to see what my kids create in this little room!
Follow along for more DIYs and fun at…


2 Comments