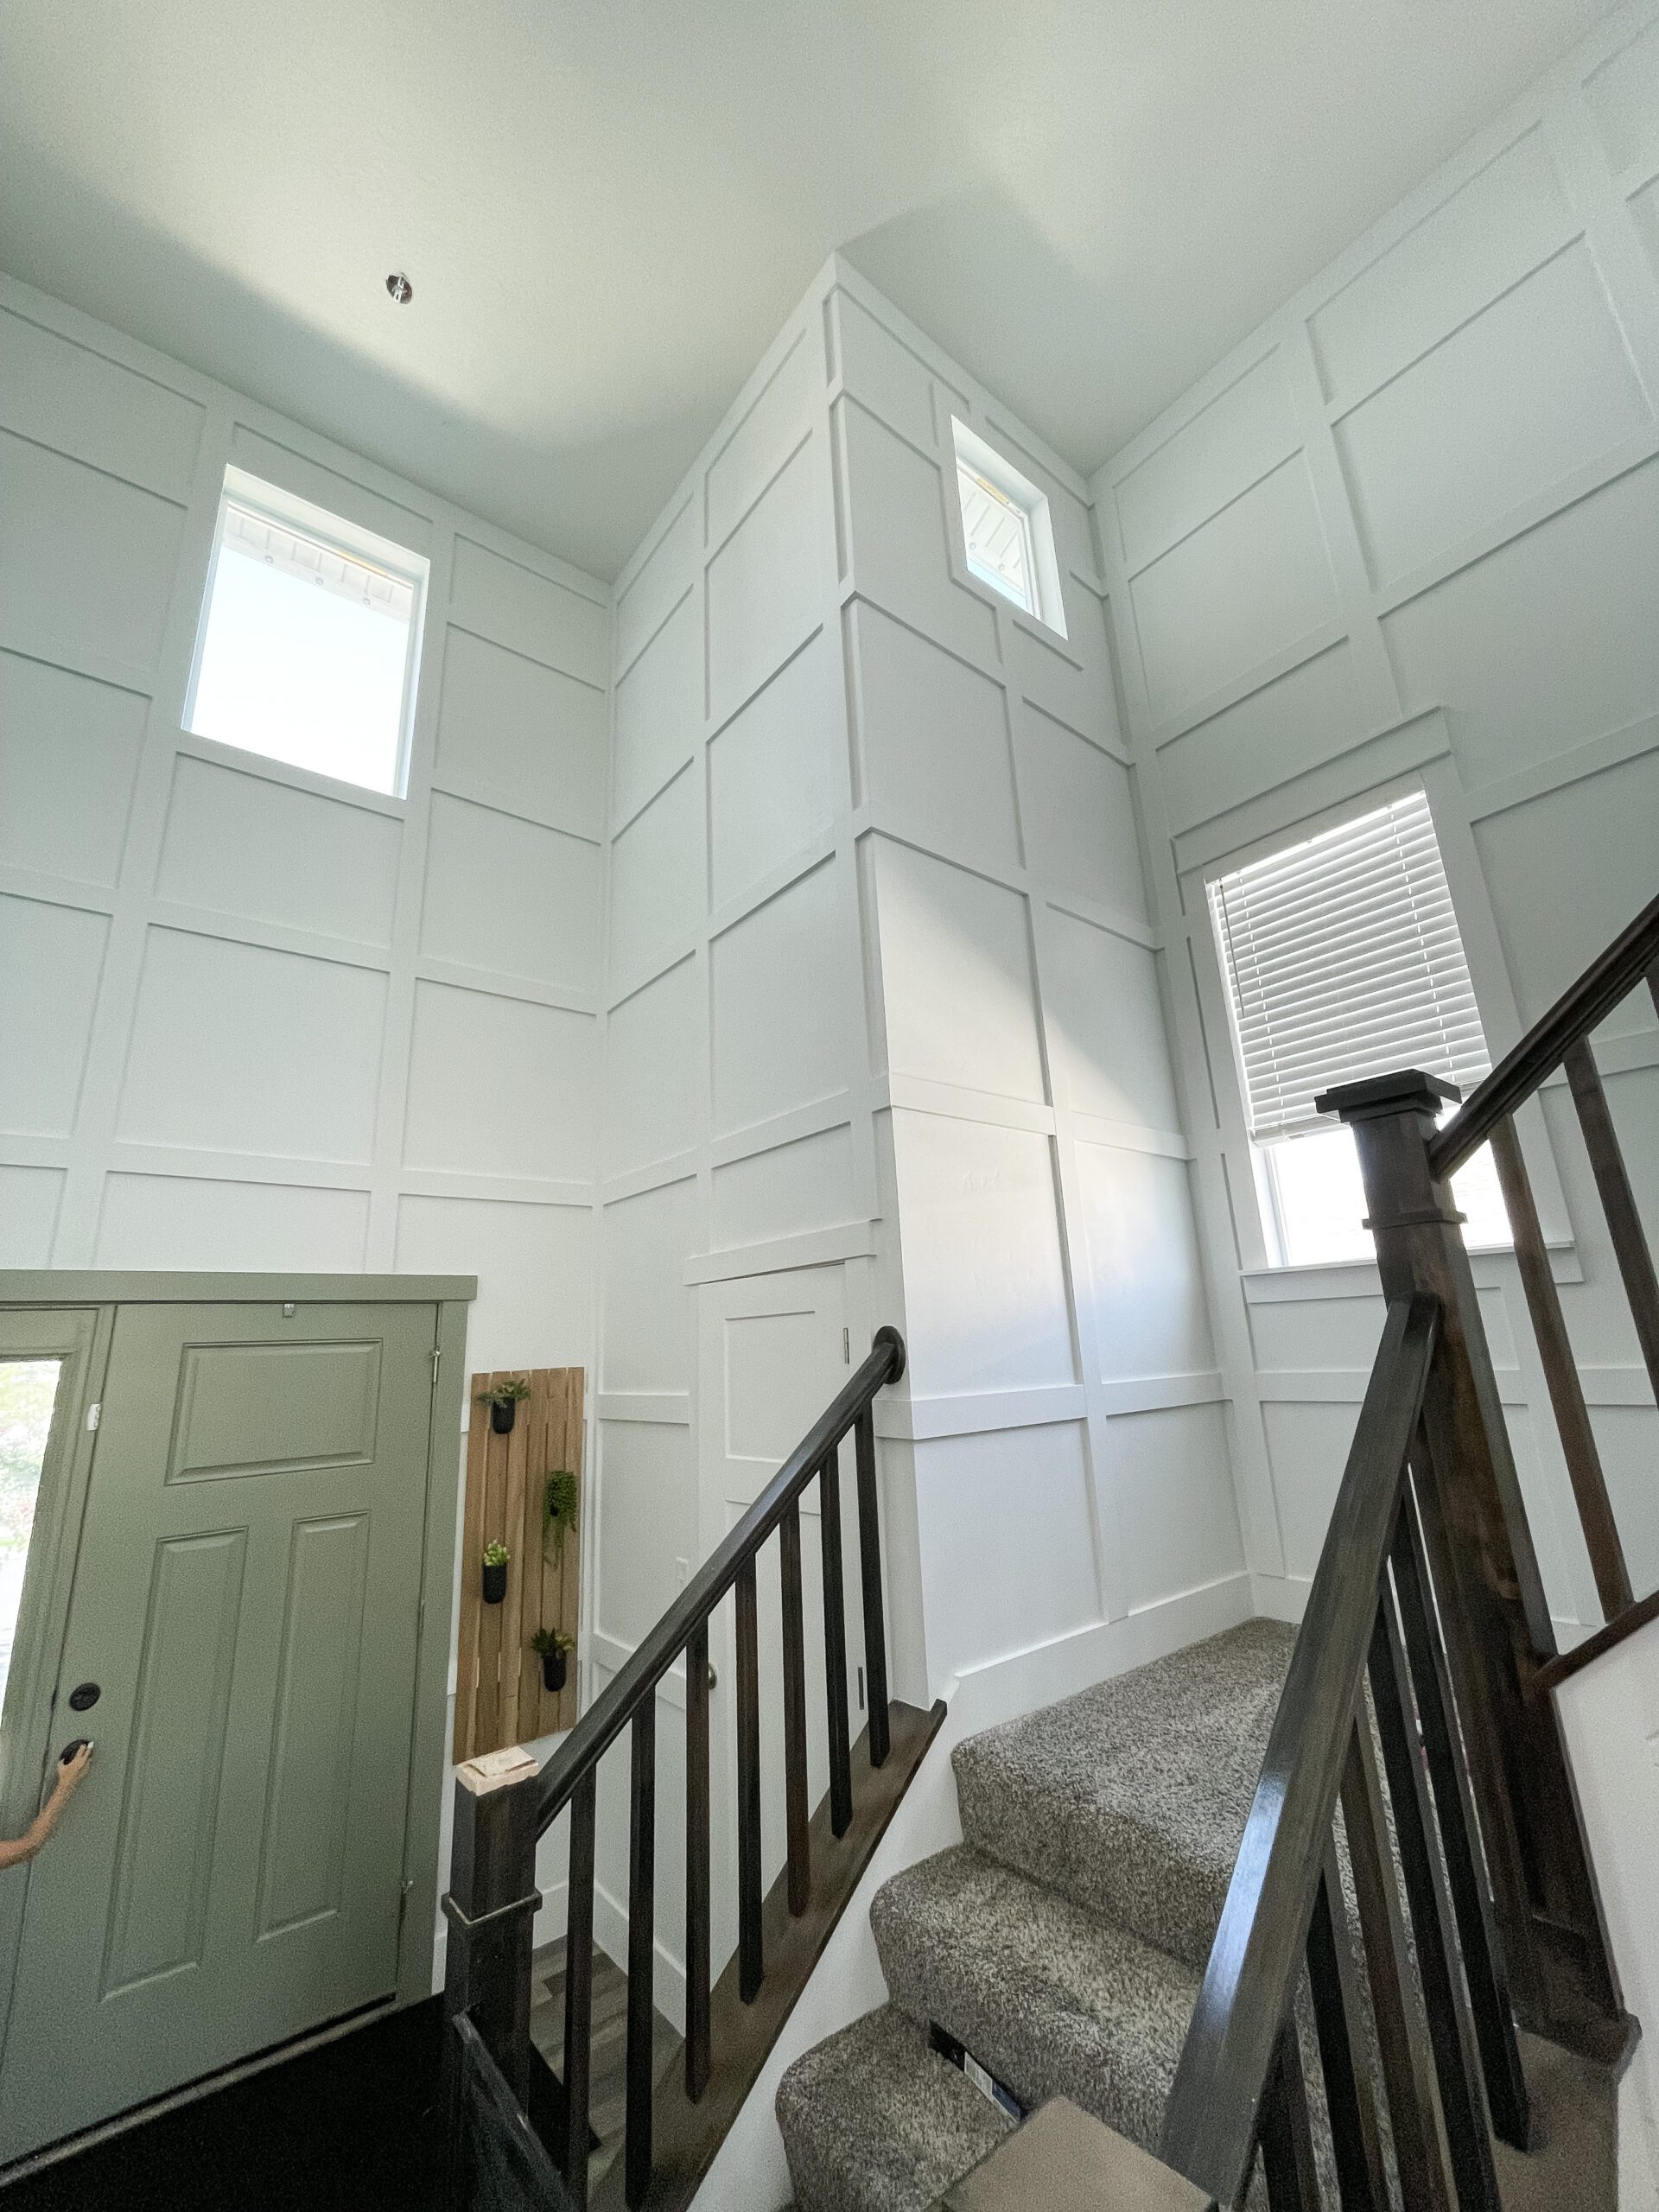
Entryway Makeover: DIY Board & Batten Grid Wall
This entryway makeover project started with me just painting my 18-foot two-story entryway, then quickly escalated to me buying scaffolding and trimming out the entire space in a board and batten design. My husband was not surprised—he’s used to my projects by now!
This DIY board and batten grid wall can be as simple or as difficult as you and your space want it to be. The size of my entryway made it slightly more difficult, but also way more fun!
Entryway Makeover Step #1: Paint
I painted the walls with a fresh coat of paint before getting started with the board and batten. This is not 100% necessary, but it can save you time later.
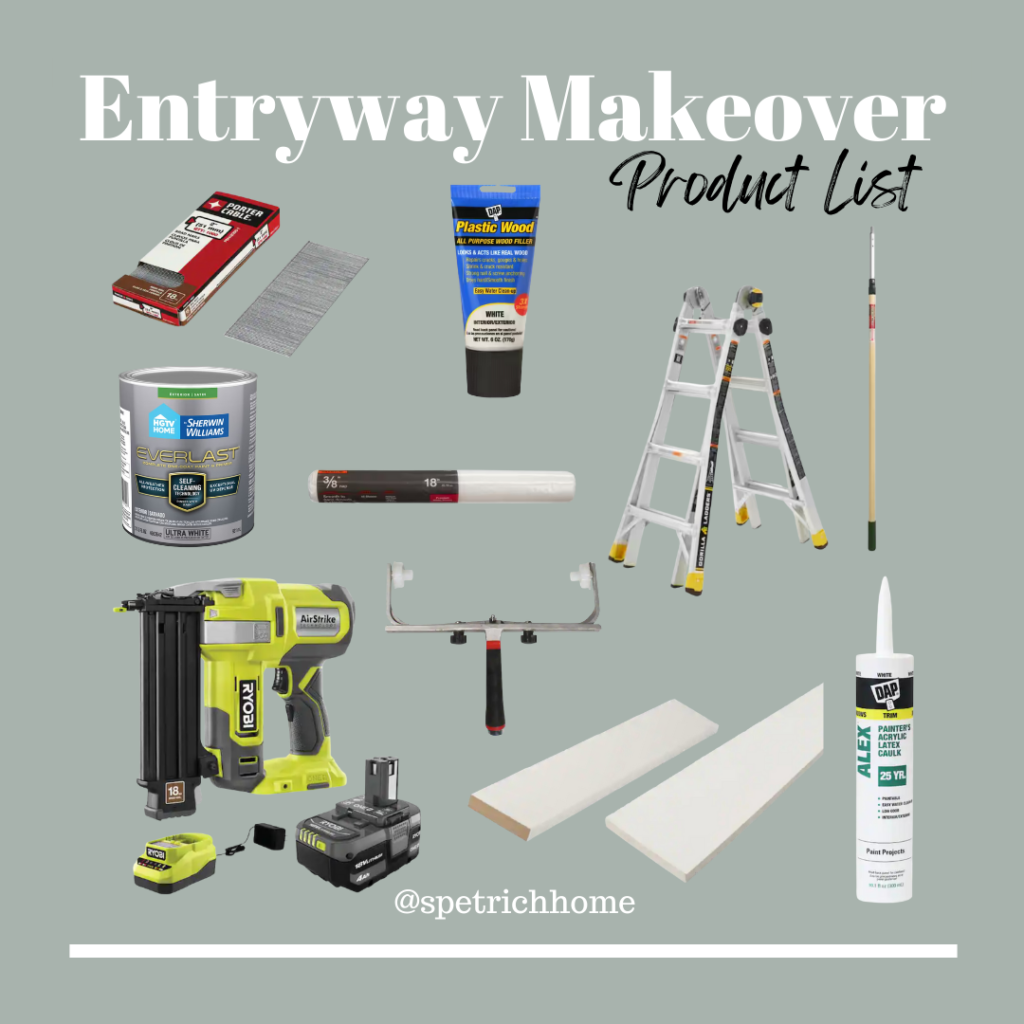
Here are a few tips and tricks for painting 18-foot walls. I used scaffolding for the top portion, but you do not have to.
- Take off the outlet covers. It makes it so much easier, I promise!
- Use an 18-inch paint roller. It covers more space, so you finish faster!
- Get a paintbrush extension pole.
- To paint the corners, I just taped a paintbrush to the end of the extension pole.
- Get a ladder to help you reach the top portion. I recommend having someone there to support you (safety first!).
- Finally, if you do not want to use a ladder, did you know you can RENT scaffolding?
Step 2#: Install the Top Trim
I wanted the trim piece that goes around the top of the wall next to the ceiling to be a larger size than the rest of them, so I installed those pieces first.
You can install them with a beveled cut or cross-cut. When beveled, the seams are easier to hide and fit together much cleaner. Mine were 18 feet high, and you would never be able to tell which way I did them, so I could have done it either way. If it were lower or in a more noticeable spot, I would bevel it.

Step #3: Install the Vertical Pieces
Next, it’s time to install the vertical pieces. Decide what dimensions you would like the squares to be. Then, install the vertical pieces. On accent walls, I usually do not glue things on, so that it is easier if I want to change it later. I prefer just using nails and a nail gun.
Pro tip: Here’s a good way to ensure the vertical pieces are the same distance apart! Cut a piece of trim that is the length of the distance between vertical boards and slide it between the installed piece and the next piece, nailing the vertical piece as you go. This will ensure that they are in line with each other.
Step #4: Install the Horizontal Pieces
Once all vertical pieces were installed, I moved on to the horizontal pieces. Be sure to measure and cut each piece before nailing it in place.
Step #5: Wood Fill & Caulk
I always say this, and I will say it again: Wood fill and caulk. This is the part you don’t want to skip! It’s the difference between a nice job and an exceptional job. Depending on the size of your project, this might take a while, but it’s worth it.
Step #6: Paint & Complete Your Entryway Makeover
We’ll end where we started: with painting. If you already painted your wall before you started, you just need to touch up the wall and paint the boards. If you want to make it even easier on yourself, pre-paint the boards before hanging them. Then all you have to do once they are on the wall is touch up! Otherwise, just make sure everything is painted and you are done!
That’s it! What do you think? As part of my entryway project, I also redid my banister. Check out that project here.
Follow along for more DIYs and fun at…


One Comment