Closet Organization Ideas: From Mess to Masterpiece
There is a closet off our entryway that has always been an awkward space that I could not figure out. It is large, and the builder didn’t really do anything to make it functional. I have re-done this room multiple times and brainstormed so many closet organization ideas, and it just never felt right. You may have seen this post where I most recently updated the closet, and I think I finally got it! However, I wanted to take you through the evolution of this closet, because it’s been a fun journey! And some of these closet transformations could inspire your own space.
The Beginning: A Basic Builder-Grade Closet

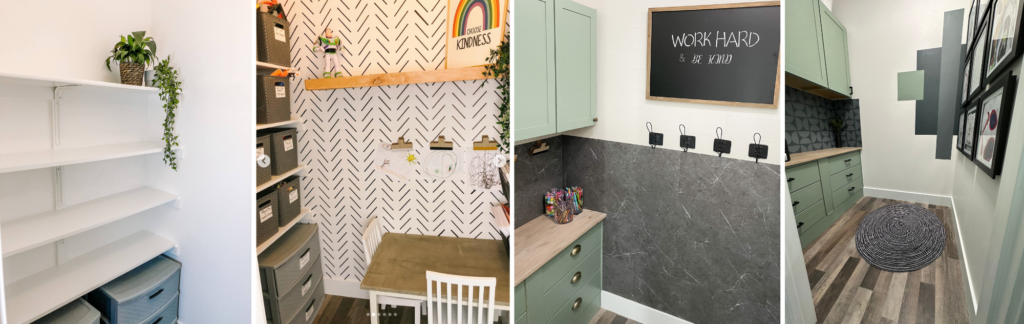
When we moved in, this closet was very basic. White walls, a few shallow shelves, and LOTS of open, empty space. We used it as storage for a while. It was the catch-all and got neglected and forgotten about. It was a mess most of the time, and I tried to avoid it because it was such a confusing space for me. Enter, the first update to this closet.
Closet Organization Ideas #1: Art Closet
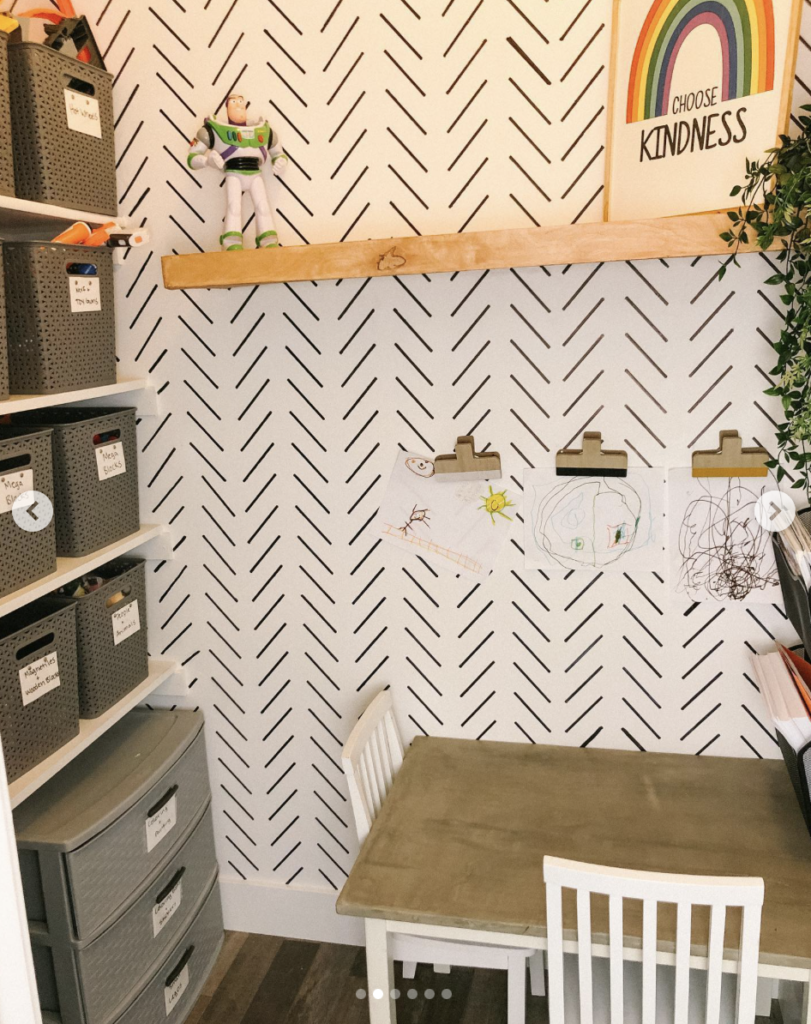
For this update, I just tried to give the room some character. I organized my kids’ toys in bins on the existing shelves. I got these plastic drawers that fit well under the shelves to hold more things.
This closet felt like a cold, sterile box, and I wanted to change that. So I added a wall treatment on all the walls and a floating shelf with some decorations.
My favorite part of this closet was the wall treatment! I stenciled all of the walls with SHARPIE! This wall treatment is simple, but it can be time-consuming depending on how much space you are doing it on. I got THIS stencil and then just filled in all the walls with it.
About halfway through, I found a different type of Sharpie that worked much better. It was a Sharpie Paint Pen. It was so much faster, and looked just as good!
I found this darling artwork to put on the floating shelf and called it done! It worked well, until it didn’t anymore. So I decided to update it again.
Closet Organization Ideas #2: Art Closet with Extra Storage
By this time, I realized that the shelves were not working for me. You could still see the mess; it was unorganized, and it was not working. So I decided to do some built-in drawers and cabinets with a countertop. Check out THIS post to see how I completed the built-ins. Though it took some time and figuring out, it worked great.
I still really liked the Sharpie walls, but they did not go with my new vision for this space. I had found some peel-and-stick tiles, and I wanted to try them out. For the record, I was very excited about this. I thought it looked great! However, after some time, I realized that for my space, the tiles did not really work well.
There were a few things that may have played into this…

- This closet gets really hot or cold. This is not good for this type of tile. It needs to be in a more temperature-controlled space.
- I have texture on the walls, so there was not a flat, even surface for them to apply to.
- I had cute little 2-year-old fingers helping me, and she may have touched the backs of some of them, making them a little less sticky.
But overall, this was a great overhaul of the space, and I loved it! However, because the tiles did not really work well, that led me to want to redo it the third and final time.
Closet Organization Ideas #3: An Intentional Space
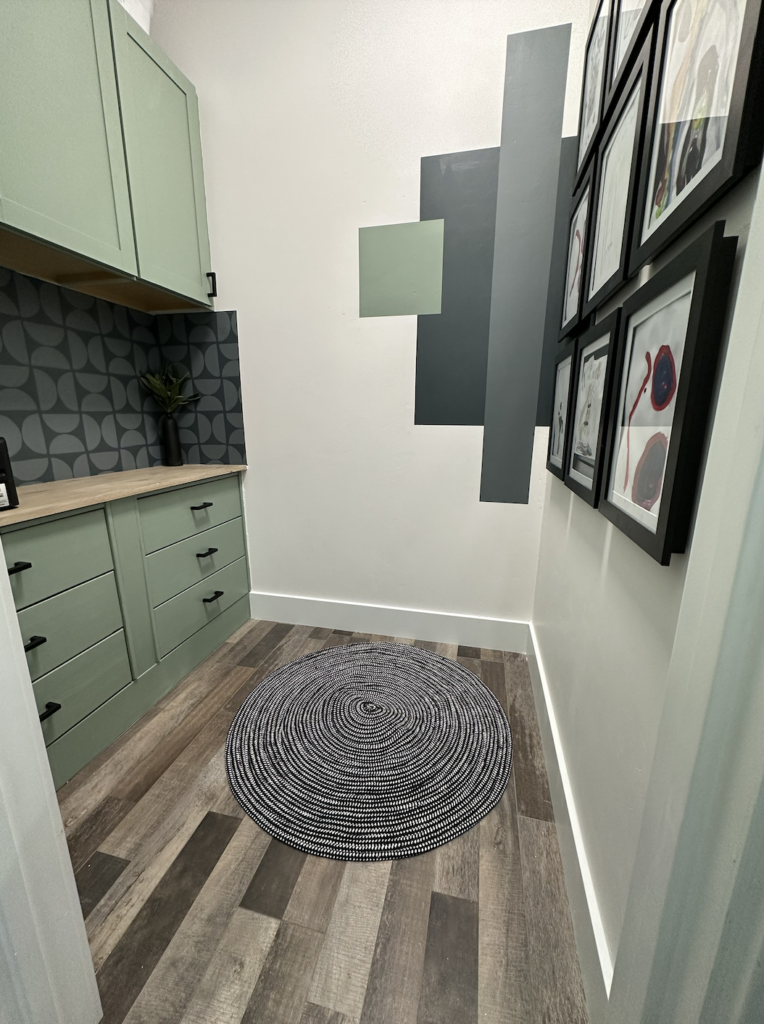
You can read about the full update here. But the short version is that I was sick of this room feeling like a forgotten space. A place where all great ideas went to die, haha. I wanted a place for my kids to do all their art projects. A place to store their artwork and do all the crafting their little hearts desired. So I decided it was time to make this room have a real purpose, instead of just an unclear space that was just a catch-all.
I kept the cabinets and organized them. Of course, I took the peel-and-stick tiles down (which was a huge ordeal itself). Then, I re-painted the whole room, and did a fun stencil as a “backsplash” (step-by-step details on that here!). I filled the drawers with art supplies and hung frames for my kids to display their masterpieces. It was perfect! And the cherry on top? I replaced the standard door with a sliding barn door! Best decision ever!
A Space We Love
Now this space feels intentional, like it’s part of my home and not an afterthought. Does it stay perfectly clean and organized? No! It’s a kids’ space, but it actually gets used, and that is all I wanted!
Will I change this room again? Probably. But that is okay! Because this works well in this phase of life, and that does not mean it always has to be this way. Life is evolving, so our home should too.
This is my reminder to you: Just because you do something in your home, it doesn’t mean you have to love it forever. This is YOUR home. Make sure you love it while you live there! And remember, it’s fine to change your mind.
What space in your home do you want to change? I would love to hear about it! Until then…
Follow along for more DIYs and fun at…