The Ultimate DIY Princess Castle: Part 2
We are back for the rest of the princess castle project! If you missed part 1, you can view it HERE! In part one, we built the platform for the upper level, did some finishing work on that, and did phase one of decorating it. But now, the fun begins! This is where the castle truly comes to life. This is where the platform becomes a CASTLE!
Princess Castle Supplies:
- Plywood
- Trim
- 1×2
- Caulk
- Wood Filler
- Paint
- Craft Foam
- Grout
- Liquid Nails
- Shiplap
- Ladder parts – see below
- Automotive Primer
Princess Castle Tools:
Step #1: Cut Out the Front of the Castle
For the castle fronts, I used THIS plywood. I started by drawing out the shape of the castle on the plywood. Once I knew what I wanted, I started cutting it out with my jig saw. If you are cutting circles, or in my case, windows, and you need to cut a hole out of the middle of the plywood while keeping the “frame” in one piece, do this:
Take a drill bit that is larger than your saw blade, and drill a hole in the corner of the space you want to cut out. Then take your jig saw and start cutting the lines. You will need to go back and clean up the corners, but your finished product will look great!
*Jig Saw Cutting Tip: When you cut with a jig saw it tends to kind of “shred” the side of the plywood facing UP. So to get a clean front, cut the plywood upside down. To do that, you will need to draw your shapes on the BACK, then cut them with the front facing down.
Step #2: Pocket Holes
I decided to put pocket holes in the sides of the castle fronts, so that I could connect the three front pieces to each other, plus to the walls. If you have never used a pocket hole jig, you need to! They will change your life. (Okay, that’s a bit dramatic, but they are amazing. I have this one. It is semi-automatic. All you do is set it to the thickness of your wood, and it does the rest for you. It is so easy and makes the cleanest finishes.
Once I had my holes finished, I attached them to the walls and to each other. This was the point I got really excited because it started LOOKING like a castle!
Step #3: Trim and Finish Work

Now the tedious work starts… Trimming everything out and doing the finish work. I added trim to the bottom door, the windows, and where the two side pieces meet the middle piece. I also added a clean piece of wood to the back side and a thin trim piece all the way around the top. Because there were a million little cuts I had to make, I actually used THIS miter box to cut them. That way I was not cutting a bunch of little pieces with my miter saw.
I used 1×2 and pocket holes to add a grid to one of the windows. Gah! Doesn’t it look so fun?!
Time to caulk and wood fill. I had to fill all the nail holes with wood filler and caulked around all the trim. I say this all the time: This step is tedious, but it makes such a difference. So don’t skip it!
And finally, to finish up the trim, I painted it all a darling pink.
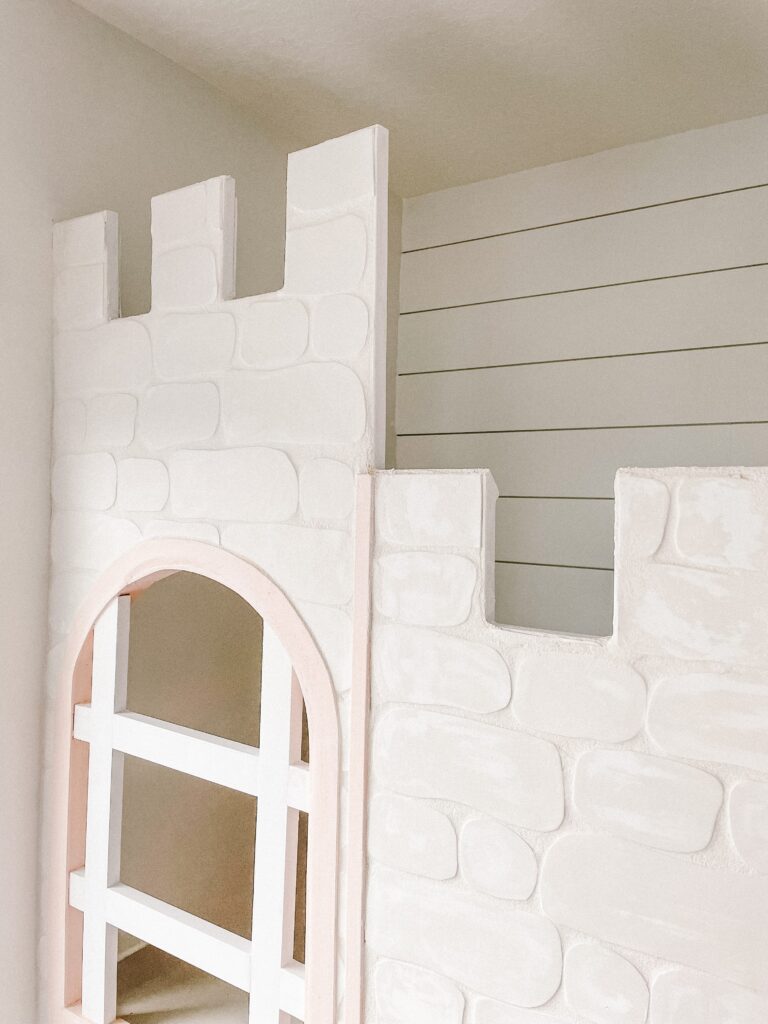
Step #4: Stone
The stone… oh, the faux stone. What a journey that was. I tested a few different methods before landing on using craft foam.
I got a bunch of sheets of these white craft foam sheets and cut out what felt like a bajillion stones in several shapes and sizes. Then, I glued them on in a brick-like pattern using Liquid Nails. Once all the stones were on, I went over the foam with a cream paint. And finally, it was time to grout! I spread it over the space between the foam pieces just like you would with tile. This part took a while because getting the grout off the foam stones was kind of difficult. As I wiped the grout off the foam, it took some of the paint off with it. At first, I thought I would have to repaint the foam, but I ended up really liking the way it looked. It gave the stone a little texture, which I felt made it look more real.
I repeated this until everything was grouted.
Step #5: Shiplap
Because you know I cannot possibly leave well enough alone, I decided to add ship lap to the back wall on the top. In my defense, you can see this wall, and I think it was the perfect unnecessary but necessary step. Haha! Plus, what is another $50 at this point, right?
A couple of quick tips when installing shiplap:
- Make sure that the seams do not line up from row to row.
- Put your nails in the lip part of the boards. This makes the wood filling part much easier.
- If you paint the ship lap a color besides the color it already is, it is so much easier to paint the edges of each board as you put them up. Then you are not trying to press a paintbrush in the creases to paint it.
Finally, I wood-filled the holes and painted them to complete the shiplap step.
Step #6: Ladder
In phase one, I showed you one way you can do the ladder. Here is another way you can do it. I bought a few things from Lowe’s in the plumbing department: metal corners, metal pipe, and metal flange.
I assembled them to look like ladder rungs, then painted them using the same method I use to paint my faucet fixtures. First, I gave them a quick sanding, then sprayed them with automotive primer, and finally, I painted them with the same paint I used on the trim. Once they were dry, I installed them to the front of the castle under the window.
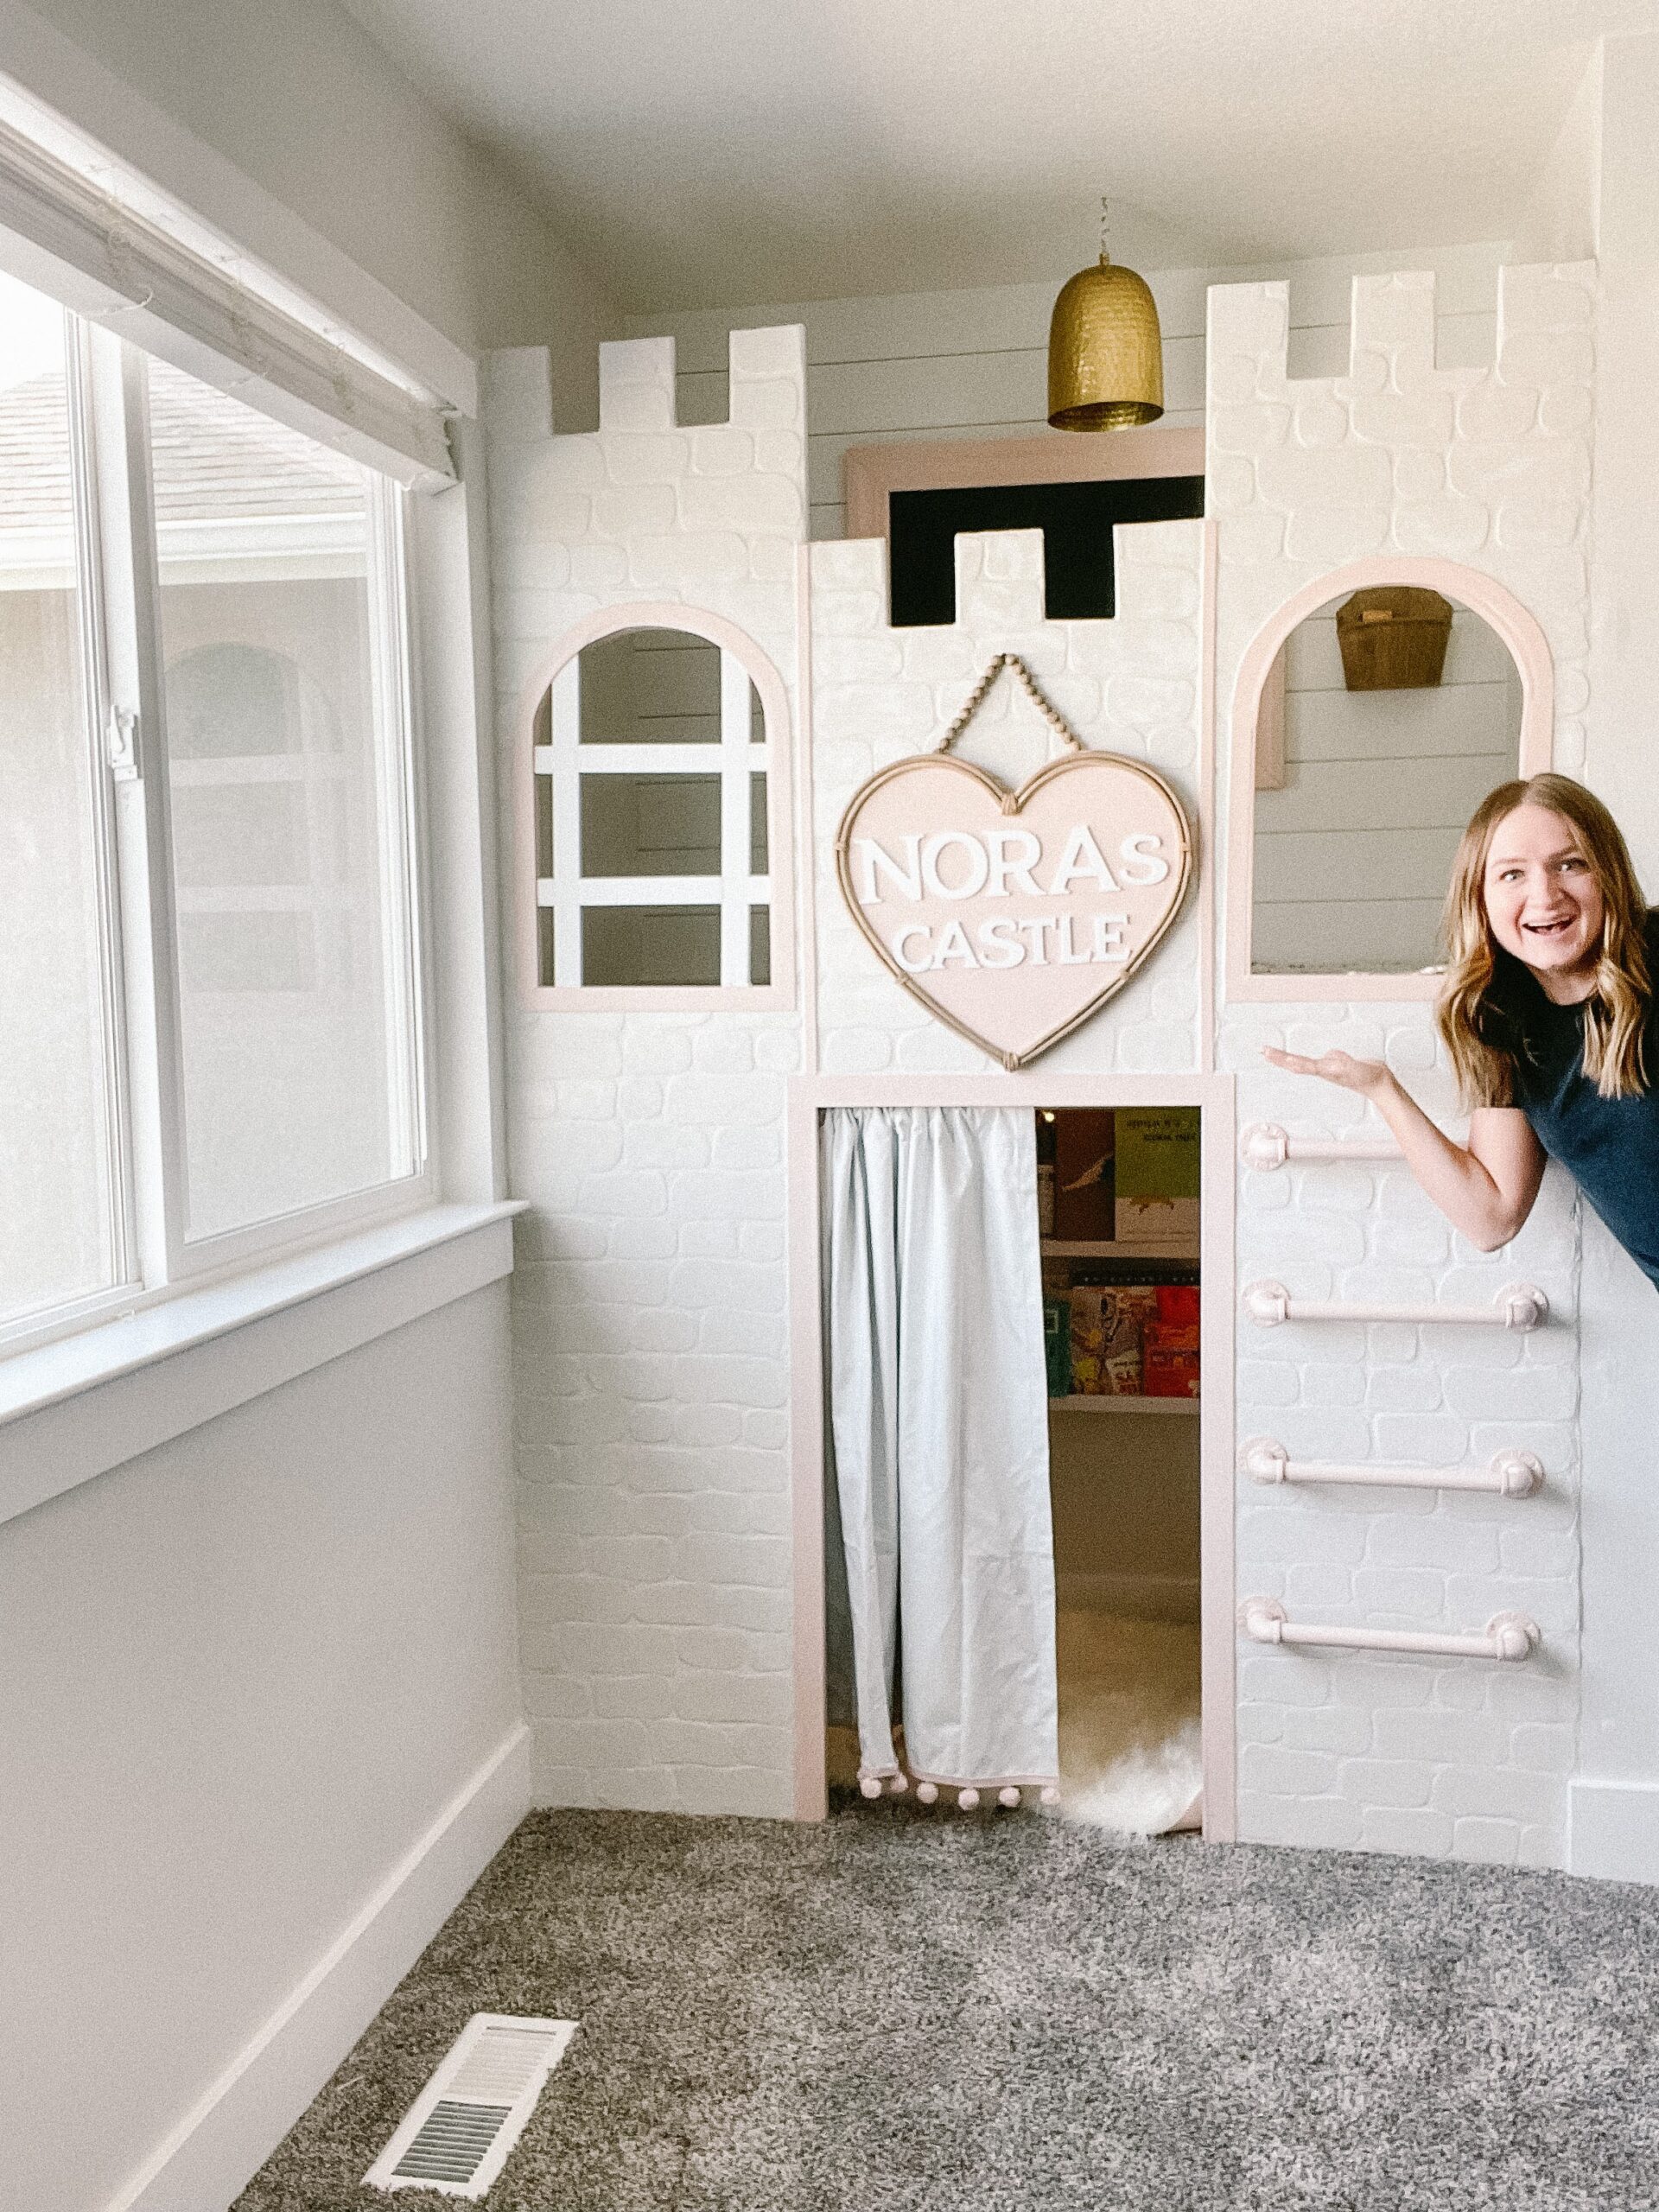
Step #7: Finishing Touches on Your Princess Castle
This is the best part: where you add all the fun finishing touches. This is also the part where my brain decides it is time to move on to the next project, and I have to force myself to stay focused and get EVERYTHING done! Here is what I did here to finish this castle up.
- Made a quick curtain to hang over the door.
- Painted the chalkboard frame.
- Found, painted, and installed a chalk basket.
- Made a cute sign to go above the door.
Once that was all complete, the princess castle was officially done! I absolutely LOVE how this castle turned out! My girls also love it and still play in it! This certainly was not an easy project, but it was not as difficult as you would think if you can just break it down into smaller, more manageable phases. Plus, my girls’ excitement made 100% of the work worth it!
What do you think about this princess castle? Would you attempt something like this? I would love to hear about it!
Follow along for more DIYs and fun at…