
Princess Perfection: Building Your Own Enchanted Loft Bed
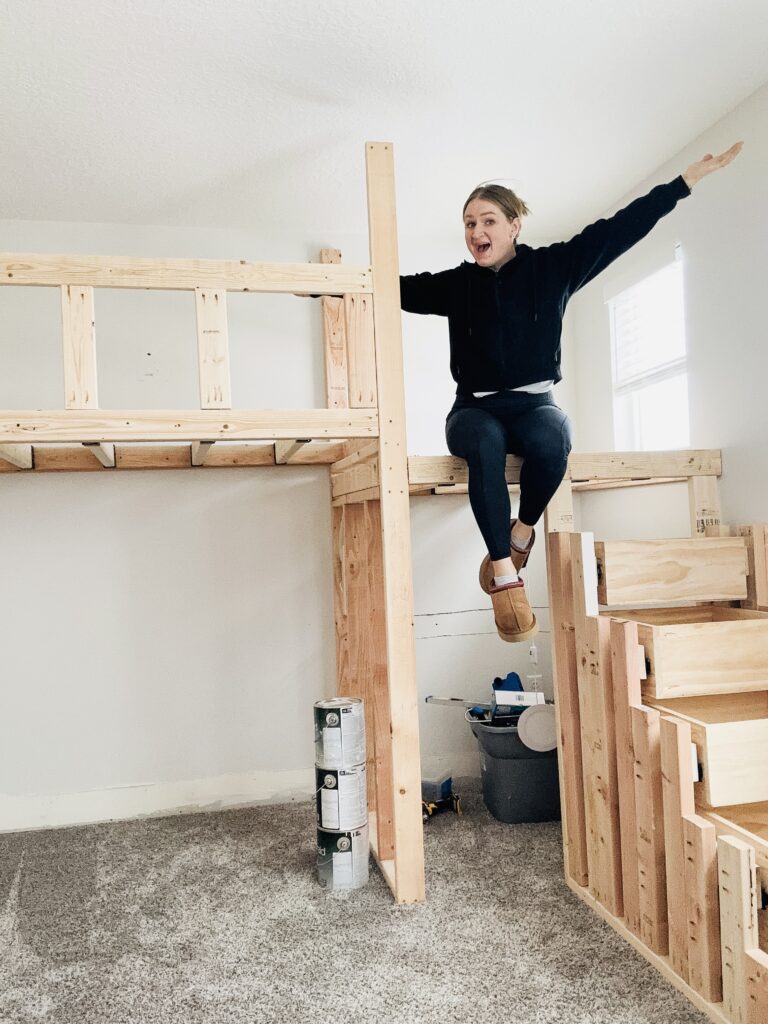
My girls will be sharing this room, and I am so excited to make it the little girl’s room of my dreams for them. I started by updating the castle. I originally built the castle a few years ago, and then I recently updated it. Then, I moved on to the closet! Who knew a closet could be so magical? And now, we are working on the bed! I decided they needed a loft bed, with stairs that double as drawers and a slide. The bottom is going to just be a loft space until my youngest daughter grows out of her crib, and then we will change it to a bed. I am absolutely in love with how it turned out!
I hope this post simply gives you the courage to try something that you are scared to do. This was a huge project and something I was a little nervous to start. But as I always say, take it one step at a time, and before you know it, you will be stepping back to admire the work you completed. Let’s get started!
Note: This post contains affiliate links. I may earn a commission at no extra cost to you. Thanks for supporting my content! 🙂
Loft Bed Tools:
Loft Bed Supplies:
- 2x4s
- 1x6s
- 1x2s
- Joist Hangers
- Drawer Slides
- Melamine Board
- Plywood
- Poplar for Railing
- Behr Poly + Stain
- Caulk
- Primer
- Paint
- Sandpaper
- Wood Filler
- Quarter Round Trim
Step #1: The Loft Bed Plan
The first step is always to plan out how you want your bed. For me, I knew I wanted…
- Little nooks on the head of each bed
- Lights on each bed
- Stairs that doubled as drawers
- A slide
- The top would be a bed
- The bottom would be an open space.
I started to sketch out what I wanted and plan my measurements and supplies. But I got overwhelmed, so I just started building. Obviously, no project would be complete if it did not require 500 trips to the store to get supplies you forgot about, did not think about, or underestimated how much you would need. So, when I say “plan your supplies,” I mean, do your best and expect to go to the store a bunch of times, lol.
Step #2: Frame the Head & Foot Boards & Platform of the Loft Bed
For the headboard, I measured the depth that I wanted the bed to be and the height from the floor to the ceiling, and I made a rectangle that size with 2x4s. Then, I added additional 2x4s inside the rectangle to build out the nooks and created a base for the top platform to sit on.
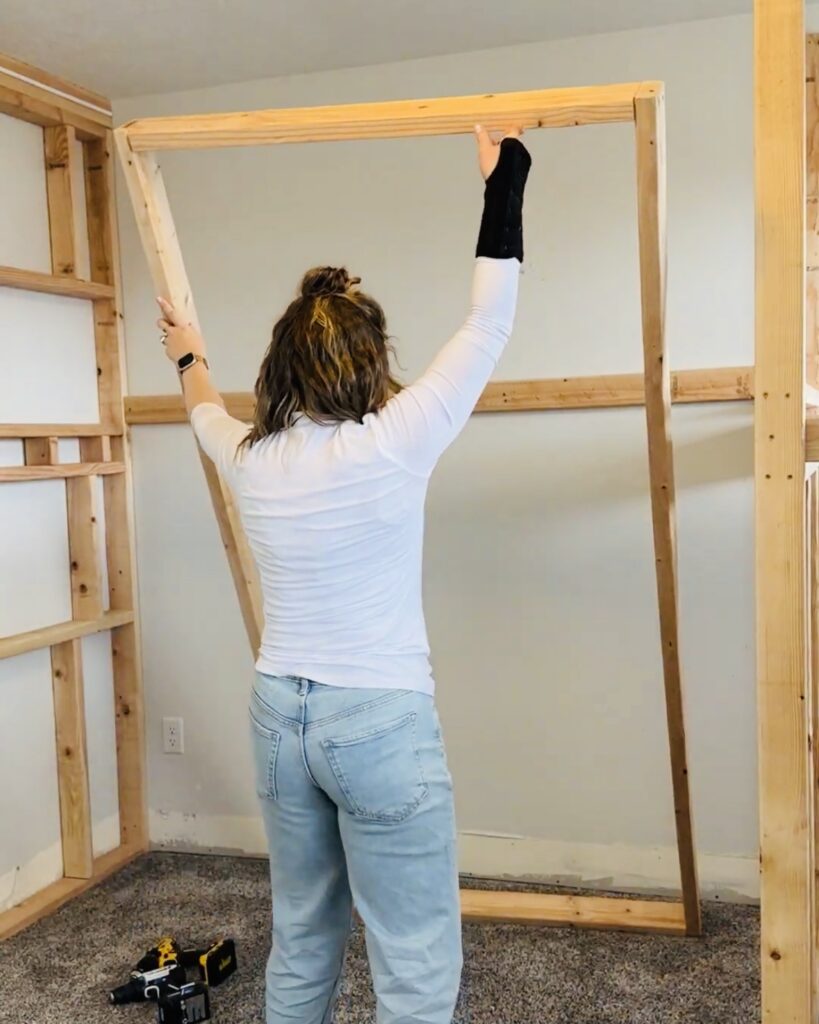
Next, I copied the size of the frame for the footboard. For the footboard, I made the bottom piece and two sides, but left off the top piece. I then installed a center support for the top platform, even with the headboard, and then I put a few 2x4s from the bottom to the center support to provide more support for the top platform.
Finally, I built the platform the same way I made the frame for the headboard: Just some 2x4s screwed together to make a rectangle.
Step #3: Install the Headboard, Footboard, & Platform

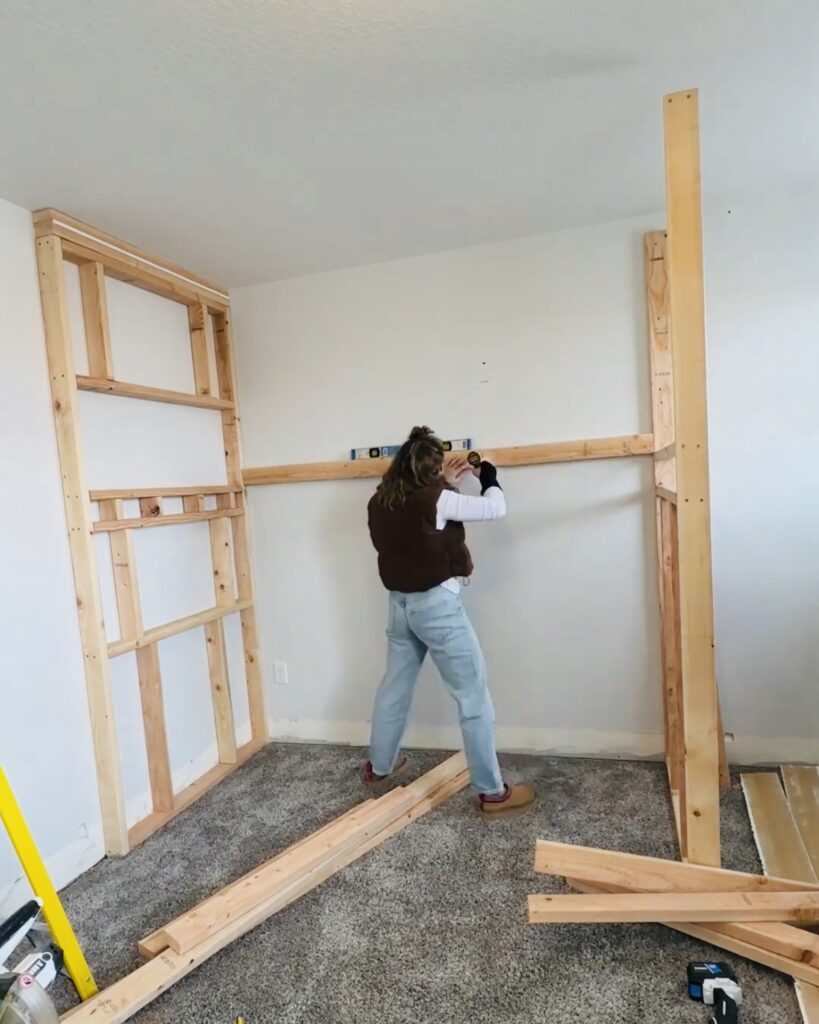
To secure the headboard frame to the wall, I simply screwed through the 2x4s into the studs at an angle. I screwed it into the ceiling and walls to ensure it was completely secure.
I repeated that on the footboard, screwing into the floorboard and the side wall.
To install the platform, I hung a 2×4 on the wall, into the studs. I then placed the rectangle frame I had built on the base I added to the head and footboards. After that, I screwed it into the wall and the four corners of the bed.
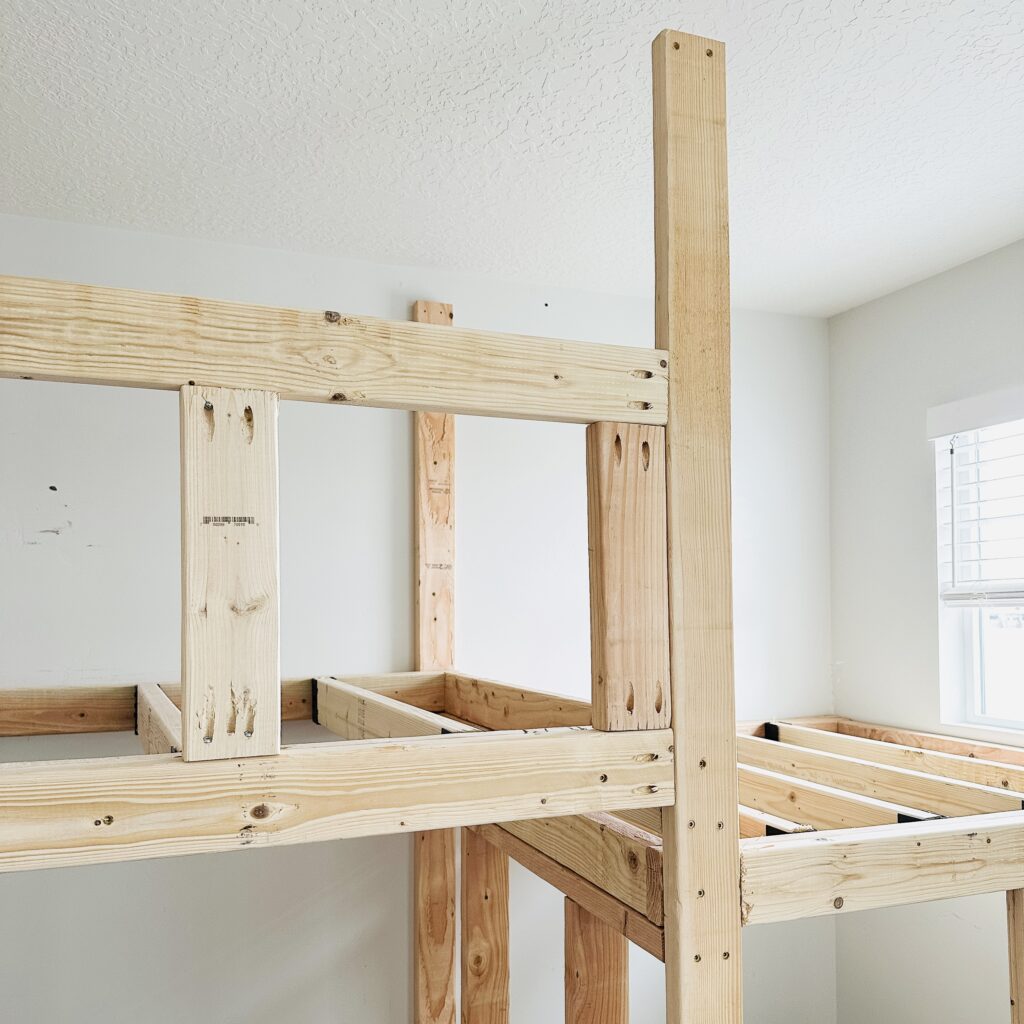
Step #4: Joists
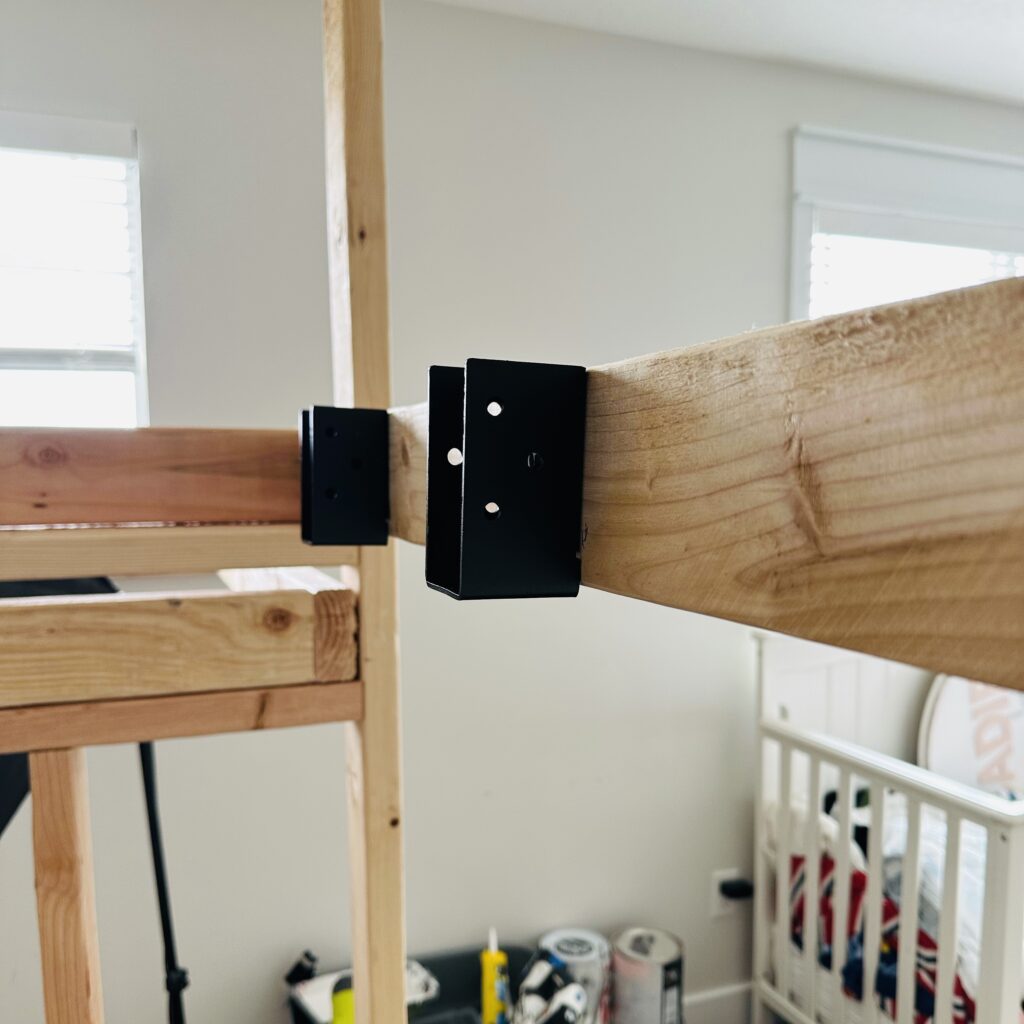
I got THESE braces for the joists on the platform. I screwed them into the platform frame evenly on the front and back. Then, I slipped the 2×4 joist into the braces and secured them into the brackets with screws. This makes the platform a lot more secure.
Step #5: Railing

Obviously, this bed is for children, and the last thing we want is for anyone to fall off. I have the CUTEST and most secure way to ensure the kids are safe. I started by building another rectangle to be the dimensions of the railing, then installing center pieces to support the railing. Normally, for railings, you need to be conscious of the distance between the vertical dividers, but I had another plan to cover this, so I was not super concerned with the space between each divider. I used pocket holes to assemble and install the railing.
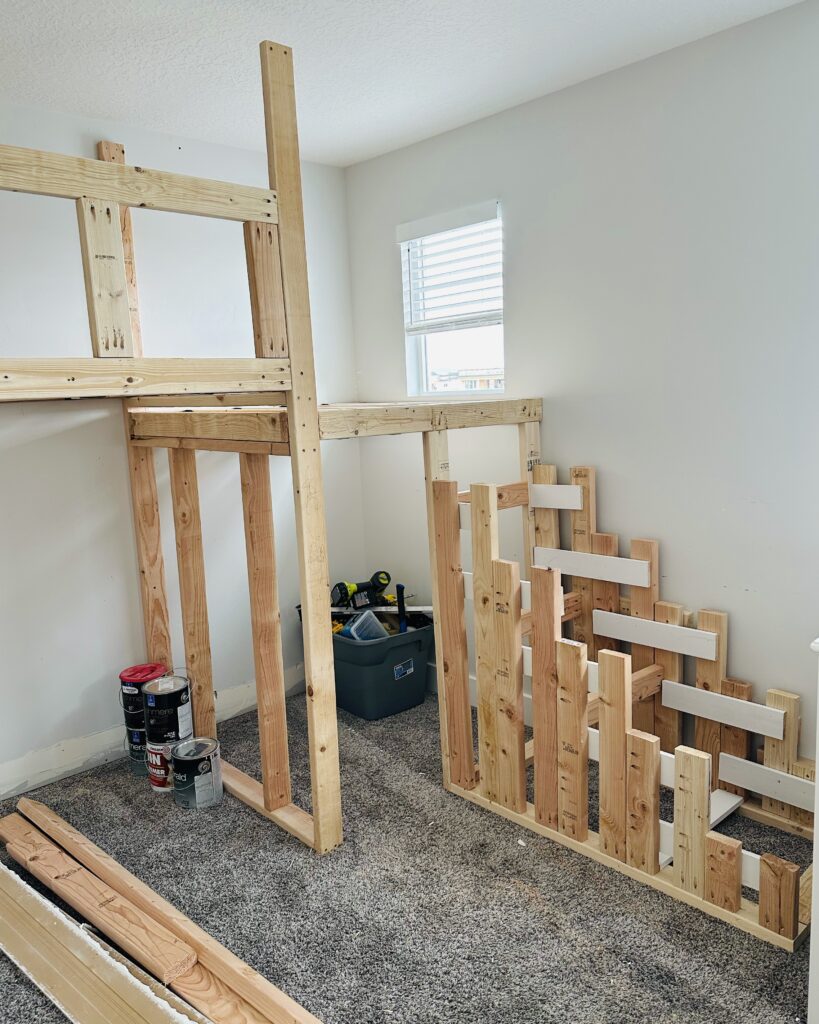
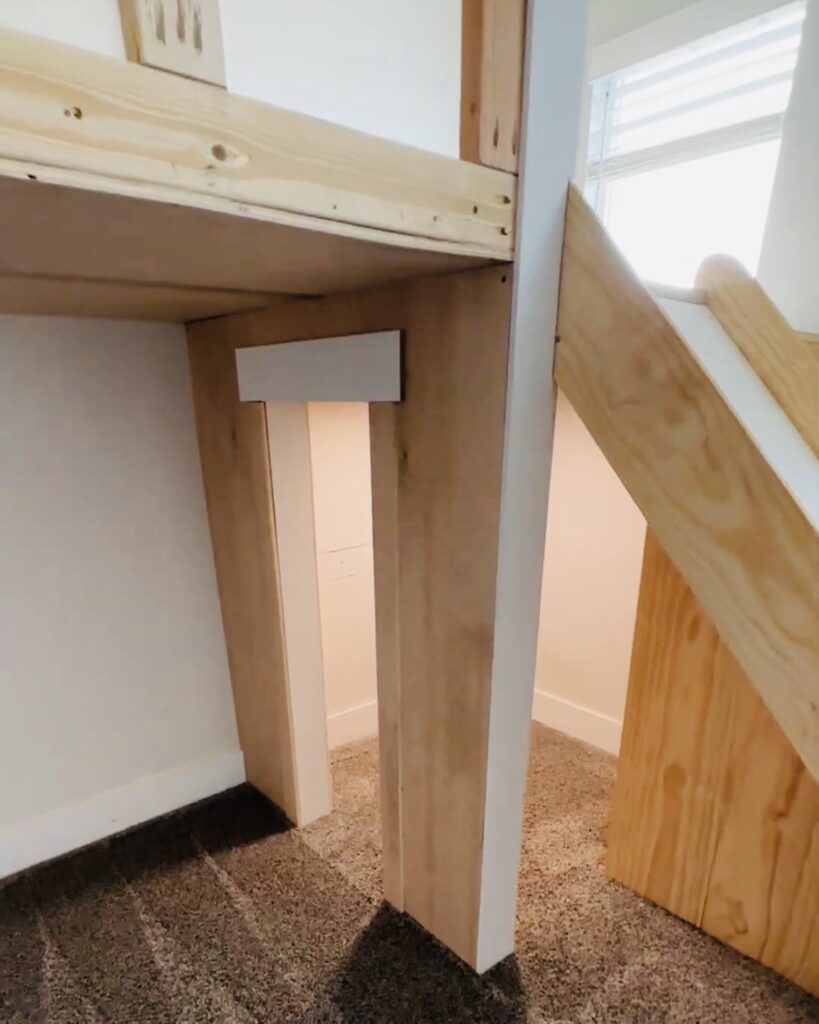
Step #6: Slide Platform
Between the bed and the wall, I built a platform that the stairs will go up to and the slide will come off of. This platform is the same as the bed platform. I installed a 2×4 on the back wall into the studs. Then, I built a square the same size as the space. I slipped it through the support on the footboard and secured it to the side wall and the 2×4 on the back.
I installed a few of the brackets and joists like I did on the bed platform.
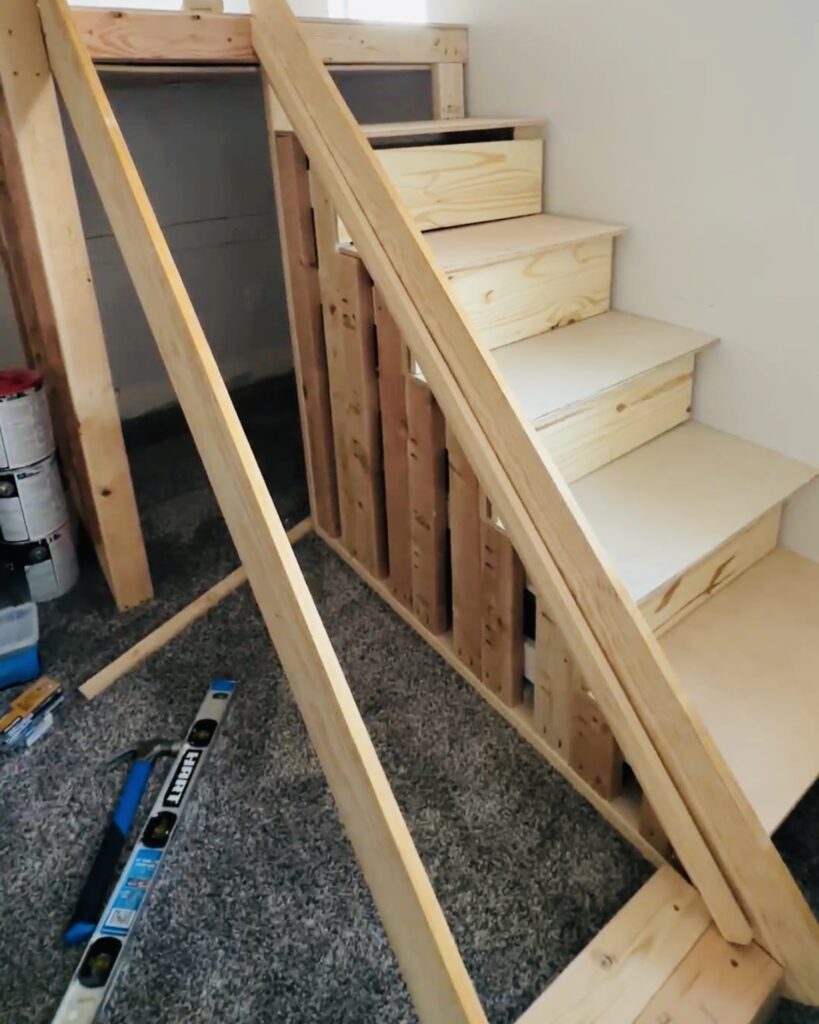
Step #7: Stairs
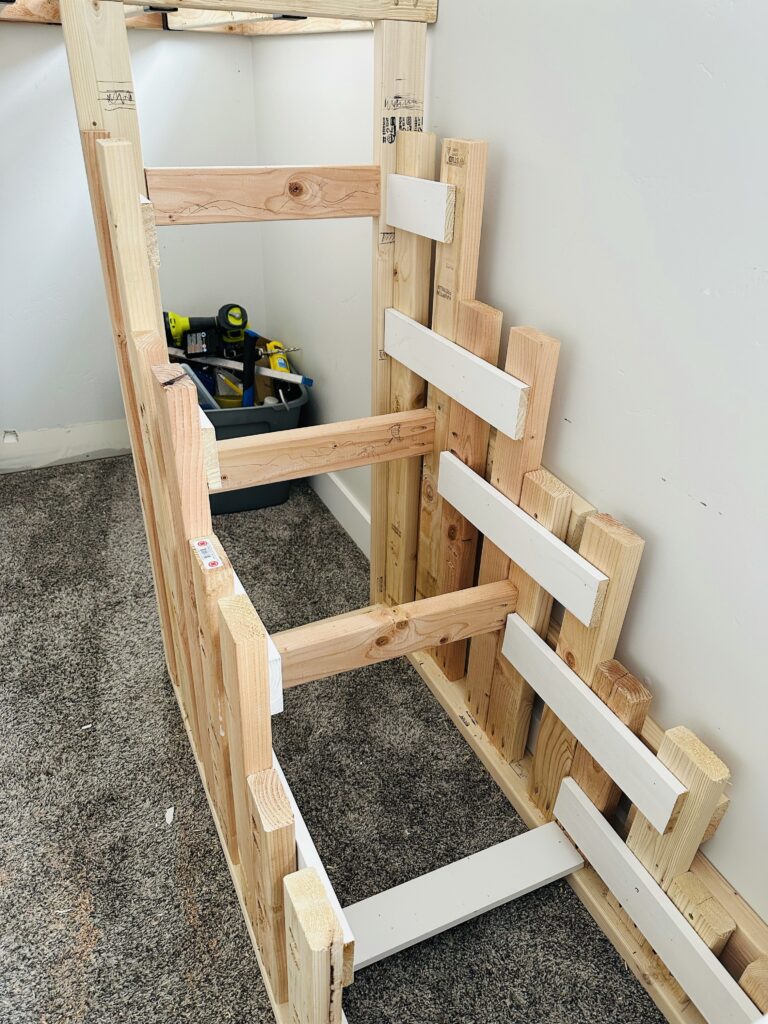
Did I know how to make stairs? Nope! Did that stop me? Nope! Did I do it the easiest or the right way? Probably not. But they work, they look great, and that is all that matters.
For the stairs, I used 2x4s, pocket holes, and some scrap wood. I started screwing 2x4s together to make the stair shape. I installed some scrap wood on the insides for the drawer slides to attach to.
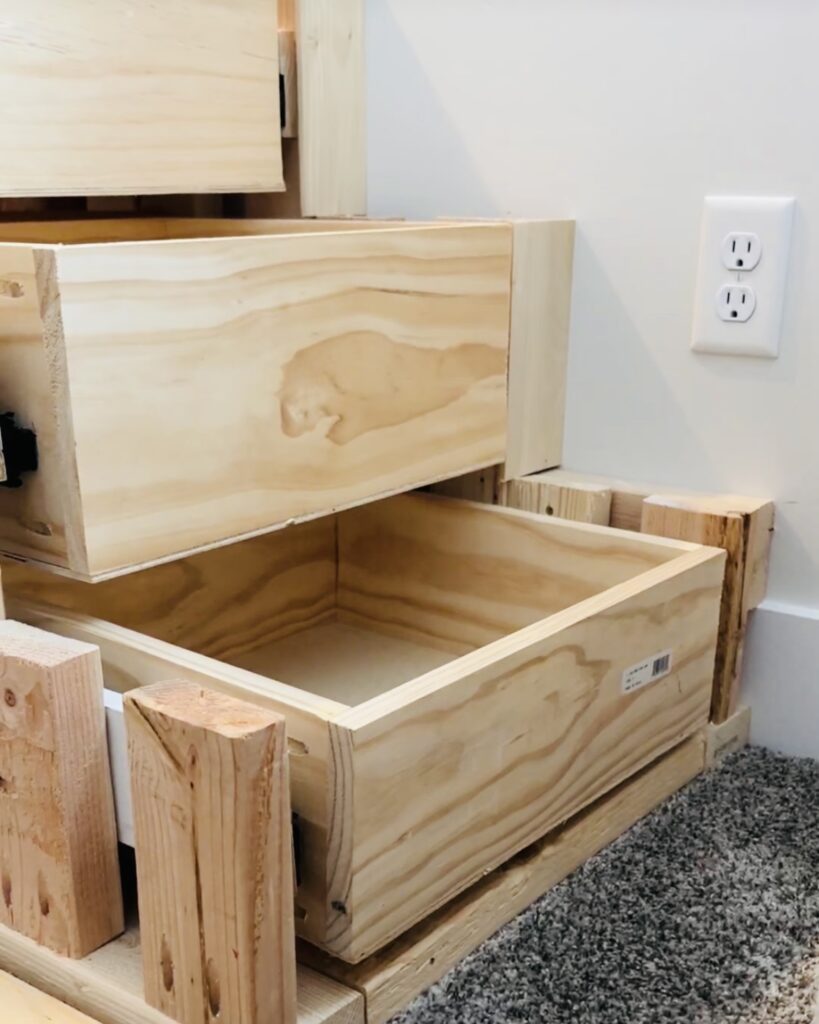
Step #8: Drawers
Once I knew the sizes of the stair openings, I started making and assembling the drawers. It is basically a box, without a top. Keep in mind, you will need to account for the steps that will go on top of the drawers. This should be a thicker hardwood so that it does not flex when stepped on. I did not account for that and had to take them all apart and cut them down. So don’t make the same mistake I did.
When installing the drawer slides, simply follow the manufacturer’s instructions. Installation varies based on the slides you get.
Step #9: Slide

To build the slide, I used two 1×6 pieces for the sides, and used my jig saw to round the corners and mitered the tops to fit the angle I wanted the slide to sit at. I attached the 1×6 to the stairs and the platform. Then, I put a few 2x4s on the floor at the end of the slide and secured them into the floor boards and the 1x6s. I attached a 1×2 on the lower insides of the 1x6s to hold the slide.
For the slide, I used a piece of melamine. Melamine has a smooth surface, so it makes for a perfect slide. I put it on the top of the 1x2s and used my nail gun to secure it in place.
Step #10: Plywood
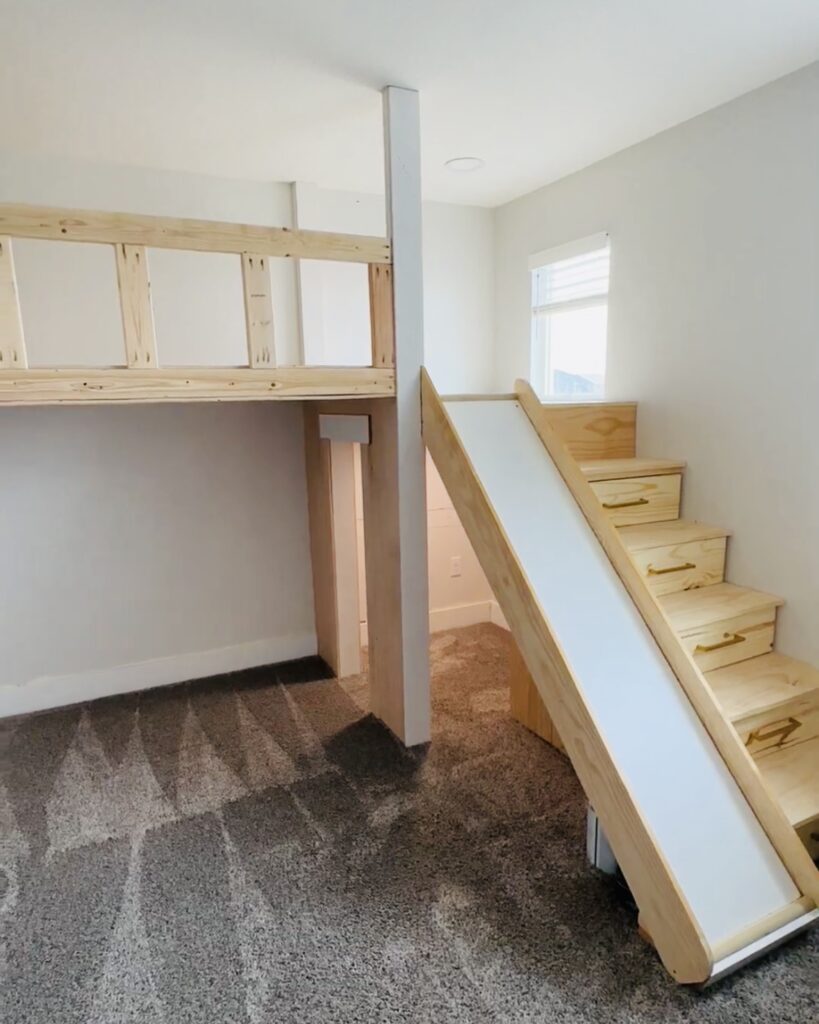
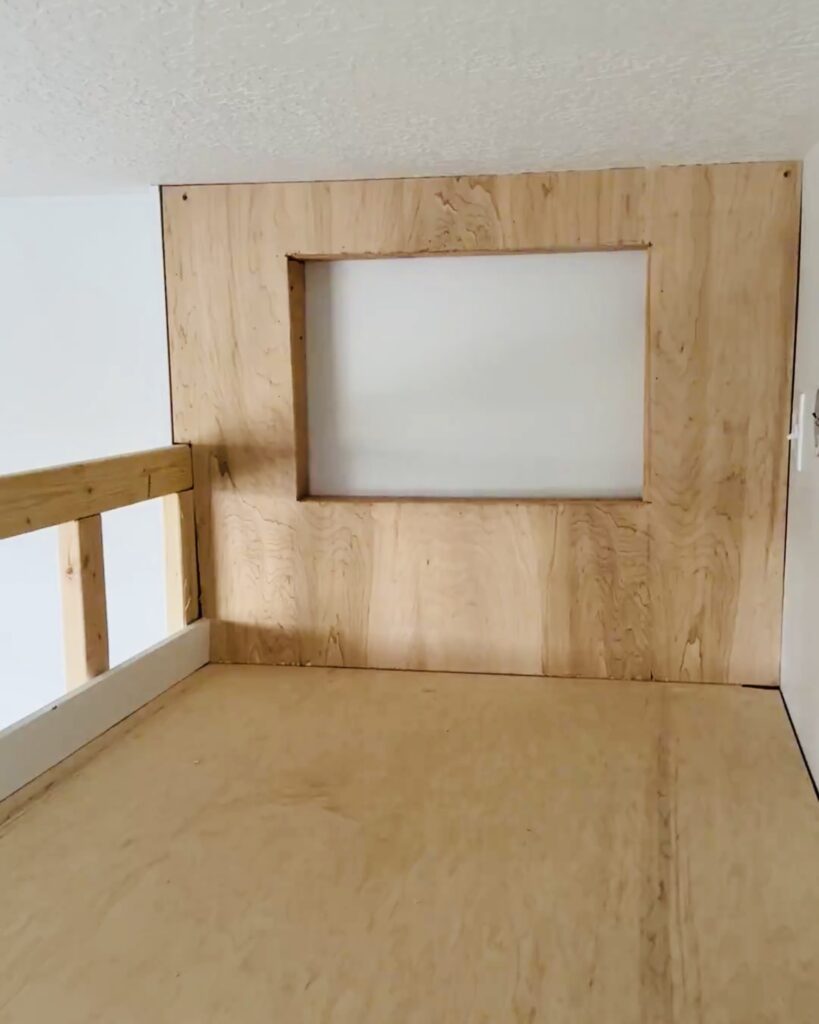
The build portion of the bed is now mostly done, so it is time to start making it all LOOK good. Using plywood, I began cutting it out to cover everything up. I put a piece of plywood on the top and bottom of both the bed and slide platforms, and I covered the little opening under the stairs and the headboard. I also used scraps to cover the underside of the stairs.
Step #11: Trim
Now it’s time to trim everything out: the doors, the window, the nook, and any other exposed 2x4s. The point here is to make it look clean, smooth, and BEAUTIFUL!
Step #12: Complete the Loft Bed Railing
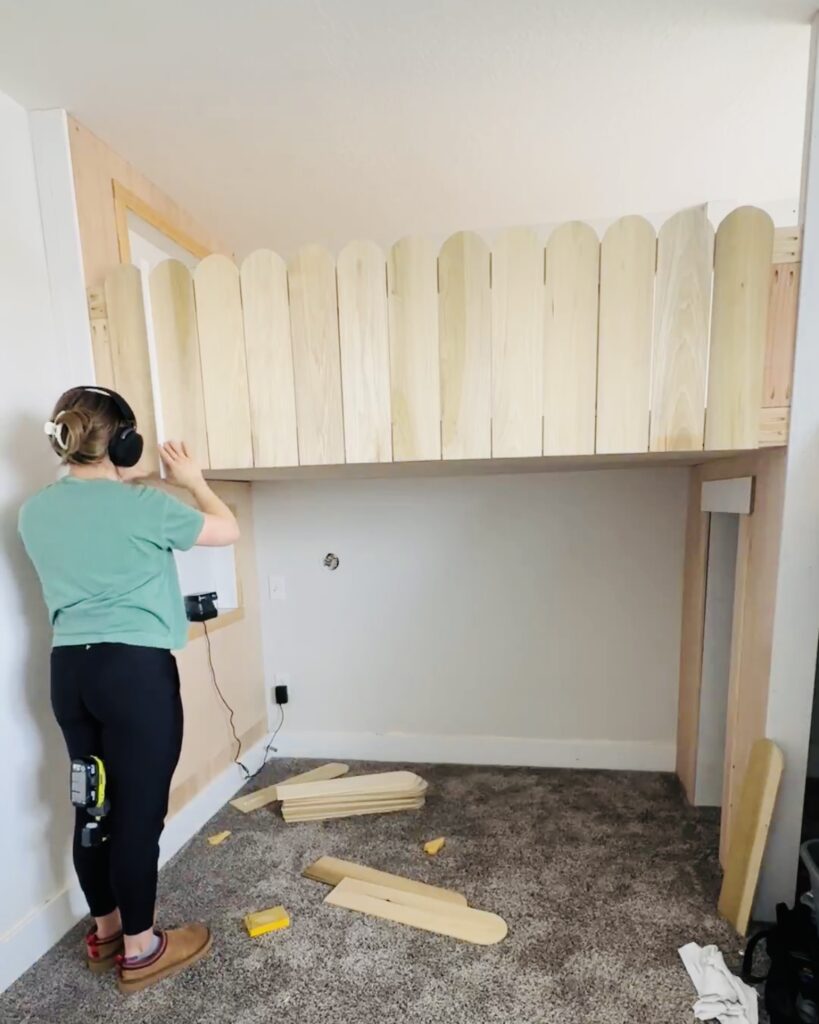
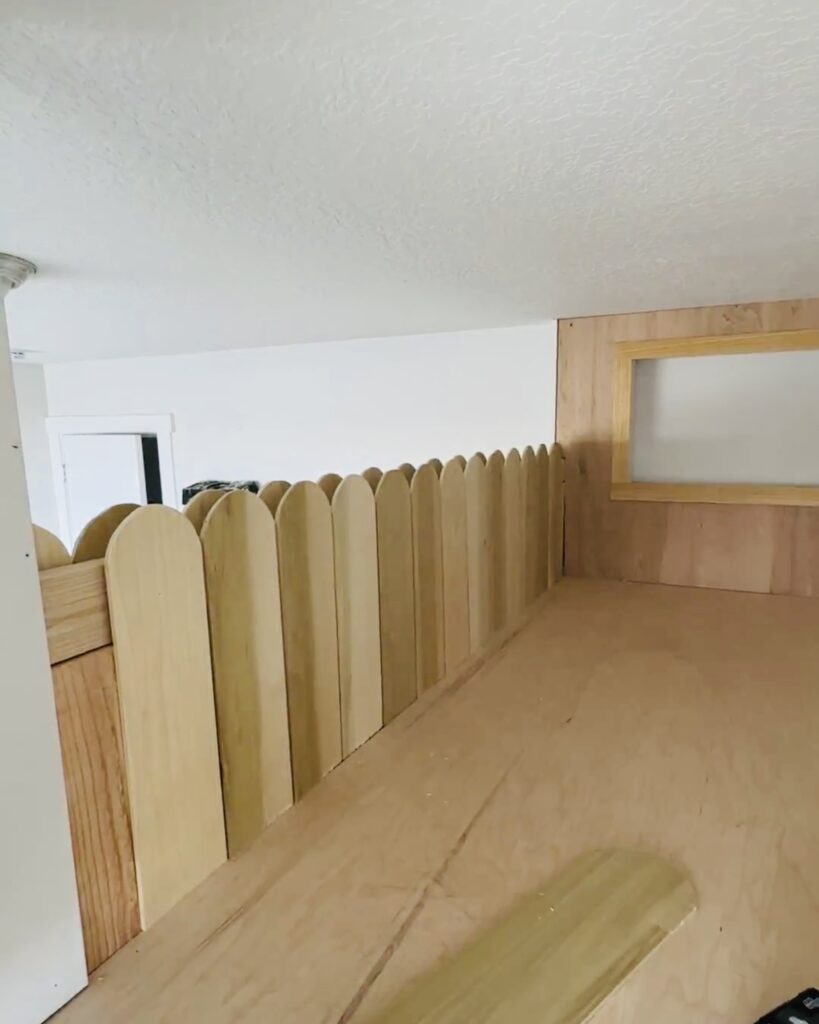
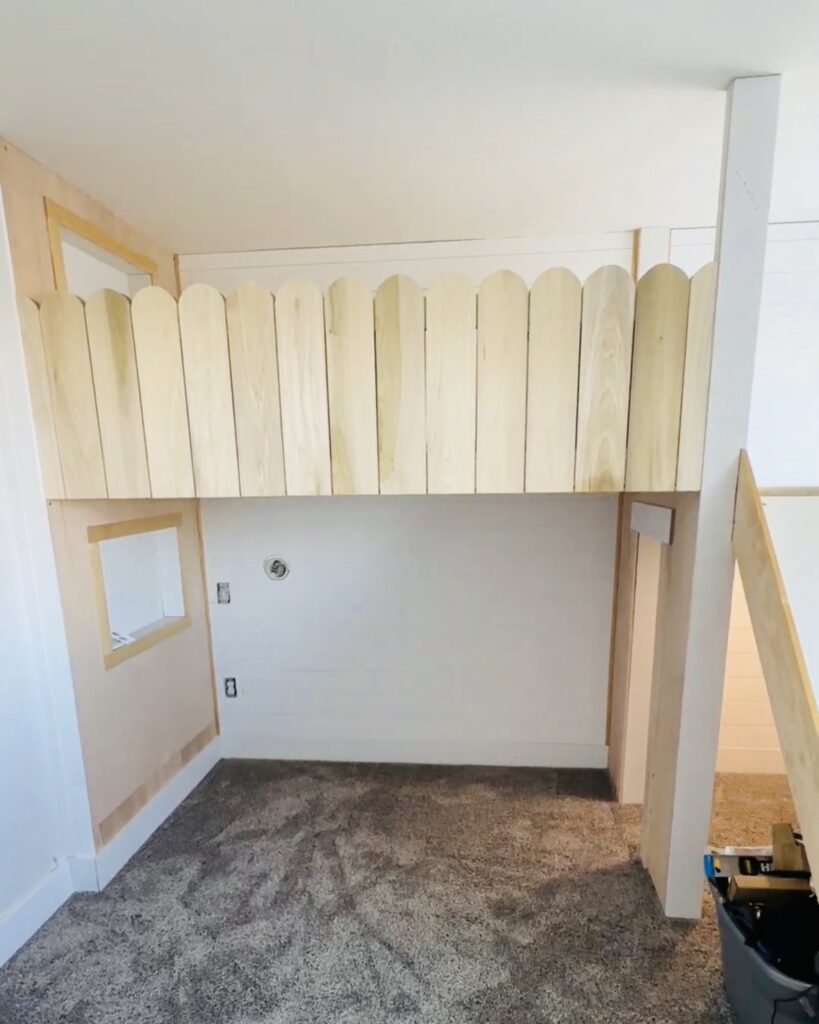
For this railing, I am making it look like a scalloped fence! So cute, huh?! I got out my jig saw and cut what felt like a million pieces of wood to be scalloped on one end. I then sanded them and installed them. Using a thin piece of wood as a spacer, I simply nailed them into the railing frame. I repeated it on the inside of the railing, making sure everything is lined up.
I stained the fence posts and the tops of the stair treads, using Behr Stain + Poly in half Pecan and half Classic Gray. It was the perfect color! Once the stain was dry, I used thin trim pieces and installed three pieces horizontally across the railing to make it look more like a fence. I love the charm this step added to the bed!
Step #13: Shiplap
You know I have to do all the extra things, and this is the perfect addition. I added shiplap to the back wall. It was an extra expense and more time, but it is just what the space needed. Plus, it pulls together the bed with the castle! I added it behind the bed and the slide platform.
I then added thin quarter-round trim on the corners where I installed the shiplap to clean it up!
Step #14: Finish Work
And now it is time for the dreaded finish work! This step took HOURS! All the caulking, wood filling, sanding, and prepping—I felt like it would never end! As much as I dread this step, I know it is critical for taking the project to the next level. The magic of caulk and wood filler is unreal!
Step #15: Primer
I can see the light at the end of the tunnel! It is now time for primer! Remember: Anytime you are painting raw wood, you MUST prime the wood first. After the first coat of primer is dry, you want to sand it down. Primer makes the wood rough, and sanding it down cleans it up. Enjoy this little primer time-lapse video.
Step #16: Paint the Loft Bed
I painted the bed white and pink… are you surprised? The paint I used was Sherwin-Williams Cashmere. I painted the shiplap, nooks, door trim, underside of the bed platform, and the walls inside the slide nook white. I chose pink for the headboard, footboard, drawer fronts, and slide sides. It looks so good!
LOFT BED FINAL REVEAL!


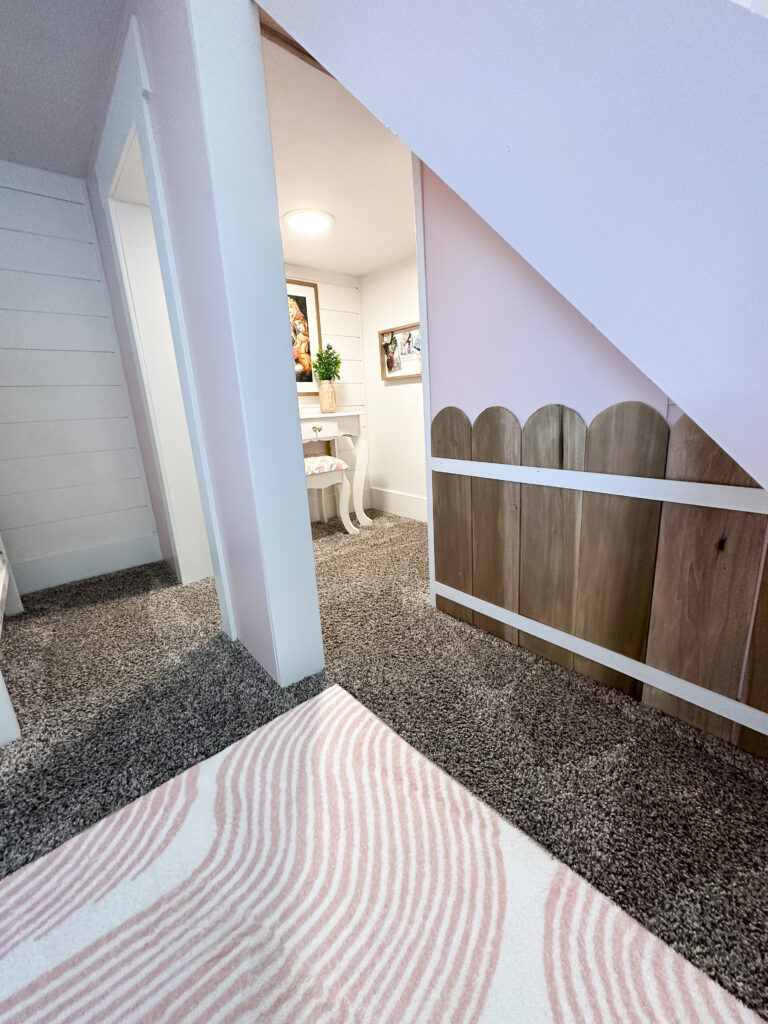
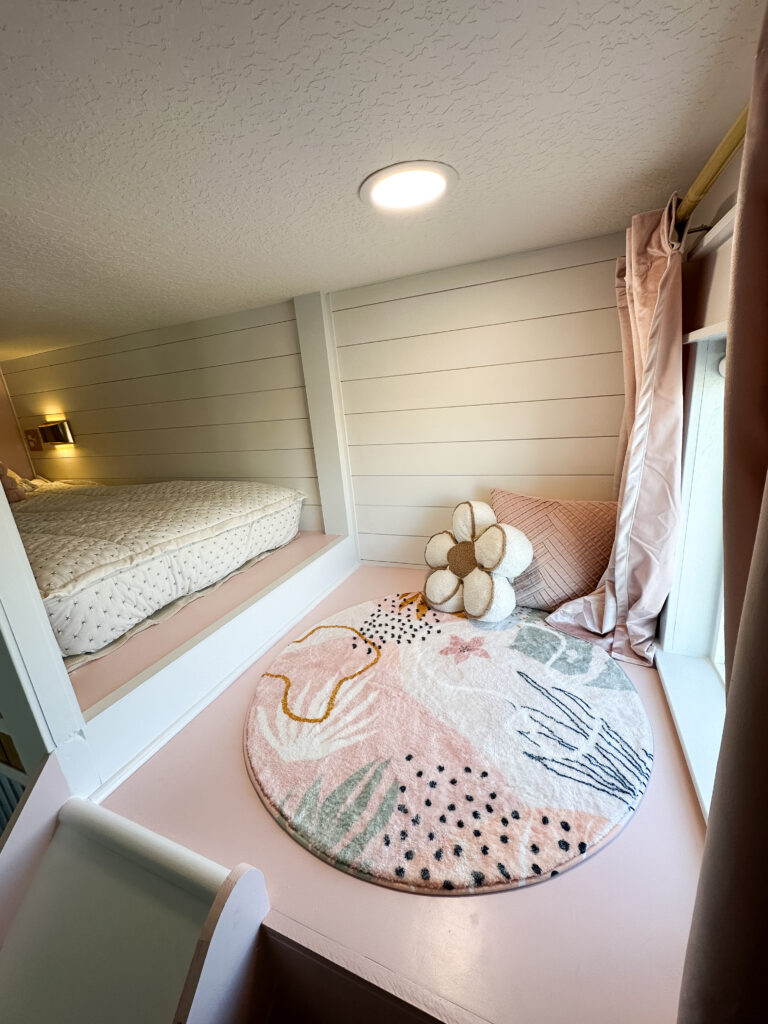
This project was a labor of love, but boy, did it pay off! Some projects are more expensive to build than to just buy, and this was one of those projects. Between supplies, tools, and time, this bed was way more expensive than just buying a premade loft bed and putting it into the room. But this bed is way more fun, personal, and is exactly what I imagined. So it was definitely worth it! My girls absolutely LOVE it and cannot stop coming into the room and smiling, and getting excited to move in. There are a few more things I need to do to finish up this room, so follow along to see the completed bedroom!
CLICK HERE to view the full bedroom reveal and links to all the decorative items used in this project.
Follow along for more DIYs and fun at…


One Comment