How to Build a Wooden Garage Pergola
One of this summer’s (many!) DIY missions: To make our builder-grade home look more elevated and custom. This is a multi-step process, but I’m excited to share the beginning of our home’s exterior makeover! First up: Adding a wooden garage pergola. Keep reading for step-by-step instructions as I share my tips and which mistakes to avoid!
Garage Pergola Tools Needed:
Just a heads-up: This post includes affiliate links. If you make a purchase, I may earn a small commission at no extra cost to you!
- Miter Saw
- Jig Saw
- Masonry Drill Bit
- 4″ Exterior Screws
- 2.5″ Exterior Screws
- Tape Measure
- 2×4 and 2x6s (These can be purchased at Home Depot or Lowe’s!)
- Cedar Stair Balusters (Also can be found at Home Depot or Lowe’s!)
- For the paint, I used a custom Sherwin-Williams paint color called Sand Paper! Here’s the formula breakdown below if you’re interested:
| Colorant | Name | 1 Quart (32 oz) | 1/2 Gallon (64 oz) | 1 Gallon (128 oz) |
|---|---|---|---|---|
| W1 | White | 34 parts | – | – |
| B1 | Black | 12 parts | – | 1 part |
| R2 | Maroon | 16 parts | – | – |
| Y3 | Deep Gold | 1 part | 1 part | 1 part |


Step 1: Cutting 2x6s & Painting the Brackets
I kicked off this project with 2×6 pieces of pressure-treated wood. But before I go any further, let me steer you away from that type of wood—I wish I had gotten cedar! The little divots in the wood ended up driving me crazy, so I had to fix them later in the project. Learn from my mistake and save yourself some time! 😉
I used my jig saw and miter saw to cut the 2x6s into brackets, then attached the pieces together with 2.5″ exterior screws. Next, I painted them to match the wood on the other side of my house.
Step 2: Install the Brackets
Time to install! Adding these to the stucco was a lot easier than I thought. I used a masonry drill bit to drill through the stucco and then used 4″ exterior screws to attach the brackets above the garage. I think this method would work well for siding, too!
Before I could move on to step three, I had to fix those divots I mentioned back in step one. I used Bondo putty to fill them in, and even though it was extra effort, I was happy to do it to get the look I was after.
Step 3: Cutting 2x4s & More Painting
I used my jig saw to cut details in the 2x4s, and then secured them on top of the brackets around the garage using 2.5″ screws. After that, it was time to paint again. Would it have been easier to paint before securing them to the garage? Probably. Let’s call this another learning moment!
Step 4: Add Balusters
I cut the cedar stair balusters in half at a 45-degree angle, so each baluster made two. Next, I painted them and added them to the top of the 2x4s to complete my pergola. After fixing a few painting mistakes, I was ready to stand back and admire my work!
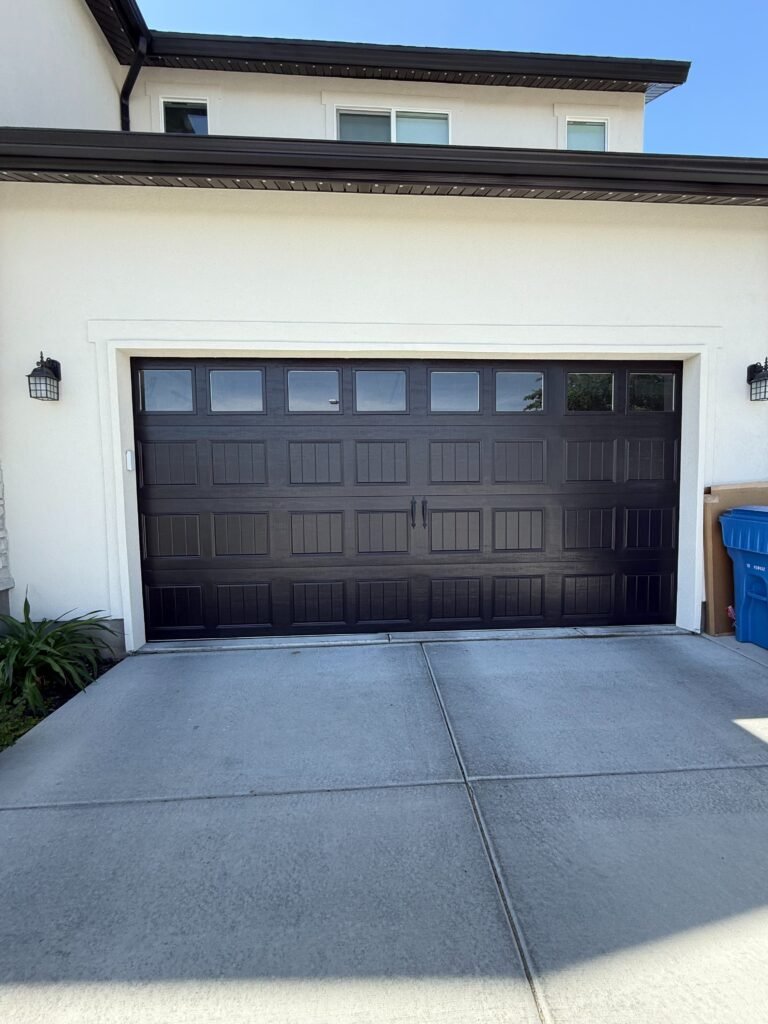
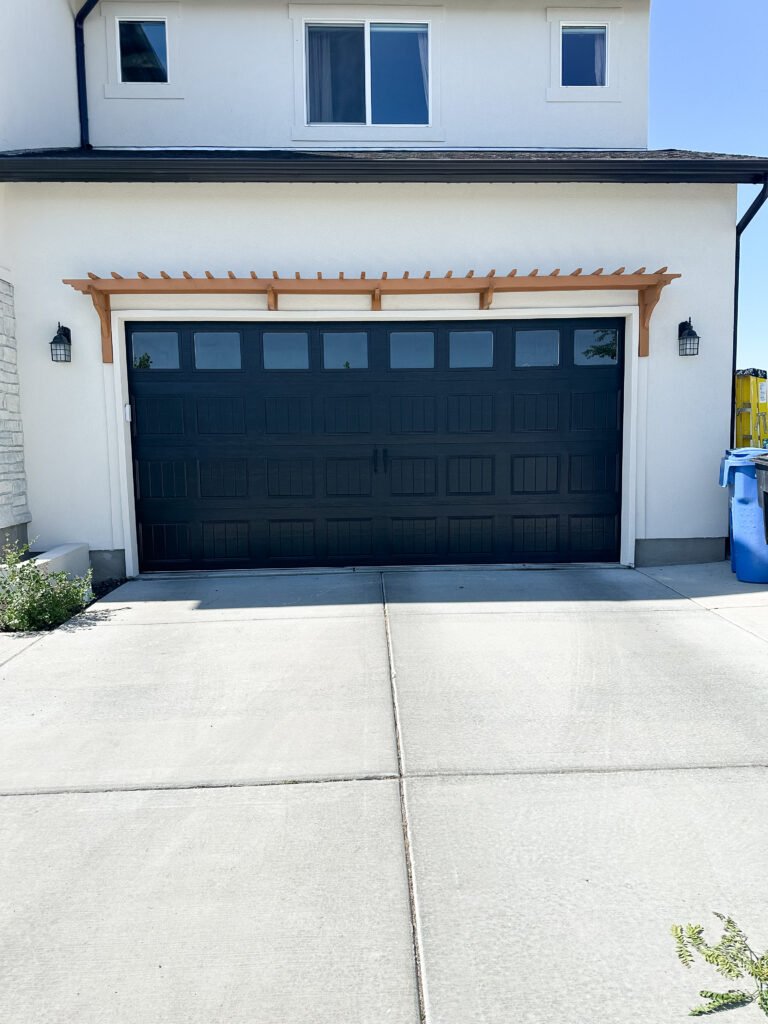
Wooden Garage Pergola: Before & After
I love the transformation between these before and afters! The garage pergola added such a nice dimension to the front of our house.
Is this a project you’re going to try? Let me know! And stick around to see the rest of our home makeover come to life in the next couple of months!
Follow along for more DIYs and fun at…