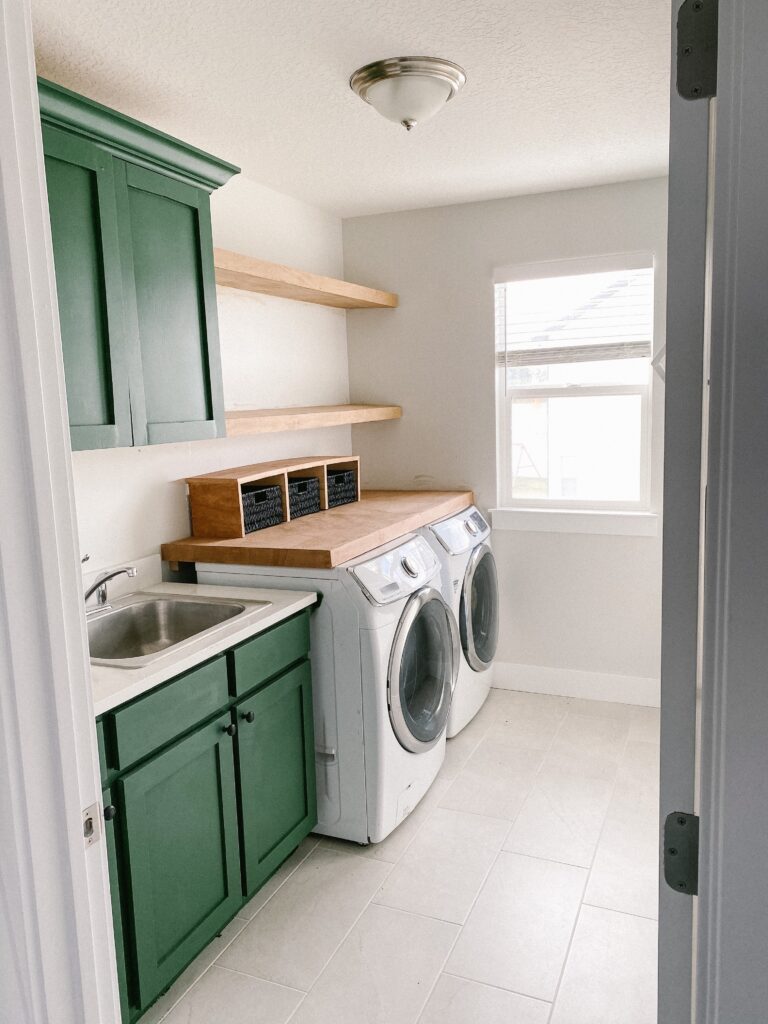
DIY Laundry Room Shelf over Washer & Dryer
My laundry room isn’t the smallest, but it’s definitely not the biggest either. So, I set out to find ways to make it more functional and of course, beautiful! I decided to build a DIY laundry room shelf to sit on top of my washer and dryer. It looks so nice and provides lots of storage too. Plus, it was pretty quick and easy to build. Follow these easy steps to make your own!
DIY Laundry Room Shelf Supplies:
- 2 2x4s
- Maple Plywood
- Wood Conditioner
- Stain
- Top Coat
- Table Saw
- Miter Saw
- Pocket Hole Jig
- Wood Glue
- Nail Gun
- Edge Banding
- Pencil
- Rolling Storage Cart for Between Washer and Dryer
Step #1: Cut Wood to Size
First, I measured how long and wide I needed my shelf to be. Then, I proceeded to cut the wood. I chose to cut one of my 2x4s in half on my table saw to make some 1x2s. It’s cheaper to do this than to buy 1x2s in the store, but you can always do that if you prefer.
Step #2: Assemble the Frame of Your DIY Laundry Room Shelf
The next step is to make the frame and supports for the shelf. I used one 2×4 in the back, a 1×2 in the front, and 1x2s for the sides and supports. I attached everything using my pocket hole jig but you could also just screw it together at the ends.
Step #3: Attach it to the Wall
I didn’t realize until I brought it up to the laundry room that it would have been MUCH easier to assemble the frame here, so I could get around the water lines. But I ended up taking it apart and putting it back together in the correct spot. I attached it to the studs on the side and back wall. It’s pretty sturdy!
Step #4: Attach the Top Board and Face Front
Next, I mitered the edges of my wood so that the top piece and the face front would match up perfectly and look like one piece of wood. Don’t worry, I did cut out a space for the water lines out of the top piece!
I used wood glue and my nail gun to attach the pieces together, but I did not attach it to the frame. This is because I wanted to be able to remove it easily if I needed. And spoiler alert, I did need to later on!
Step #5: Fill the Seam
Instead of using wood filler to fill in the seam, I used a DIY trick that I saw on The Honest Home. You take a pencil to press down and together on the wood. It pushes the wood together so that you can’t see the seam. It works so well!
Step #6: Condition and Stain the Wood
I always use wood conditioner before I stain. It helps the stain to apply more evenly and look nicer. You can choose any color stain you’d like. I used Early American, which is my go-to! I’ve used it on several other projects too, including my DIY plant wall, a repurposed picture frame, and my bathroom vanity makeover.
After you apply the stain, make sure to do a protective coating to seal it.
Step #7: Build a Cubby to Hide Water Lines
I looked at a couple of different options to hide the water lines in the back. Since I didn’t quite love the ideas I found, I came up with one of my own. I grabbed some baskets and decided to build a wooden cubby to go over them. It ended up working out really well!
I took some plywood, cut it down to the right size, assembled the cubby using my nail gun, and then did edge banding on the outside edges.
The edge banding is really easy to work with. You cut it to the length you want and then use your iron to attach it to the wood. It gives it a really nice finish. I did cut the back out of one of my baskets and part of the cubby, so that the water lines could fit behind it and stay hidden.
Step #8: Finishing Touches to Your DIY Laundry Room Shelf
I ended up staining the cubby the same color as my washer/dryer shelf. I also spray-painted my baskets black. It always amazes me what a difference a little paint can make.
Bonus Idea: Rolling Storage Cart
There was a small space between the washer and dryer, so I got this cart! It’s been so great for holding detergent, dryer sheets, and a small trash bin for lint.
I love how this turned out. It elevated the look of this room so much! Follow me on Instagram for more beginner-friendly DIY home projects!