
Mudroom Magic: How Lockers Can Transform Your Entryway
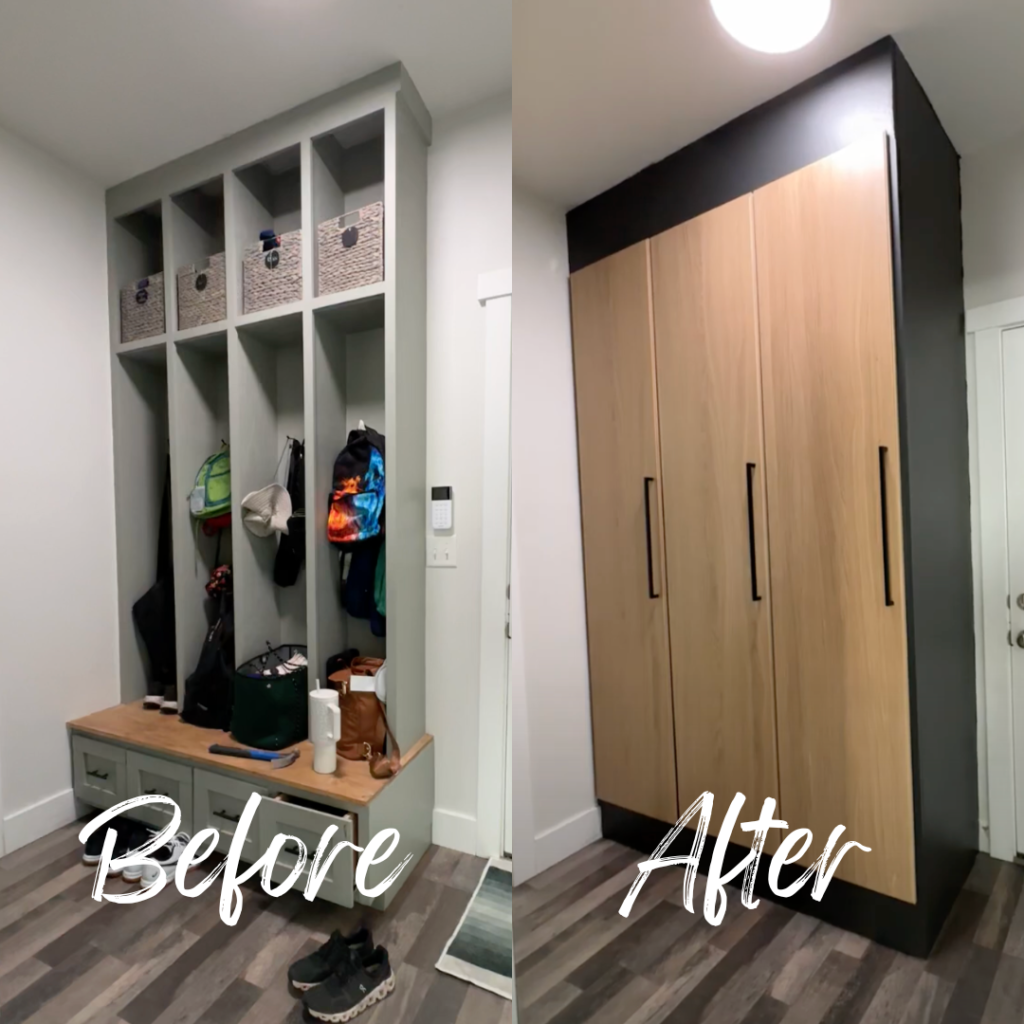
One super important thing to remember is that your house should serve your needs, not someone else’s. I built this mudroom three years ago, and it’s beautiful. It still works great and is in good shape. It has served our family very well. However, it’s no longer working for us, so we are changing it, and that’s okay! Our mudroom lockers were open, and you could see all the mess inside. I wanted something cleaner and larger, so we are ripping it all out and starting over! The best thing about it is that I can reuse a lot of these materials, so it’s not all going to waste. Without further ado, here’s how I gave our mudroom a makeover!
Mudroom Lockers Supplies:
- 2x4s (Enough to create your base)
- IKEA Pax Units (Choose whichever units fit your space)
- Doors (Again, choose whichever fits your space! These come in several dimension options.)
- Hardware
- Hooks
- Baskets/Drawers
- Paint
- Primer
- Caulk
- Spackle
- Trim and Wood of Choice
Step #1: Demo Existing Mudroom Lockers
Because I plan to reuse a lot of this material, I took it apart carefully. I built this, so I know that it is put together with nails, and I can simply score the caulk and then pry it apart. If it were also held together with glue, it would not be that easy to do.
Step #2: Build the Base
Remember this tip! Anytime you want to make something look built-in, build a base so you can put baseboard around it. It instantly makes a piece look custom!
Decide how big you need your base to be, then grab some straight 2x4s and make a square. Add a few additional pieces, evenly spaced out, to act as supports. Then find the studs in your wall and secure them to the wall.
I had to add another layer of wood to the base to raise it up a little more so that the base was the same height as the baseboards. You may or may not need to do this depending on how tall your baseboards are.
Step #3: Assemble the Pax Units
I got IKEA Pax units to use as the base of my mudroom lockers. Once they are assembled, it’s important that you secure them to each other and to the studs to ensure they do not fall over.
I also added a piece of wood between the wall and the side of the unit. This acts as a bump out, so when the door swings open, it does not hit the wall, and it can open more.
Step #4: Add Trim
This is where it starts coming together and looking custom!
On the exposed side of the mudroom lockers, I added a sheet of wood. This makes it easier to paint, and it takes the IKEA units to the next level.
Then, I added 1×2 trim to all the seams, where two pieces of wood meet. I was able to reuse the trim from the old units here!
I wanted mine to go all the way to the ceiling, so I added some trim here too. Start by adding a 1×2 directly to the studs in the ceiling to give you something to attach the front trim piece to. Then add the front trim to the 1×2 and the front of the unit.
And you have a completely built-in unit! But we are not done yet. Let’s keep moving!
Step #5: Complete the Finish Work
Do you know those tiny holes on every IKEA unit? They have a great purpose, but I don’t like the way they look, so I like to fill them in. I think it makes the unit look more custom and less IKEA. It’s tedious work, but I think it’s worth it! I fill the holes with this spackle. It is lightweight and does not require sanding!
Next up with the finishing work is to caulk. Everywhere two boards meet, we caulk. It gives it that finished vibe we are going for.
Step #6: Prime & Paint
Okay, listen up! When painting IKEA units (or something that has that plastic-y/shiny finish on it), it is important that you use a shellac or oil-based primer. It helps the paint adhere better. This is my favorite primer! Caution: It is stinky. So you may need a mask or to have ventilation when using it.

For the paint, I used Iron Ore by Sherwin-Williams. I used the multi-surface acrylic because it is best for furniture pieces, and chose the eggshell sheen, which is best for darker colors since it hides brush lines.
Also, this is my favorite paintbrush ever!
Step #7: Wrap Up Your Mudroom Lockers
Time for the finishing touches! To pull everything together, I added two mesh drawers to each locker. I just followed the instructions that came with the drawers to install them.
Next, I added hooks on the sides of each locker.
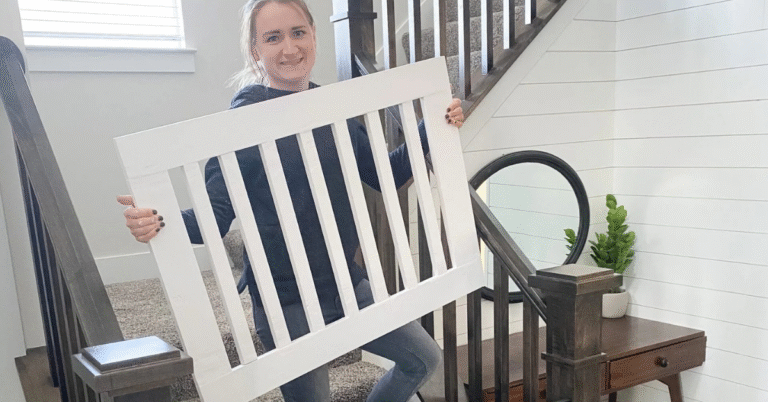
The main reason I did this mudroom makeover was to hide some of the clutter the kids accumulate, so this may be the most important finishing touch: putting the doors on. These doors are meant to go with Pax units. You may need to buy the hinges separately, depending on which doors you choose. When you do install the hinges, simply put them on the door first, then the locker. Adjust them per the instructions to make sure they are all level with each other.
Then it was time for the last step: adding door handles! I used these door handles. Just measure where you want them to go, drill a hole, and screw them on.
AND GUESS WHAT?! You are done! I love how our lockers turned out. My favorite part is that the doors hide all the mess behind them!
Follow along for more DIYs and fun at…


2 Comments