Game Room Level Up: Creating a Custom Game Room Closet
We’ve had a spare bedroom that’s mostly just been used for storage up until now. Recently, I decided I’d had enough of the wasted space and wanted to turn it into a room my family would actually use and enjoy: a game room! Of course, with games comes plenty of cards, board game boxes, and all the little pieces that go with them, so we needed a functional place to put everything. That’s why I decided to start this makeover with the storage space! Follow along to see how I transformed it from a cluttered catch-all into a functional, organized game room closet.
Note: This post contains affiliate links. I may earn a commission at no extra cost to you. Thanks for supporting my content!
Game Room Closet Supplies:
- Cabinets
- If you’re painting the cabinets:
- Drill
- Hammer
- Mallet
- Pry Bar
- Wood Glue
- Butcher Block
- Circular Saw
- Wallpaper
- Hardware
- Rub n Buff
- Polyurethane
Floating Shelf Supplies:
- 2x4s (for the wall supports)
- Plywood Sheet or 1×12 Boards (for the shelf base, depending on how deep you want your shelves)
- 1×3 Board (for the front face/trim)
- Wood Screws
- Drill
- Level (I also love this laser level!)
- Stud Finder
- Wood Glue
- Spackle (for nail holes)
- Sanding Block
- Primer
- Paint (I used the same color as what I painted the cabinets)
Step #1: Demo the Existing Game Room Closet
This room’s closet was a decent size, but it was a little hard to tell because it was filled with so much stuff! There was a spare mattress pad, gift wrap supplies, diapers, and more. So my first step was to clear out all the things that had accumulated.
Once the space was empty, I was left with builder-grade shelves that I was eager to take down. I knew that I could build a more functional storage system in that closet, so they had to go! I used a hammer, a mallet, and a pry bar to remove the shelving and a drill to unscrew the clothing rods.
Last, I removed the baseboards on the wall where the cabinets would go so they could sit flush against the wall. Finally, I was left with a clean slate!
Step #2: Assemble the Game Room Closet Cabinets
Next, I assembled these cabinets. They didn’t come with instructions, but I’ve put so many cabinets together at this point that I was able to tackle it without them. A short time and a little wood glue later, and they were ready to go.
After placing the cabinets in the closet, I cut a piece of wood to run along the bottom and attached it as a base. It creates a “footer” that makes the cabinets look much more built-in.
Step #3: Add the Countertop
I just love a butcher block counter! I have one in my office and garage workshop, and I was excited to add one here too. After cutting it to size with my circular saw, I placed it on top of the cabinets. It was a perfect fit! Gotta celebrate when that happens.
Step #4: Stain the Countertop and Paint the Cabinets
Of course, this step is optional if you already like the color of the countertop and cabinets! I knew they could be better, so I made some improvements. After priming and sanding the cabinets, I painted them Homburg Gray by Sherwin-Williams.
Spraying cabinets is usually the best way to go, but since these were in a closet, I wasn’t too worried about them. I used a brush first (this one is my favorite!). Then I went over it with a foam roller for a smooth finish. Once the cabinets were done, I stained the butcher block counters.
Step #5: Install Hardware
In addition to lacking instructions, the cabinets I chose also didn’t come with hardware. But I wasn’t complaining because it gave me a chance to pick my own! Unfortunately, I didn’t love the brass tone of the drawer pulls I ordered, but after a couple of coats of Rub N Buff, they looked so much better. I finished them off with some polyurethane to help protect the finish. Since they’ll be handled often, this extra step will help keep them looking good as new.
Step #6: Add Wallpaper to Dress Up the Game Room Closet
It’s no secret that I love peel-and-stick wallpaper, and I knew that it was just what this space needed! I found this plaid pattern that’s both neutral and playful (perfect for a game room closet) and got to work installing it!
Step #7: Build Floating Shelves for Additional Storage
Now, you could order pre-built floating shelves, but I really wanted mine to fill the full wall. Plus, it would have been tough to find shelves that fit those exact measurements, so I figured I’d make my own! This isn’t my first time making DIY floating shelves (and it probably won’t be the last 😂). Here’s a quick tutorial on how I did it!
Step #1: Install the Wall Supports
First, I used a stud finder to locate the studs along the back and side walls of the closet. This part is super important, because these shelves are only as strong as what they’re anchored into!
Then, I attached 2x4s along the walls horizontally at the height I wanted the shelves. These act as the main support system. I secured them directly into the studs using long wood screws.
For extra support, I added short vertical 2×4 braces between the front and back supports, creating a simple frame for the shelf to sit on.
Step #2: Add the Shelf Base
Once the frame was in, I placed a plywood sheet on top to create the actual shelf surface. The depth will depend on your space, but a standard 3/4″ thick plywood works great.
I cut the board to fit snugly inside the closet and laid it right on top of the 2×4 frame, then secured it with screws.
Step #3: Attach the Front Face
Next, I attached a board along the front edge. 1×3 is usually a good choice for the front face. This does two things:
- Hides the 2×4 frame underneath
- Makes the shelf look thicker and more custom
I used wood glue and a few finish nails to attach the front board, then filled any nail holes for a clean finish.
Step #4: Sand, Prime, and Paint
After priming and sanding, I painted the shelves the same gray as the cabinets. I love how cohesive it looks!
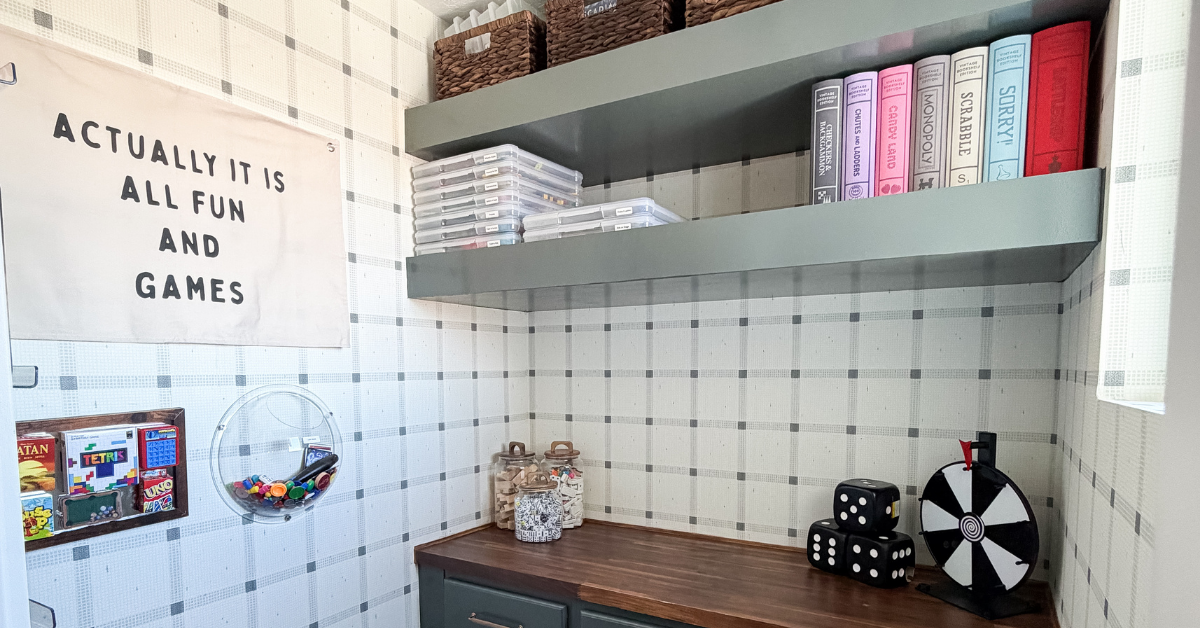
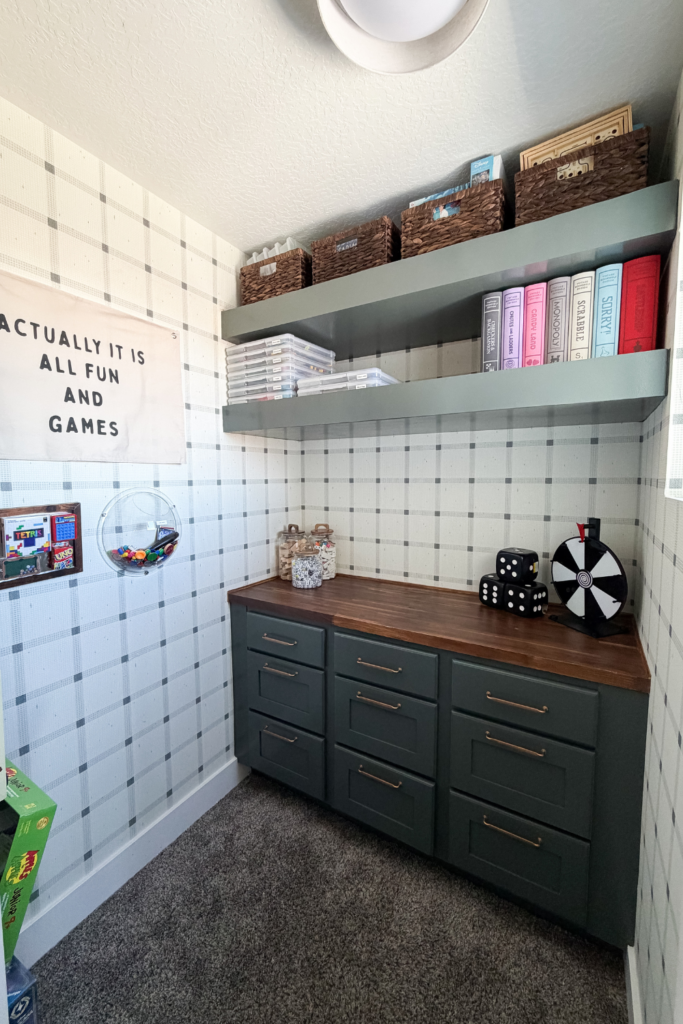
Step #8: Add Finishing Touches to Your Game Room Closet
To keep things organized, I found dark brown wicker baskets that matched the butcher block stain and put them on the top floating shelf. Hans commented that he is the only one who can reach them, so I may be on the lookout for a stool next! I also added some other game room-themed decor. Decorating the space was so much fun!
Game Room Closet Decor

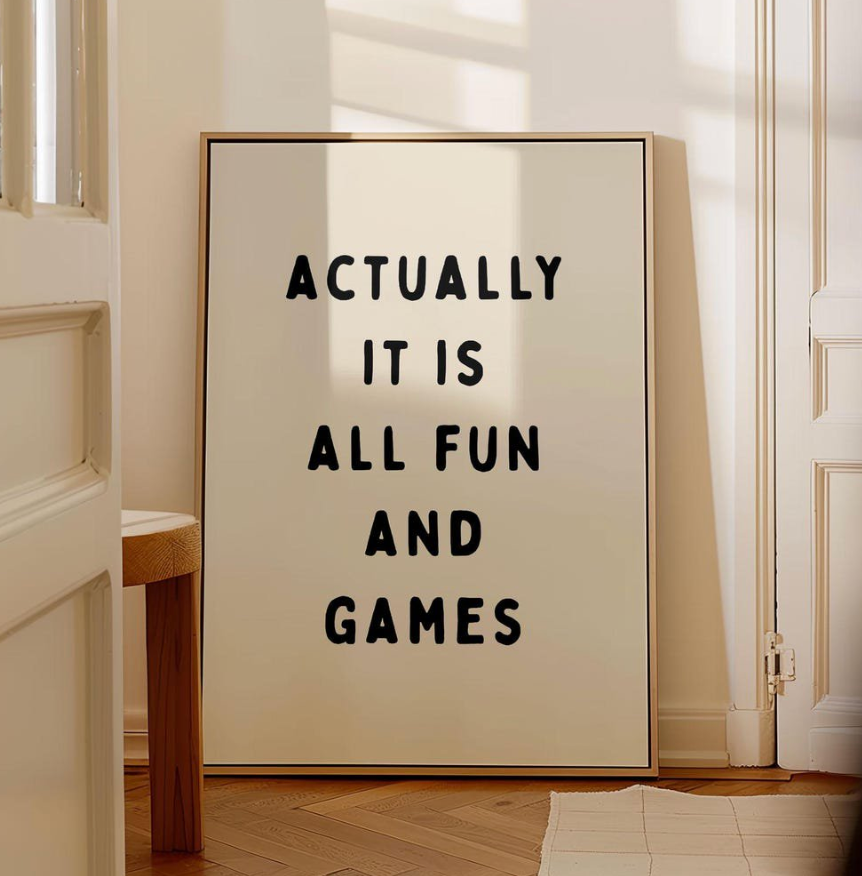
Fun and Games Sign (This is similar to the one we have, which is sold out!)


Hanging Display (We use ours for rogue toy pieces!)

Vintage Sorry Game (Find the other vintage games here!)


Game Room Closet Reveal

Game Room Closet Cost Breakdown
I always think it’s interesting to see the cost of DIY projects! The total for this project was $2,868. Here’s where the money went:
- Cabinets: $768
- Butcher Block Countertop: $450
- Wallpaper: $1,000 (I know—yikes! This was a pricier choice, but I really do love how it turned out! You could paint the space or find cheaper wallpaper to save here.)
- Paint: $40
- Shelf Materials: $100
- Decor: $510 (Another place to save!)
Our game room closet is officially done! And now it’s on to the room itself. I can’t wait to show you what I have in store for this space! Don’t forget to follow along in stories for daily DIY updates.