Fixture Facelift: How to Use Spray Paint for Stunning Results
This was quite possibly the most controversial project I have ever done (in addition to this project, of course)! On that note, did you know you can do a bathroom fixture facelift with spray paint?
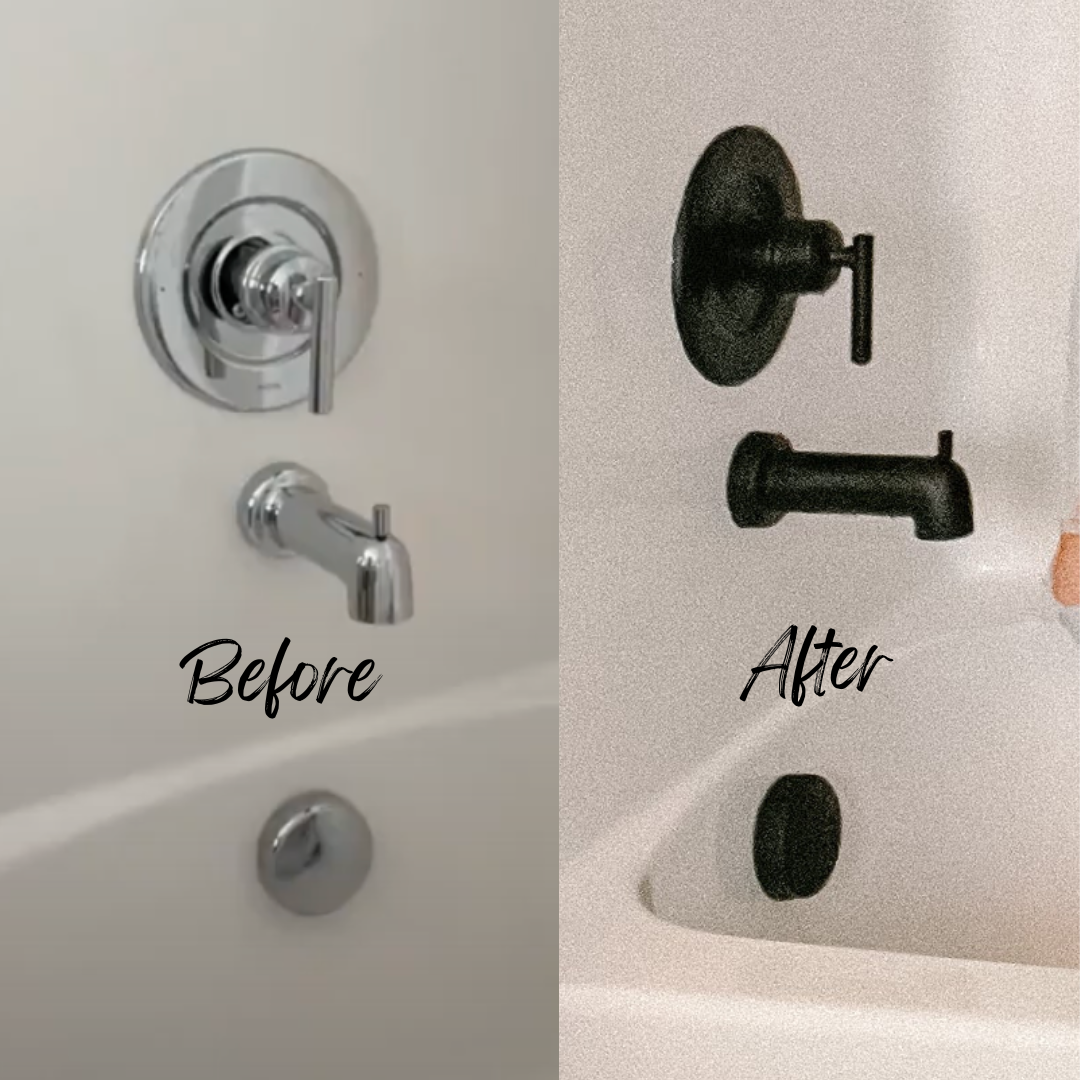
I had chrome bathroom fixtures, but I wanted them to be matte black. The price to upgrade did not seem worth it when you can buy a few dollars’ worth of spray paint and get the same thing. I figured I would give this a shot, and if it did not work, I could invest in a new faucet. But if it worked, I would get the fixtures I wanted for way less!! And to my surprise, it worked and they have lasted!
The two keys to making your fixture facelift last: scuffing them up with a sanding sponge and using automotive primer. With that in mind, let’s get into spray painting these bathroom faucets!

Spray Paint Faucets Step #1: Scuff ‘Em Up!
The spray paint hack I mentioned above is the first step! You can also use 80 grit sandpaper to scuff up the faucets.
Step #2: Tape and Bag It
Next, I taped around the faucet. After it was taped, I added a bag to contain the paint. The trash bag contains the smell and overspray, so you do not have to tape off the entire room.
Step #3: Prime & Paint
I then sprayed the fixture with automotive primer. Make sure to tape the bag up so it does not touch the fixture while the primer dries. Once that was dry, I sprayed it with black spray paint.
Step #4: Clean Up and Admire Your Spray-Painted Faucets!
While the black spray paint is still wet, take off the bag and tape. Any paint that bled through can easily be scrubbed off. Let it dry thoroughly, and you have gorgeous black matte fixtures!
I have original matte black fixtures and ones that I painted black, and they have both held up the same over time.
Check out this video of the whole process!
What do you think? Are you going to try this super-easy DIY? I’d love to see the results!
Follow along for more DIYs and fun at…


2 Comments