DIY Pirate Ship Display: Spookiness on the High Seas
If you’ve been following along for a while, you know I go all out for Halloween. And last year was no exception! When Hans asked me to build a Halloween pirate ship display for our front yard, I tried to play it cool and act “too busy,” but I couldn’t resist. This project is on the larger side, but surprisingly, it didn’t take as long to put together as you might think. Ready to make your own? Let’s get started!
Note: This post contains affiliate links. I may earn a commission at no extra cost to you. Thanks for supporting my content! 🙂
Pirate Ship Display Supplies:
- Wood for Ship (All wood cuts will depend on the size of your ship!)
- Wooden Stakes
- Wood for Bench
- Wood Dowel for Mast
- Metal Conduit for Mast
- Drill
- Miter Saw
- Jig Saw
- Hammer
- Brad Nailer
- Level
- Measuring Tape
- Paint or Stain
- Paintbrushes
- Captain’s Wheel
- Color-Changing Solar Lights
- Pirate Costume
- Pirate Flag
- Fog Machine
- Mini Fog Machine
- Skeleton
- Sheets (for Sails)
- Zip Ties
- Treasure Chest
- Gold Beads and Coins (for Treasure)
- Fish Net
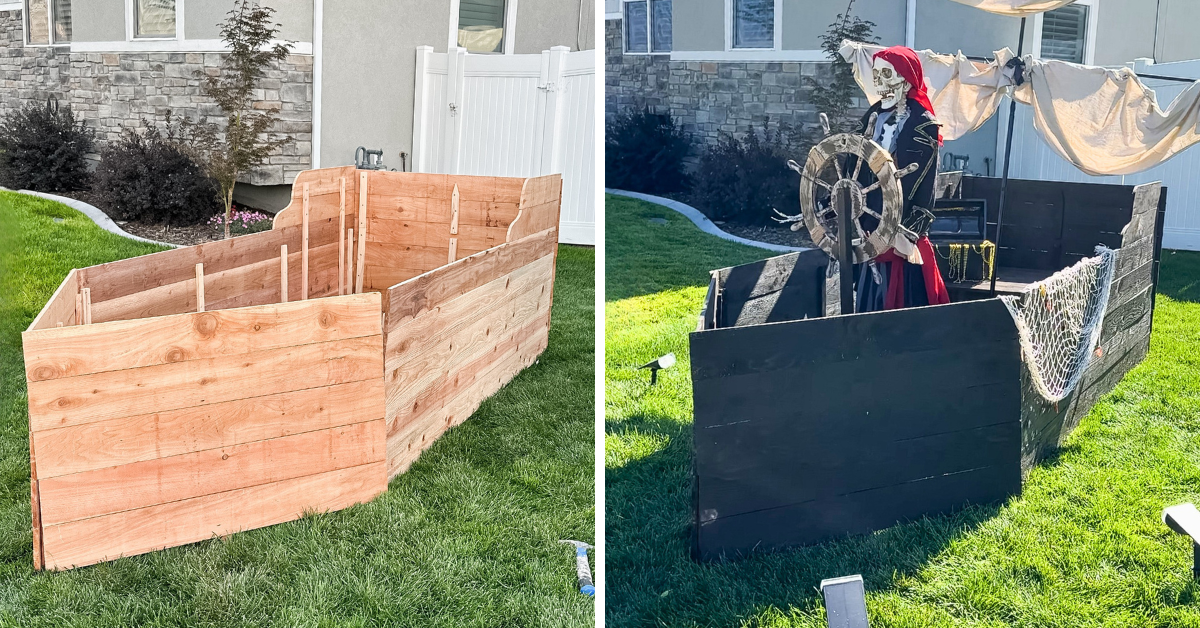
Pirate Ship Display Step #1: Build the Sides and Back of the Ship
First up: assembling the ship! The great thing about this project is that it’s completely scalable to your yard. I wanted this pirate ship display to be a showstopper, so mine is on the larger side.
When thinking about the shape of the ship, imagine a stretched-out pentagon—except not all sides are equal lengths. I’ve included a picture below so you can get an idea of what you’re aiming for before you start building!
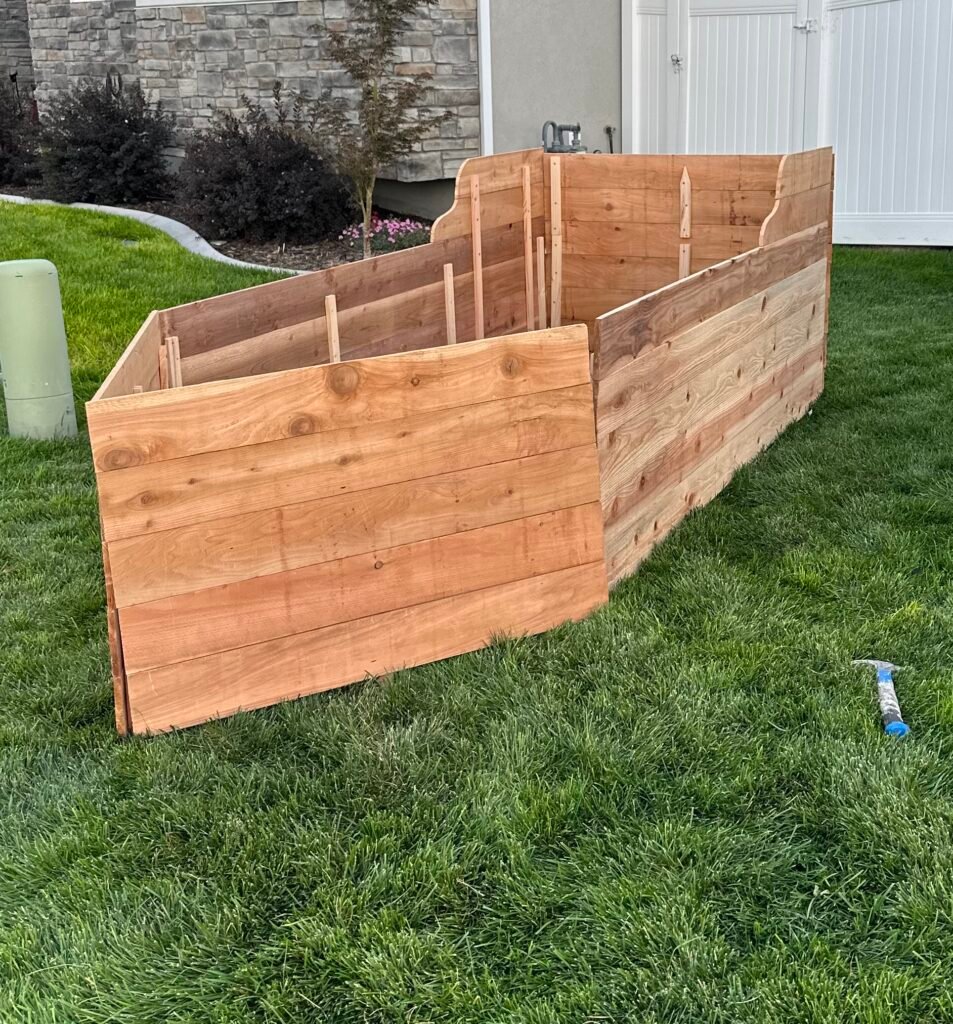
Alright, let’s build! For the sides, I started by cutting the wood, then stacking the pieces on the ground. From there, I attached everything by screwing wooden stakes into each piece with my drill, and repeated the same process for the other side. Bonus: Building the ship on stakes makes for easy setup and storage!
Now for the back (or stern, as I learned from Pirates of the Caribbean 😉)! It’s going to be about 3/4 of the length of your sides. You’ll repeat the process above: stacking the pieces, then attaching them with stakes.
The back of the ship will be two pieces taller than the front and sides. This gives you room to add some decorative woodwork, so it looks like a ship instead of a coffin! Depending on the length of your wooden stakes, you might need to add a few extra ones to keep everything securely attached (I did).
For the decorative side pieces near the back, I used a jig saw to cut curved edges and then secured them with stakes.
Step #2: Build the Front of the Ship
The two front pieces are about half the length of my ship’s sides. I repeated the process I used for the sides and back: Just stack the wood, and attach them with stakes.
Step #3: Assemble the Pirate Ship Display
Once the build is complete, it’s time to assemble! I (and my four favorite little helpers) hammered the staked wood pieces into the ground. If your volume is on, please enjoy Sadie’s whistle in the video. 😂
Step #4: Build the Bench
Of course, we had to have a bench for the captain to sit on! The length will depend on the size of your ship, but I built mine using 1x2s. I attached short cuts of wood to the sides of the ship and screwed the 1x2s into those supports. Just make sure the seat is level, otherwise your skeleton captain might tip over!
Note: When it was time to store the pirate ship display after Halloween was over, I just unscrewed the bench!
Step #5: Paint or Stain the Ship
Your pirate ship display can be any color you want! My pick was black—that screams “pirate ship” to me! I used these paintbrushes.
Step #6: Add the Steering Wheel
No ship is complete without a steering wheel! I used my drill to attach it to a wooden stake. Then, for increased support, I added leftover wood to the front and cut a small hole in between it to slide in the steering wheel.
Step #7: Assemble the Mast and Sails
I got thin wood dowels to act as my ship’s mast and stained them to match the rest of the ship. Then came the sails (AKA bed sheets, but feel free to use whatever you like!) and the pirate flag. I threaded zip ties through the fabric to attach everything to the masts.
Since October weather can be unpredictable, I reinforced the dowels by sliding them into metal conduits. After staking those poles into the yard, our ship was almost ready to set sail!
Step #8: Set Up Your Pirate Ship Display
What’s a pirate ship without treasure? I added gold coins and beads to the treasure chest, and draped some fishnet across the side. These jewels would have been cute too! Then, I placed our skeleton captain, who was all decked out in a pirate costume, behind the wheel.
This pirate ship display was so much fun to build, and I wanted it to be visible even at night! So I set up these solar-powered color-changing lights and a fog machine for maximum spookiness on the high seas.
Pirate Ship Display Final Reveal
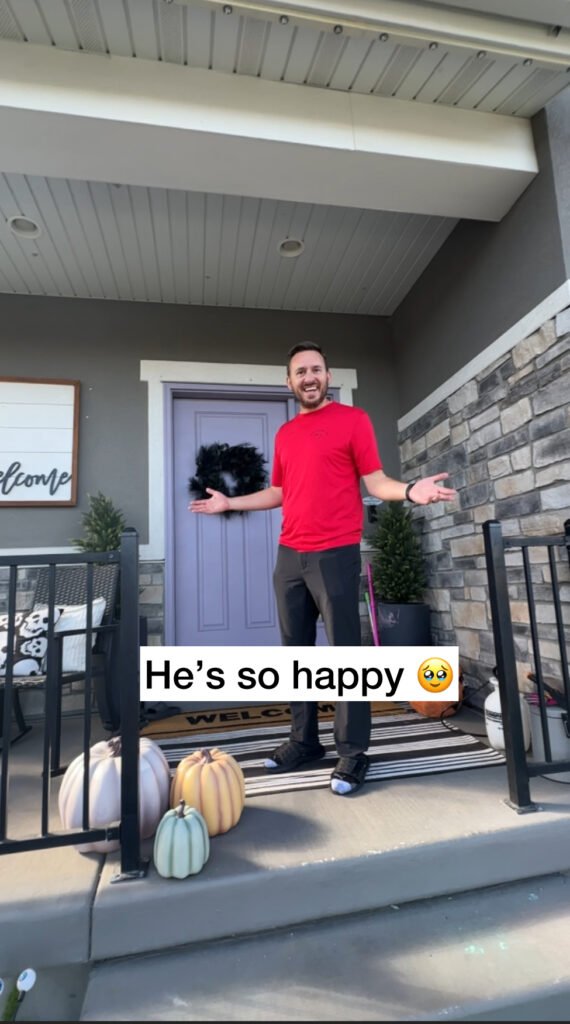
Check out the video below (and the photo of Hans’ reaction) to see how it all turned out! And keep an eye out for a cameo by Mr. Skelly, the toxic waste skeleton I made a few years ago.
I might have some tricks up my sleeve for this year’s Halloween yard! Follow along on Instagram so you’re the first to know what I dream up!
Follow along for more DIYs and fun at…