Dresser Makeover: Bringing New Life to Old Furniture
I recently renovated my ENTIRE bedroom…
It was a big project and took a while to do it all. I think if I could only give you one piece of advice about taking on a large project, it would be to break it down into smaller, more manageable projects. My bedroom project could have easily overwhelmed me. However, I broke it up into smaller projects, and it did not seem so bad. My latest smaller project: this dresser makeover!
Primary Bedroom Projects:
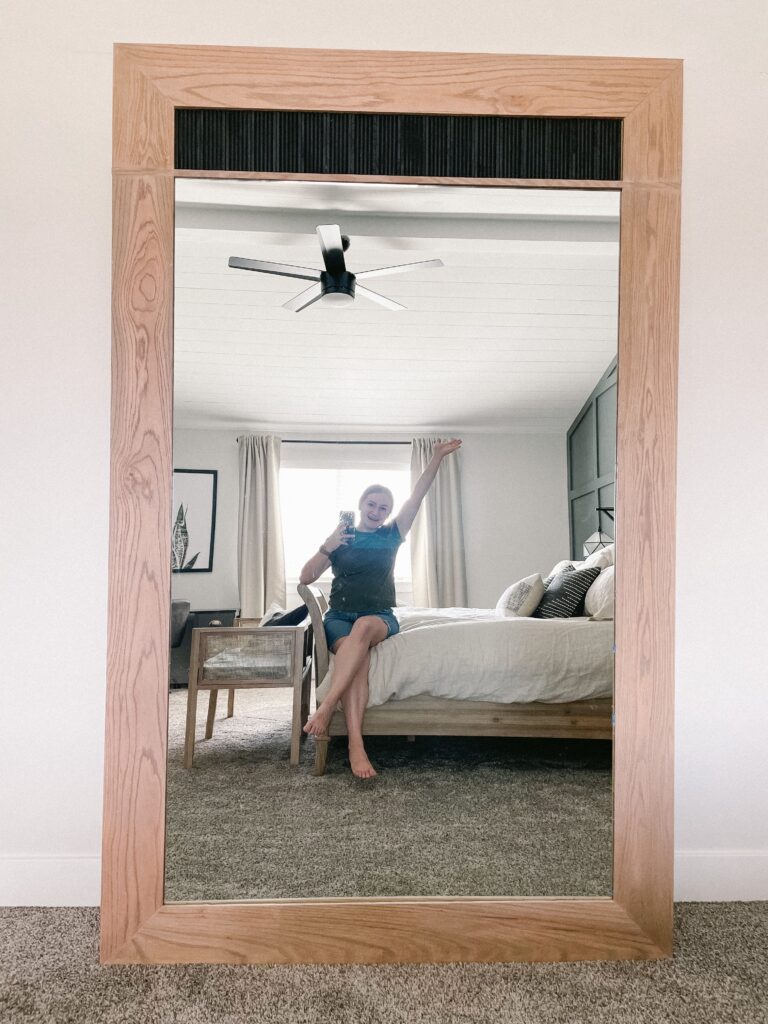
- Adding a Ceiling Beam
- Creating a Grid Accent Wall
- Adding Peel and Stick Wallpaper in the Vestibule
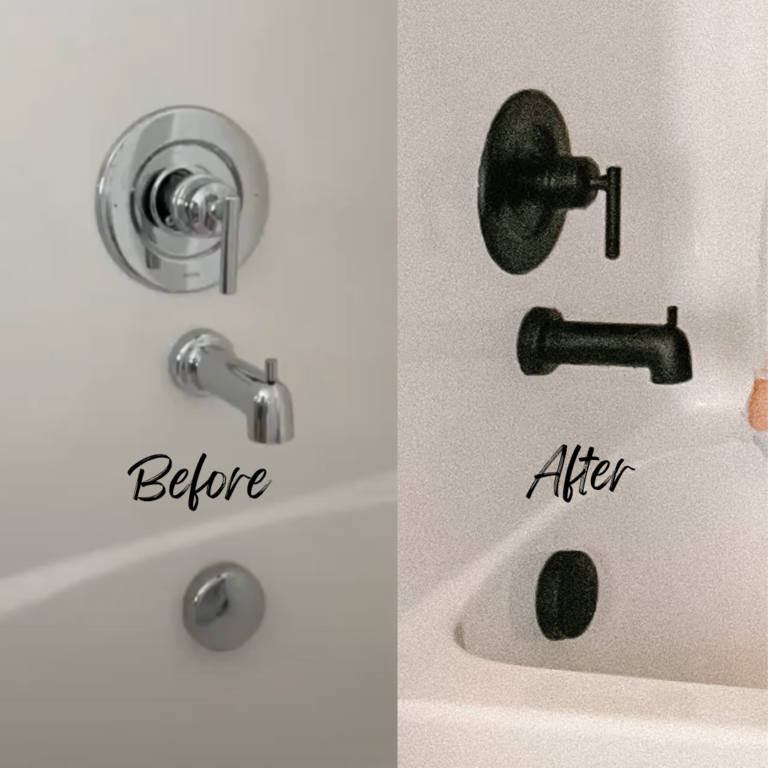
- Installing Backsplash in the Master Bathroom
- Building My Own Nightstands
My second piece of advice: You do not have to remain in some arbitrary boundaries that “they” set. Whoever “they” are. You do not have to complete your projects in any certain way. There is no right or wrong way to make YOUR house, YOUR home. Also, it is important to remember that the path to your perfect home is not a straight line. You may start your project one way, and need to scrap it and start over… that is okay.
Okay, now that all the motivational stuff is out of the way, let’s get down to the reason you are here:
The Dresser Makeover
I had a dresser that I did not like. So, because I like to do things the hard way, I spent hours and hours, plus a bunch of money, doing a dresser makeover instead of just buying a new one. However, it was so much fun to do, and I absolutely love the finished look, so I am going to say it was worth it. Most of the fun of DIY is experimenting to figure out how to do different things and what I want. Do not be afraid to get creative when redoing furniture. Here’s how I thought outside the box for this dresser makeover.
Dresser Makeover Step #1: Drawer Faces
I started by removing the drawer faces, which is really easy: all you need is a screwdriver.
First, remove the pulls. Next, there are usually four screws on the INSIDE of the drawer that hold the drawer face on. Unscrew those and they should come right off.
This dresser has rounded edges on the drawer faces, and I did not want that look. I wanted them straight, sleek, and clean. I originally planned to just use my table saw and cut the curved parts off, but once I did that, they were a little too small for my vision. So, I just made new ones with some plywood.
Now, remember, when you cut plywood, the edges don’t look great. You need to cover them before you start staining or painting them. I simply put edge banding on them. Edge banding is essentially wood strips with a heat-activated glue on the back side that you literally iron on the edge of the plywood. It is paintable and stainable, and it comes in lots of different colors. If you are keeping your wood raw, you can get one that matches the color of your wood. Edge banding cleans the edges up really well. It’s a genius invention!
Step #2: Main Dresser Box
Luckily, my dresser is solid wood, so I just sanded it down to the raw wood. Yes, it took a lot of time and made a huge mess, but that is okay.
Once all the original paint was sanded off, I decided that I wanted the top and drawer faces to be the same raw wood color, and I wanted the main box to be painted a different color. So I removed the top (we will discuss that next) and painted the dresser box Homburg Gray by Sherwin-Williams.
Step #3: Dresser Top
This is another part of this project that changed from my original plan. Like I said, after getting it all sanded down, I decided I wanted the drawer faces and the top to be the same color. Because I had made new drawer fronts, the drawers and top were now different woods, so I decided to just make a new top too.
Removing the top is as easy as removing the drawer fronts. Take the top drawers out, and there should be a few screws holding them on. Simply remove those, and the top should come right off. I made a new top with the same plywood I used to make the drawer fronts, stained it the same color, put edge banding on it, and put it back on.
Dresser Makeover Step #4: Pulls
I added these sleek, modern pulls to the drawers, using this super convenient handle guide and a ruler. Check out this video to see how I measured where to put the holes so all the handles are even.
Dresser Makeover Reveal
As you see, I had an idea of what I wanted when I started, and it changed a few times along the way, but that is okay! I love how it ended, so that is all that matters!
This before-and-after is mind-blowing! I cannot believe it’s the same dresser. Would you take on a project like this?

Follow along for more DIYs and fun at…