How to Repurpose a Picture Frame in 3 Easy Steps
Usually, when I end up DIY-ing a project, it’s because I can’t find what I was looking for, or what I was looking for was way too expensive. I went to the store looking for a frame to hang in my pantry, and I could not find a frame like I was envisioning. So I decided to repurpose an old frame that I already had. It’s a great way to update old, outdated frames. You could definitely also use this tutorial to make a frame and just find some backing or a mat to go with it. I used oak for my wood pieces, but you can use any kind of wood to make this. Follow the steps below to repurpose your own picture frame!
Supplies Needed:
- 1/4 x 2-inch Oak Wood Pieces
- 1/2 x 2-inch Oak Wood Pieces
- Wood Clamps
- Wood Glue
- Wood Conditioner
- Stain (I used a mixture of Early American, White Wash, and Weathered Gray)
- Brad Nailer
Step #1: Cut, Stain, & Glue
First, I cut four pieces of 1/4 x 2″ oak wood to the length I needed with a mitered edge. Then I stained the pieces before I assembled them. I used my favorite staining combination, which is approximately 20% White Wash, 40% Early American, and 40% Weathered Gray. After staining, I assembled the pieces straight onto my frame. I used wood glue, clamps, and weights to secure the wood while the glue dried.
Step #2: Cut, Stain, & Nail
I cut four pieces of 1/2 x 2″ oak wood to the length I needed and stained them using the same combination in step one. After staining, I used wood glue and my brad nailer to nail these into the sides of the frame.
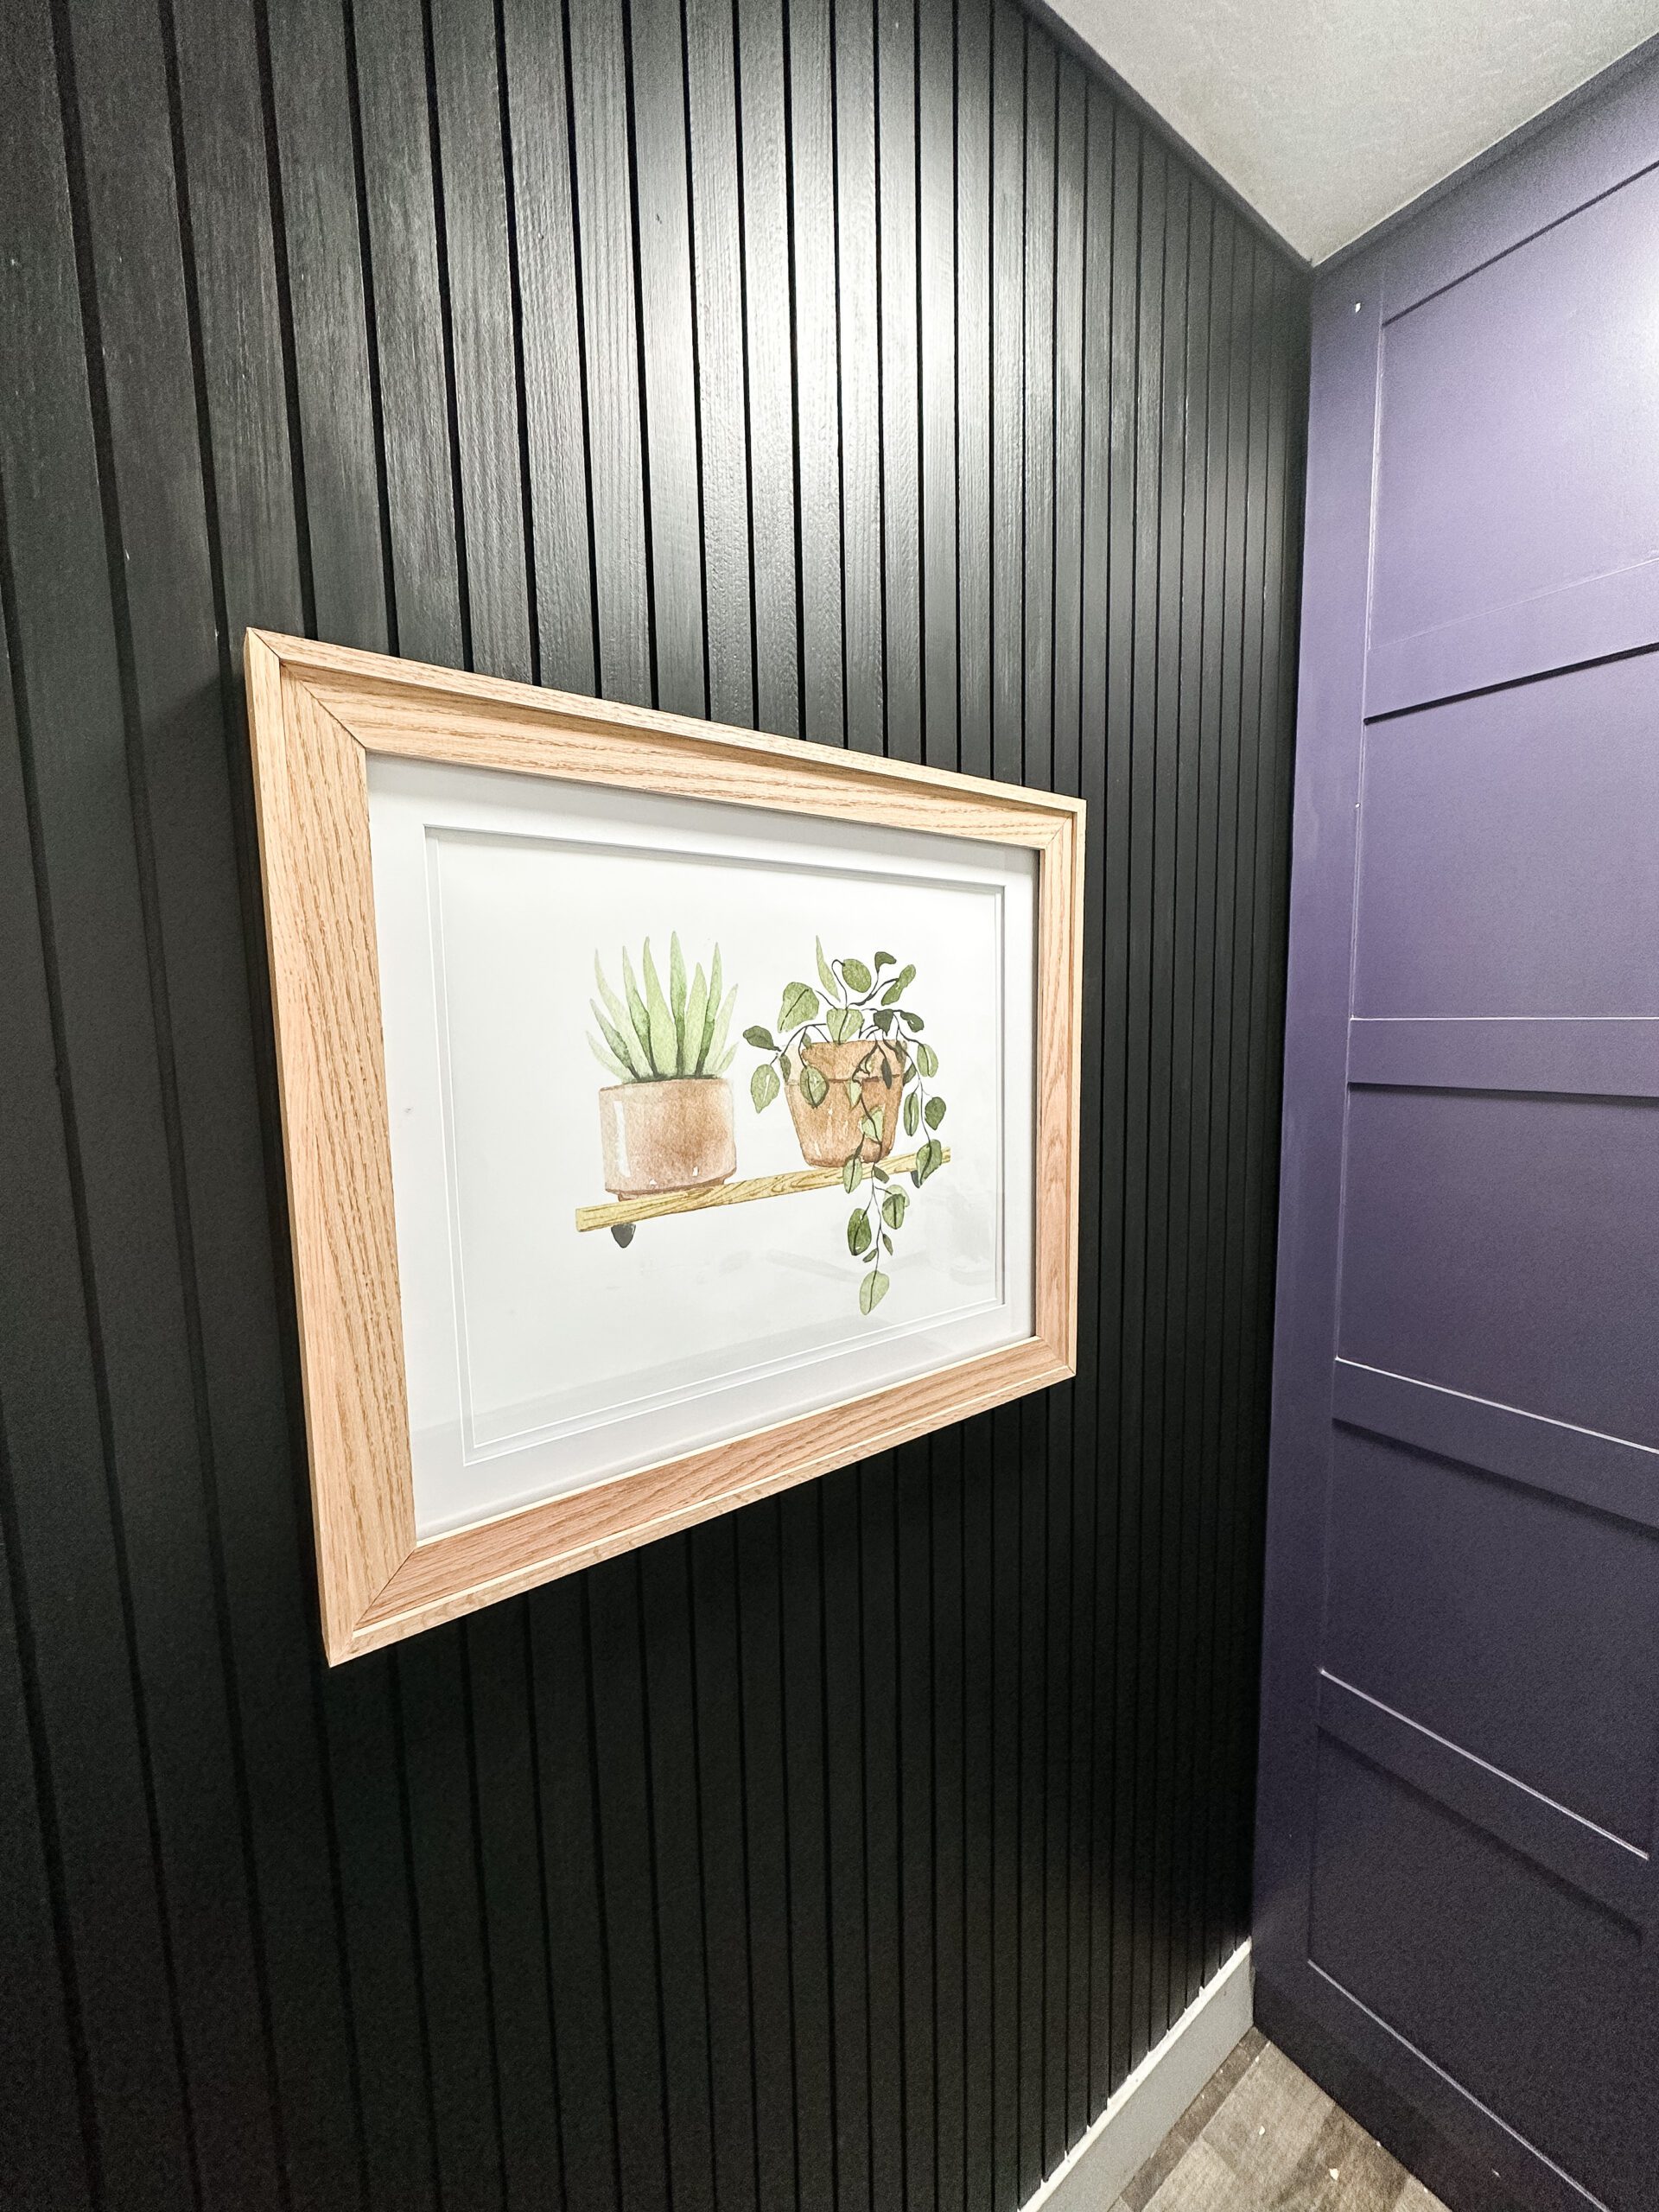
Step #3: Hang it Up & Enjoy Your New Frame!
This is one of my favorite parts about the accent wall in my pantry. I love how it totally changed the look of the frame! It’s a really easy and quick project that you can definitely complete in an afternoon. Follow me for more home DIY projects!