Turning Walls into Playgrounds: A DIY Rock Climbing Wall for Kids
There is something extra special about doing projects for your kids! My boys have all the energy and needed a safe and healthy way to get it all out, so I decided to build them a DIY rock climbing wall in their room. They absolutely loved it and it has been so fun! If you want to do this in your home, follow along and let me know how your wall turns out!
DIY Rock Climbing Wall Supplies:
DIY Rock Climbing Wall Step #1: Locate Studs & Install Braces
It is very important that you build this in a way that it will be safe and secure, in order to keep the kiddos safe. The first step is to find the studs in the wall. We will want to make sure everything is attached to a stud so that it is the most sturdy.
Once you find and mark your studs, you will need to get some wood to attach to the studs to act as an anchor. We will then be installing the plywood buildings on it. I used scrap wood from previous projects, but you can use 2x4s or rip down some plywood. Attach the wood horizontally across the wall, securing it with screws into the studs.
Put this anchor piece wherever you will have the rock wall. You can install more as you go if you need to.
Step #2: Design & Cut the Buildings
I started by taking a photo of my wall and “drew” buildings to determine how I wanted them to look. The easiest way to do this is to open the photo on your phone and edit it. There should be an option for you to draw on the photos. If you do that, you can get an idea of how and where you want each to be.
Now you will take that draft and decide on the measurements and sizes. You will then take those measurements and designs and draw them on the plywood and cut them out.
Pro Tip: When cutting a straight line, take a scrap piece of wood and two clamps. Place the scrap piece on the plywood and clamp it to use as a guide. Then take your jig saw and follow the edge of the scrap wood to cut a straight line.
Step #3: Install the Buildings
Now, take your buildings and install them on your wall. Be sure to secure them to the scrap wood you attached to the studs. I used so many screws on this because I wanted it to be super secure!
Step #4: Add Trim
I wanted the buildings to look like they were solid, so I found trim that I could attach to the edges to close them off. I cut and attached the trim all the way around the edges of the buildings using my nail gun.
Step #5: Wood Fill, Sand, & Caulk
Ahhh… the tedious step: Filling all the nail holes. This takes so much time, but is absolutely necessary. Once everything is filled, and dried, you will sand it all down. I did not realize how hard sanding this down would be. It was so messy!
I then wiped everything down to clean up all the dust. I used baby wipes, but you can use a towel or terry cloth.
Finally, go through and caulk anywhere the wood met the wall or where two pieces of wood meet at an angle.
Step #6: Prime & Paint
Make sure the wall is all clean and dust-free before painting. I used a gray-tinted primer. Note: When priming raw wood, you will get some texture or rough spots. So I recommend taking some 220 grit sand paper and sanding it down. Then apply the second coat of primer.
Next, go over it with a couple of coats of paint. Remember to take the tape off while the paint is still wet to avoid paint peeling.
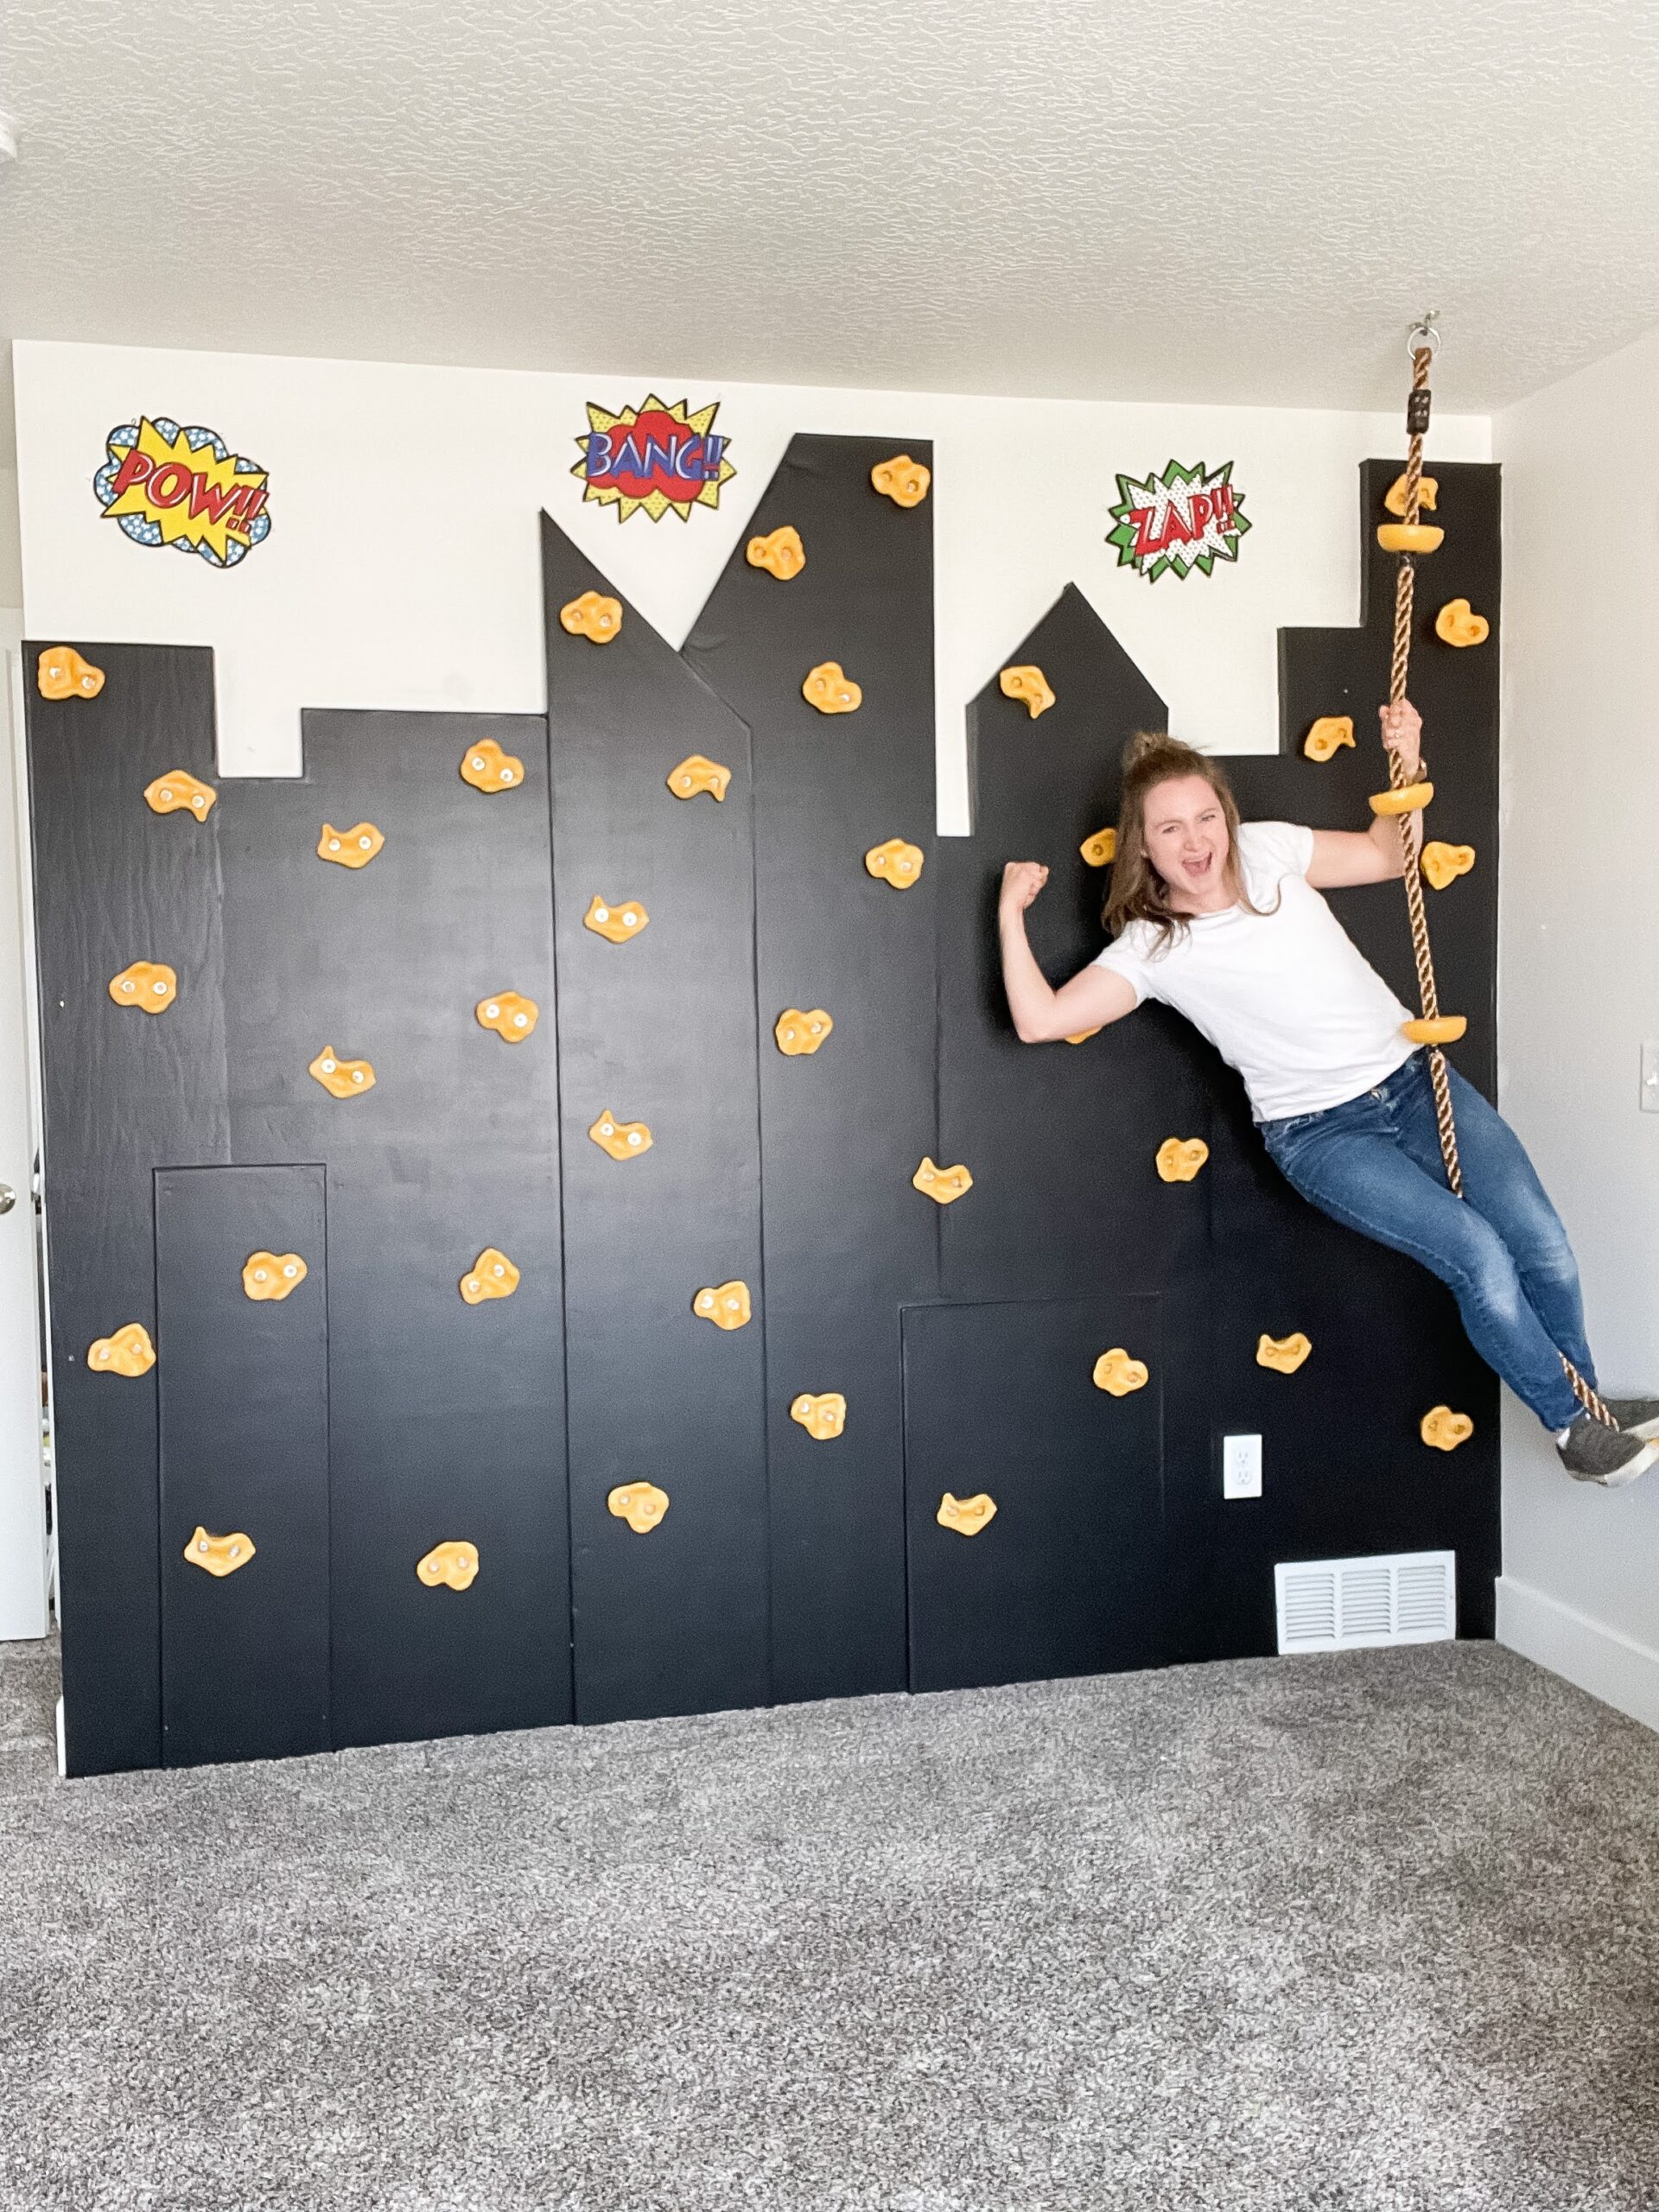
Step #7: Paint the Handholds & Swing
I got THESE handholds and THIS swing. However, they were not the color I wanted. You can buy them in specific colors, but the price difference was not worth it in my opinion. So we are going to paint them! The hand holds are plastic, and finding a paint that sticks to plastic is kind of challenging. So I am going into this expecting to have to do some touch ups. That’s okay!
I started with THIS Universal Bonding Primer. Then painted them with THIS yellow spray paint.
The handholds came with bolts that have a piece that you are supposed to put on the back side of the surface you are putting them on… obviously, I did not plan that out. Instead, I just went to my local hardware store and bought some lag bolts and washers and then painted them with the same yellow spray paint.
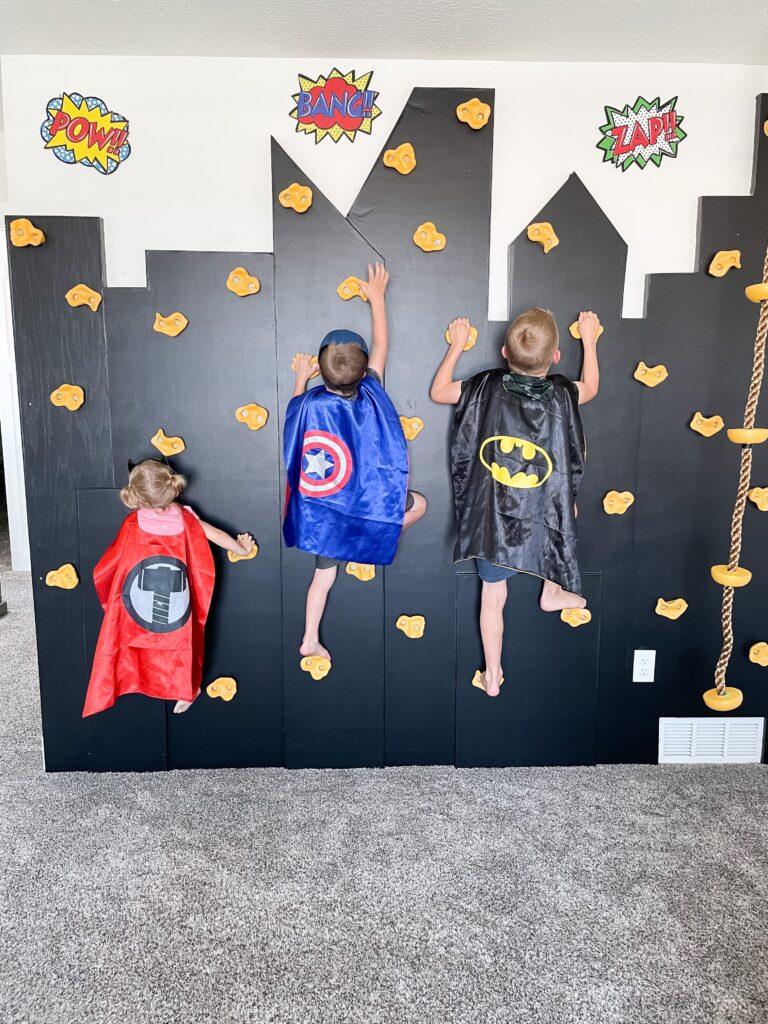
Step #8: Install the Handholds to Complete the DIY Rock Climbing Wall
I needed to know where I was going to put each hand hold. So I got some Post-Its and put little sticky notes all over the wall. This allowed me to figure out where I wanted them all, and was able to move them around a bunch until I got it right, without putting a million holes all over the wall.
Once I knew where I wanted them all to go, I pre-drilled the holes. Pre-drilling makes it so much easier to install the screws. I then finished up the project by installing the handholds.
My husband and kids thought it was the best, and they have loved playing on it! Check out their reaction below! Priceless!
Would you install a rock wall in your home? Does seeing this make you more or less likely to do it?
Follow along for more DIYs and fun at…