How to Replace a Bathroom Faucet (Easier Than You Think!)
This week I finally crossed something off my to-do list that’s been sitting there for a while: updating the faucet and drain in our powder bathroom. Since it’s on the main floor, this faucet gets a lot of use, and it was overdue for an upgrade. I’m going to change up the entire bathroom in the near-ish future, so this was a good step in that direction! The whole project was so much easier than I expected, and it’s completely DIY-able even if you’ve never done any plumbing work before. Follow along to learn how to replace a bathroom faucet!
Note: This post contains affiliate links. I may earn a commission at no extra cost to you. Thanks for supporting my content!
Supplies:
- Basin Wrench
- WD-40 (optional, see step 2)
- New Faucet
- Razor Blade (to remove old putty)
- Plumber’s Putty or Silicone
How to Replace a Bathroom Faucet Step #1: Turn Off the Water
Before anything else, turn off both the hot and cold water supply valves under the sink. Once that’s done, disconnect the water lines from the existing faucet. Be sure to have a bowl or towel handy, because there will still be some water left in the lines. Don’t let my commentary in the clip below scare you. 😂 It’s just a bit of an awkward angle to try to disconnect things, but you’ve got this!
Step #2: Remove the Old Faucet & Drain
Faucet
With the water lines disconnected, it’s time to remove the old faucet. Underneath the sink, there will be a mounting nut holding it in place. Loosen that to release the faucet. A basin wrench makes this a lot easier in tight spaces, and if the nut is corroded from age, a little WD-40 left to sit for a few minutes can help if it’s being stubborn!
Once the nut is off, the faucet lifts straight out from the top. Before moving on, clean up any old putty or residue left on the sink surface by scoring it with a razor blade. You want a clean area for the new faucet to sit against; otherwise, it won’t sit flush and can cause leaking down the road.
Drain
Then tackle the drain! Untwist it, pull it out, and set it aside. Fair warning: it was fast to remove but also a little gross. You’ve been warned. 😬
How to Replace a Bathroom Faucet Step #3: Install the New Faucet
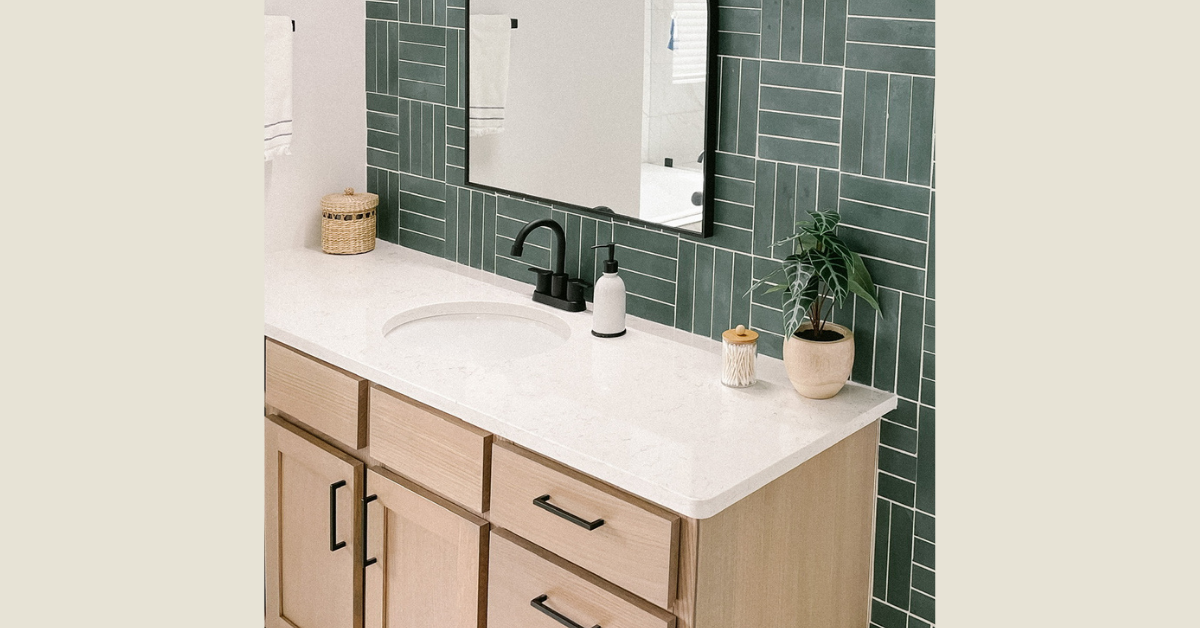
Place the new faucet into position and secure it from underneath. This is the faucet I went with! Then attach the hot and cold water lines and tighten them well.
Step #4: Install the New Drain
Install the new drain by basically following the same steps you did in part 2, but in reverse. Depending on your drain kit, you may need plumber’s putty or silicone underneath the drain to create a watertight seal and help prevent leaks. Once everything is lined up, tighten it into place.
How to Replace a Bathroom Faucet Step #5: Turn the Water Back On & Check for Leaks
Turn the supply valves back on and let the water run for a minute. Check all of your connections carefully for any drips or leaks before calling it done. Better to find them now than later!
That’s it! Start to finish, this is a project you can knock out pretty quickly, and the difference it makes in a bathroom is worth it. And you did it on your own! How cool is that?!
If you’re ready for more DIY bathroom projects, check out this list of easy and affordable bathroom updates! And as always, be sure to follow along on Instagram for more DIY tips.