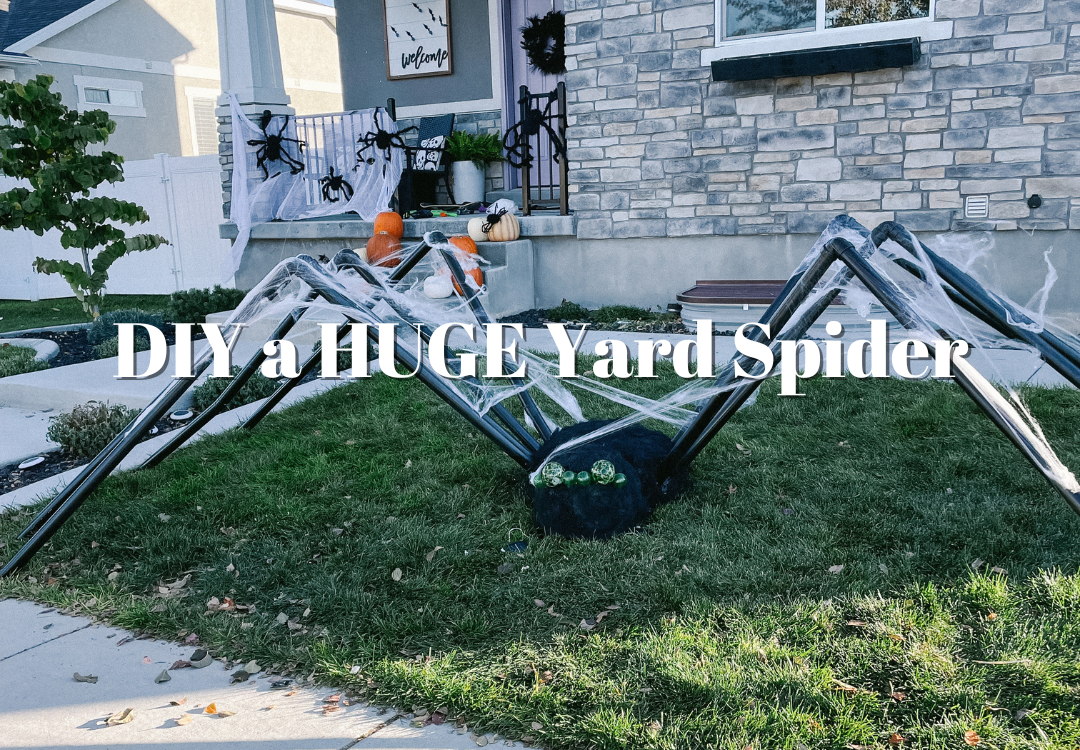
Web of Wonder: Crafting an Enormous DIY Yard Spider
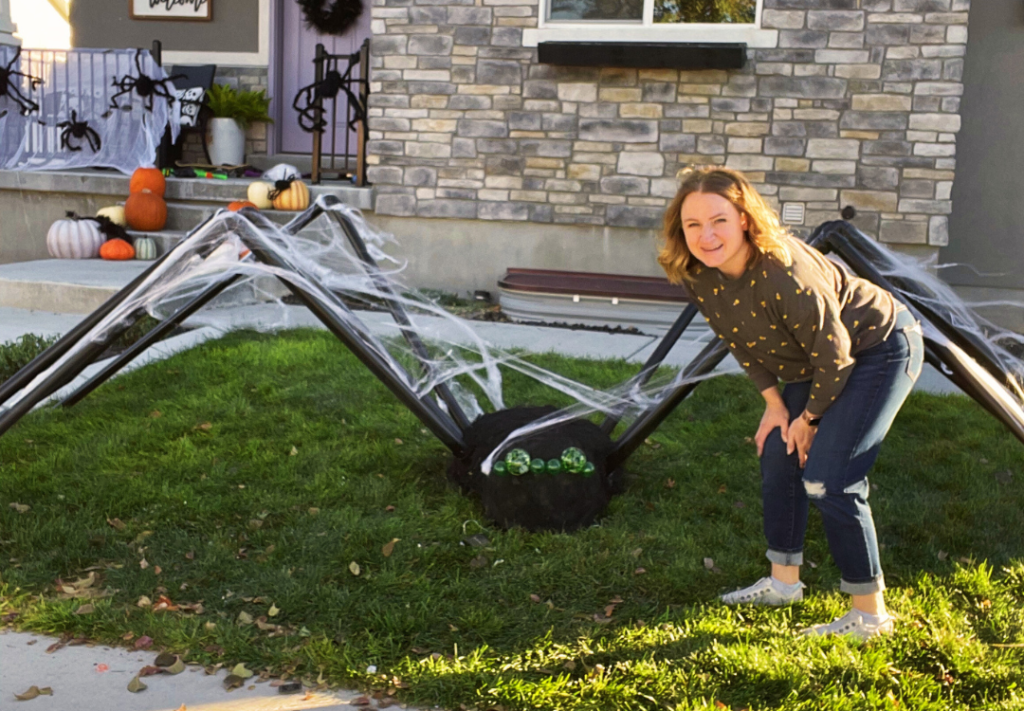
I was on a family walk and saw a giant yard spider decoration, and my kids and I decided we needed one for our yard! After looking online to find one without any luck, I decided I would just make one. It couldn’t be that hard, right? And once I solved the issues with the gap filler, it went smoothly. I love how it turned out! The best thing about this project is that you can get as creative with it as you want. Follow along, and you can make your own DIY yard spider, too!
DIY Yard Spider Supplies:
- Gap Filler
- Spray Paint
- Black PVC Pipe
- PVC Elbows
- Steel Wool
- Spray Adhesive
- Foam Blocks and Spheres
- Toothpicks
- Glass Watering Bulbs
DIY Yard Spider Step #1: Lay Out the Base Shape
Begin by arranging the foam blocks to create your base shape. I joined the foam pieces for the head and body using toothpicks. The connection doesn’t need to be strong, since we’ll reinforce it with spray foam, ensuring everything stays securely in place.
Step #2: Cover with Spray Foam
Next, I used the spray foam gap filler to cover the entire thing. Once it was completely covered, I still did not like the way it looked, so I added more craft foam to the body and did another layer of spray foam.
Step #3: Shape the Spider
Once it was completely dry, I used a hand saw to shape it to look more like a spider. I had to touch up a few spots with the foam again, but once this part was done, the shape was perfect!
Step #4: Paint
I painted the entire thing black, and this is when it really started to take shape!
Step #5: Cover with Steel Wool
I had some steel wool lying around and decided to cover the entire thing to give it that hairy look. It was exactly what the spider needed! Even my husband thought it looked creepy! Once the steel wool was on, I painted it again.
Step #6: Build the Legs
Time to make the legs. I used black 2-inch PVC, and cut six shorter pieces and six longer pieces. Then, put the elbow pieces on one small and one large piece of PVC to create the legs. I cut holes in the body for the PVC pipe to go in. The legs were wobbling all over, so I foamed in a piece of piping with an attachment to the body. This would allow me to slip the legs in and out so I can take it apart easily to store.
Last Step to Your DIY Yard Spider – Step #7: Add the Eyes & Web
I used glass watering bulbs as the eyes. I just stuck them in the head and voila, it now looks like a spider! To be a little extra, I added spider webs to the legs, and it looks so good! The neighborhood kids love our spider just as much as we do!

Check out other Halloween DIY projects like this Halloween Village, or this Toxic Waste Skeleton!
Follow along for more DIYs and fun at…