DIY Bench: The Ultimate Statement Piece for Your Home
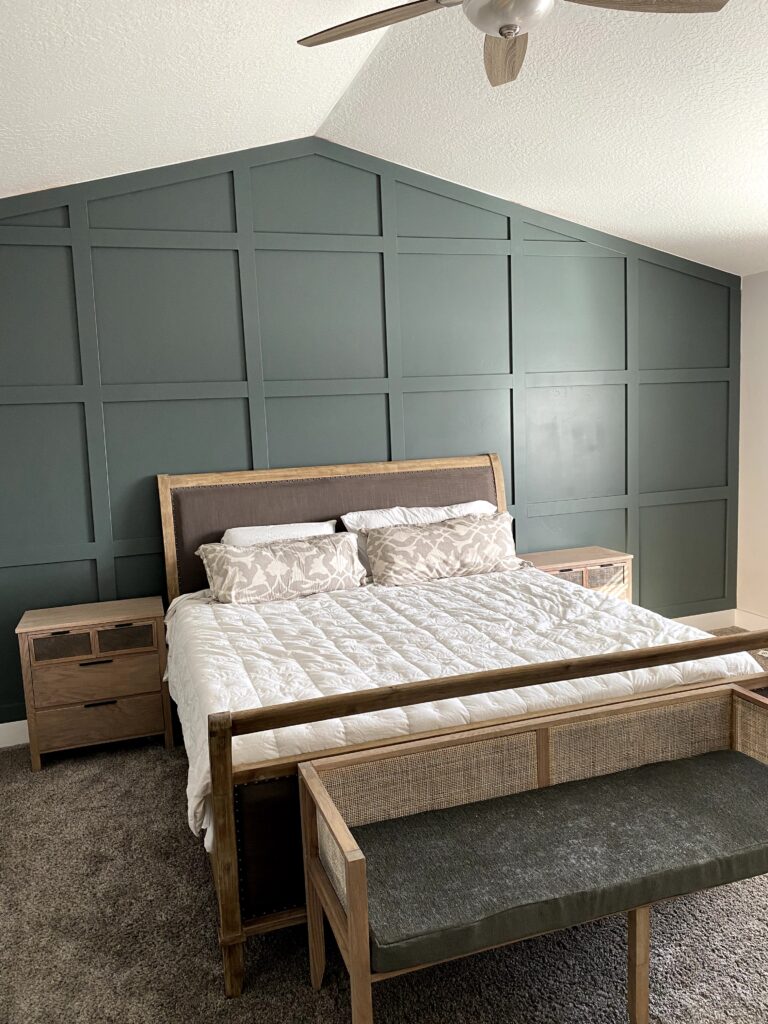
I found this bench that I loved; however, I did not love the $1,000 price tag! Lucky for me, I can make my own DIY bench for a fraction of the price. Follow along with this tutorial, and you can make a custom bench of your own! And while you’re here, check out the other projects in my primary bedroom makeover:
Note: This post contains affiliate links. I may earn a commission at no extra cost to you. Thanks for supporting my content! 🙂
DIY Bench Supplies:
- 2×2
- 1×2
- Cane Webbing
- Pocket Hole Screws
- Foam
- Your Choice of Fabric
DIY Bench Tools:
In order to make this bench look its best, you will need a pocket hole jig. However, you can get away without a table saw if you can get 1×1 dowels.
DIY Bench Step #1: Make Cuts
First up: Cut your wood.
2×2:
- 4 – 26.5 inches
- 2 – 15 inches
Cut the bottom 4 inches at an angle to create a stylized leg.
Repeat on both sides of the 12-inch pieces to form a V.
1×2:
- 4 – 18 inches
- 3 – 56 inches
- 1 – 11 inches
1×1: You may need to rip a 1×2 down on a table saw.
- 8 – 8 inches
- 4 – 16 inches
- 4 – 25 inches
Scrap Wood:
- 5 – 18 inches (These can be any width between 2-5 inches)
Step #2: Build the Sides
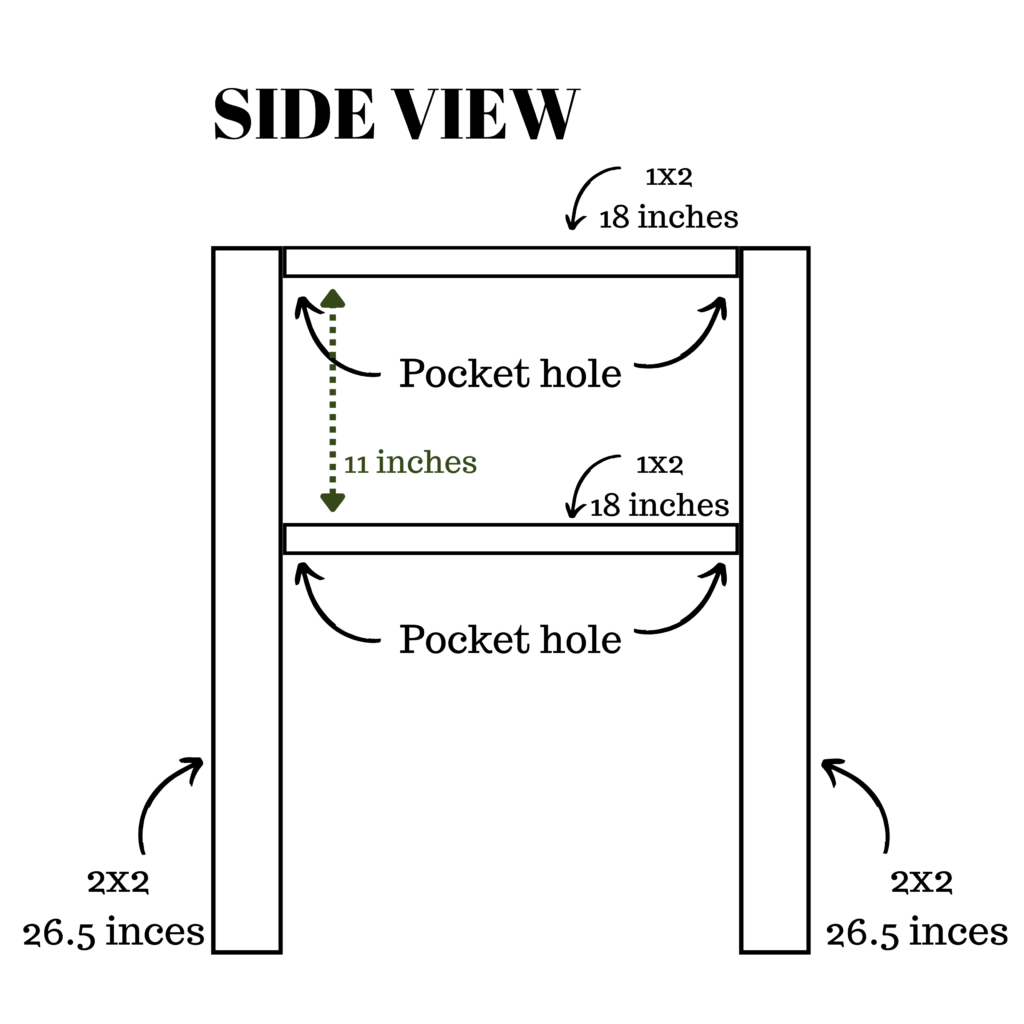
Take two of the 26.5-inch 2×2 and two of the 18-inch 1×2. Put a pocket hole on the bottom of each side of both of the 1×2s.
Secure one 1×2 to the top of the 2x2s. Make sure the angle piece of the 2×2 is at the bottom, facing away from the 1×2.
Next, secure the second 18-inch 1×2 11 inches down from the top 1×2.
Repeat for the other side.
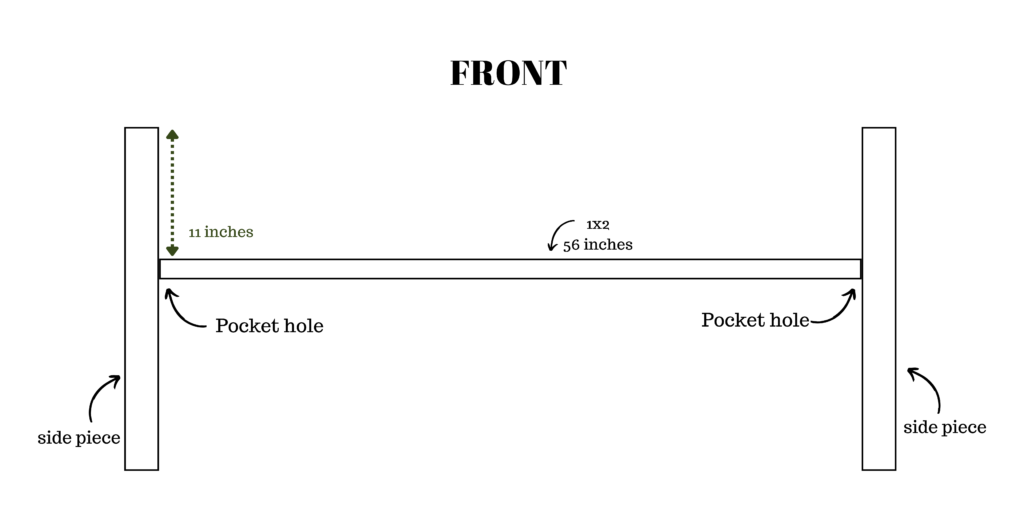
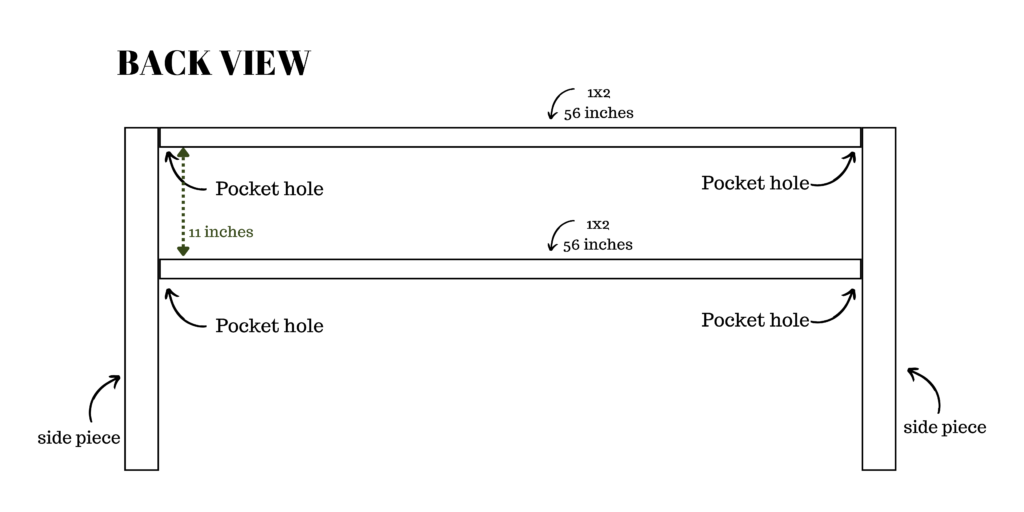
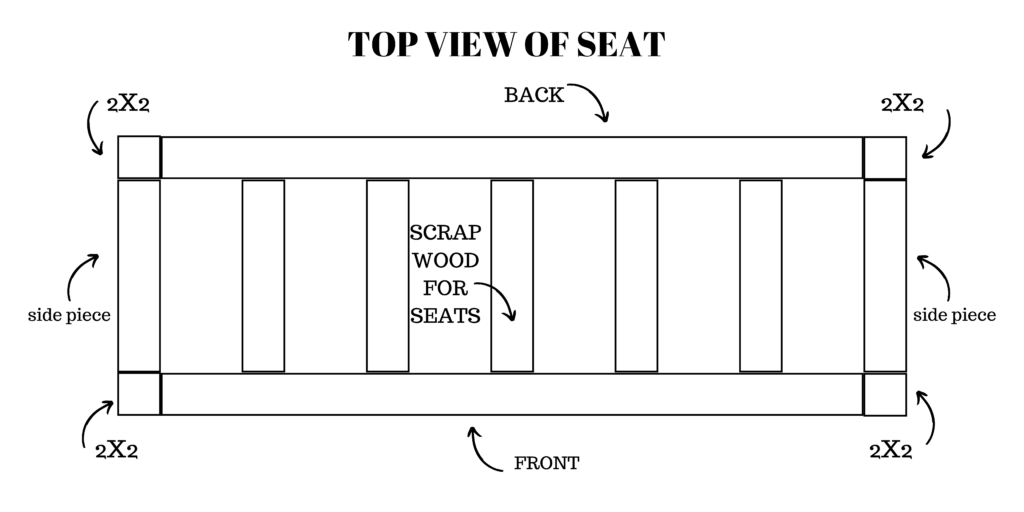
Step #3: Make the Front, Back, & Seat
Drill pocket holes in the bottom of each side of the 56-inch 1x2s. Then, secure one at the top of the 2×2, one 11 inches down to be in line with the 1×2 on the side, and one on the front side of the side pieces 10 inches down.
Finally, take your scrap wood that you cut to 18 inches and put two pocket holes on each end of it. Install it between the front and back middle pieces of 1×2.
Step #4: Attach the Support Legs
Take your remaining two 15-inch 2x2s and put a pocket hole in the back sides. Secure them in the middle of the 56-inch 1×2 to create center support legs.
Your frame is now complete! Yay!
Step #5: Don’t Skip the Finish Work!
The great thing about pocket holes is that they are in a spot that you cannot see, so you do not have a bunch of holes you need to fill. However, if you would like to seal up the pocket holes, you can with pocket hole plugs. Just hammer them into the holes, then use wood filler and sand them flush. They make the holes disappear.
Give the frame a good sanding to make everything smooth and splinter-free. If you want to stain it or paint it, now is the time to do that!
Step #6: Build Cane Webbing Frames
We will be creating “frames” that we will staple the cane webbing to. Carefully measure and cut so the frames fit snugly.
I used my table saw and ripped down my 1×2 to be a 1×1. Take two of the 16-inch 1×1 and put a pocket hole in each end. Attach the 8-inch 1x1s to the 16-inch 1x1s to create a frame. Repeat for the second 8×16 inch frame and again for the two other 8×25 inch frames.
Dry-fit the frames to make sure they fit with a little space for the cane to go.
Step #7: Add the Cane Webbing
It is recommended that you soak the cane for 30 minutes. The cane will soften up, making it much easier to work with.
Stretch it over the frame and staple it to the side of the frame. Make sure you pull it tight! As it dries, it will tighten up a little more and will be strong.
Put the frames in the spaces and use a nail cut to secure them in place.
Step #8: Make a Cushion for the DIY Bench
I am not a seamstress, but I can sew a straight line! So, if you can sew a straight line, you can do this too. Keep in mind, these measurements are giving you a ½” room for overhang on the fabric.
Start by cutting your fabric. You will need two pieces 53×19”, two pieces that are 5×19″, and two that are 53×5”.
Next, sew the 5” pieces together to make one long 141” piece. Remember, when sewing a case, always sew the fabric right side together. You will then turn it right side out once you are complete.
Then, take one of the 53×19″ pieces and sew it to one end of the 141” piece all the way around. Repeat with the second 53×19″ piece, leaving one end open.
Insert the foam into the case, then either manually sew it closed, or you can attempt to close it with the sewing machine.
Put your cushion on, and your DIY bench is complete!

Do you love it? Doesn’t it feel so good to create something so beautiful with your own two hands, and to get quality furniture for a fraction of the cost to buy it retail? I would love to see your finished product!
Follow along for more DIYs and fun at…