DIY Basement Home Theater
My family loves watching movies together. So when our basement was finally finished, we knew we wanted one of the rooms to be a home theater. My husband was so excited to finally put his projector and sound system to use, and I was excited to make the space beautiful and functional. This theater room turned out so well, and we use it all the time! Here’s how you can DIY this basement home theater, too!
Note: This post contains affiliate links. I may earn a commission at no extra cost to you. Thank you for supporting my content!
Basement Home Theater Supplies:
Entertainment Center
- Entertainment Center Cabinets (I bought two)
- 2x4s for the entertainment center base
- Screws
- Scrap wood to raise the entertainment centers and make them level
Projector Screen Wall
- Multi-Tool (Here’s a more affordable option, too!)
- Painter’s Tape (This kind is my favorite!)
- Paint (I did Peppercorn by Sherwin-Williams in the satin sheen)
- Trim for around the projector screen
- Black Spray Paint
- Nail Gun
Theater Room Walls & Trim
Finishing Touches
- Sconces
- Rub-N-Buff
- Battery-operated lights for sconces
- 1x2s for the speaker stand
Basement Home Theater Part #1: Entertainment Center
I wanted my entertainment center to have a more custom look and be a little taller than the cabinets I bought. So I kicked off this project by building a base for it out of 2x4s. The steps for this will vary based on the kind of entertainment console you have. But regardless of the cabinets you have, the base you’re building will just need to be the same size as the entertainment center you are attaching to it. I cut two boards the length of the entertainment center, and then I cut little boards to brace in between the two. Finally, I used screws to attach them. The video below provides a visual of what I did!
I ended up using some scrap wood on top of my base to make sure the entertainment center would be level. And though I considered it, I opted not to remove the baseboards on the wall where I was going to put the entertainment center because I wanted the option to be able to move it if necessary.
I also needed some space behind the entertainment center for cords, because home theaters come with a lot of cords! I used two screws to attach the base to the studs in the wall. Lastly, I added a baseboard to put on the front of my base to give it a more finished look.
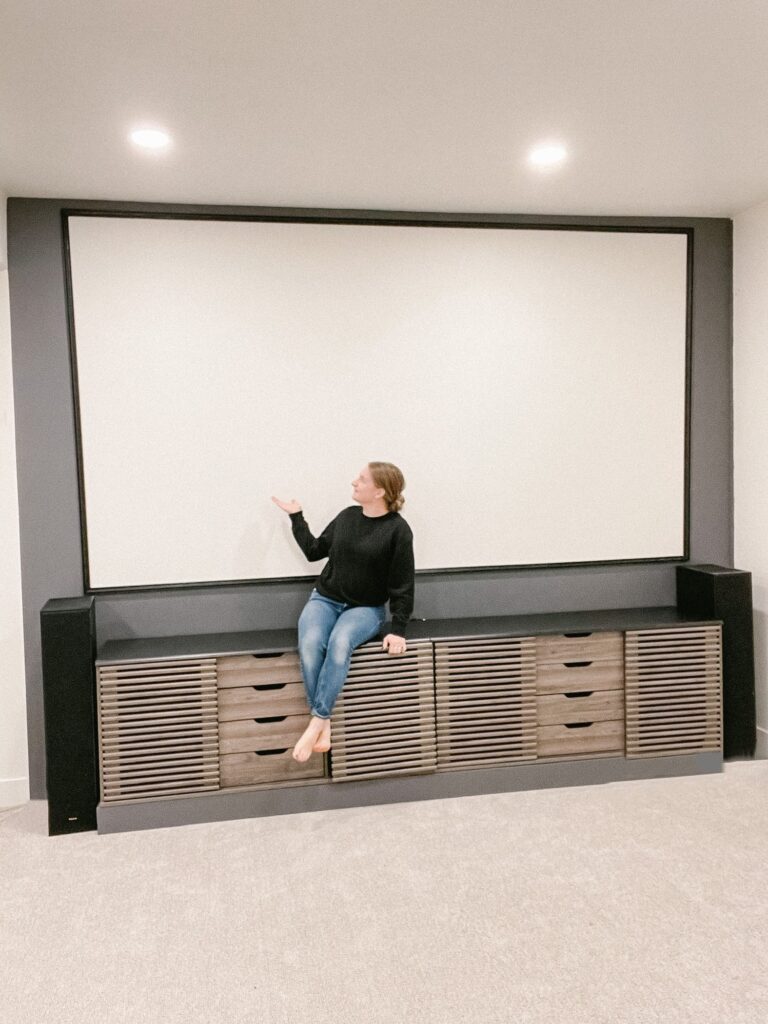
Part #2: Projector Screen Wall
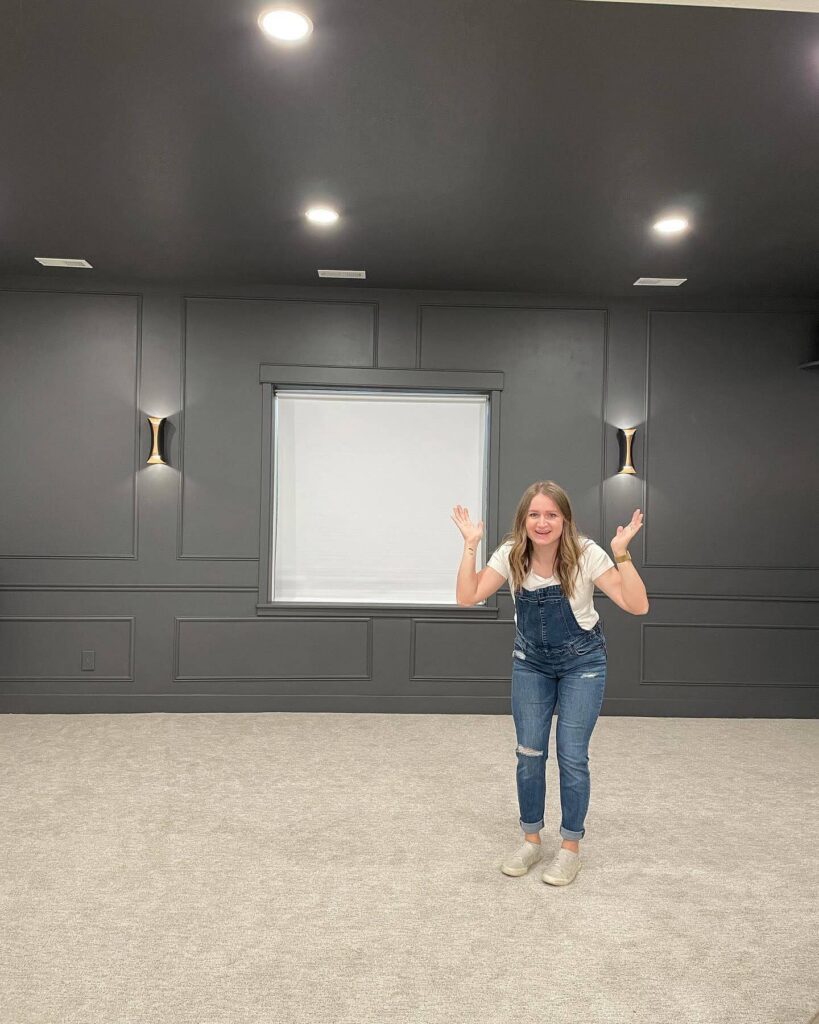
After building the entertainment center, it was time to start painting! I chose a dark shade to mimic the feel of a real movie theater. Once the wall was dry, I taped off the screen for the projector.
Next, I used mitered cuts for the corners of the trim pieces and labeled them on the back so I knew where they would need to go when I put them up. This ended up being so helpful! Then I spray-painted them black to match the walls.
Once the trim was dry, I attached it around the projector with my nail gun. I love the way it finished the projector screen wall!
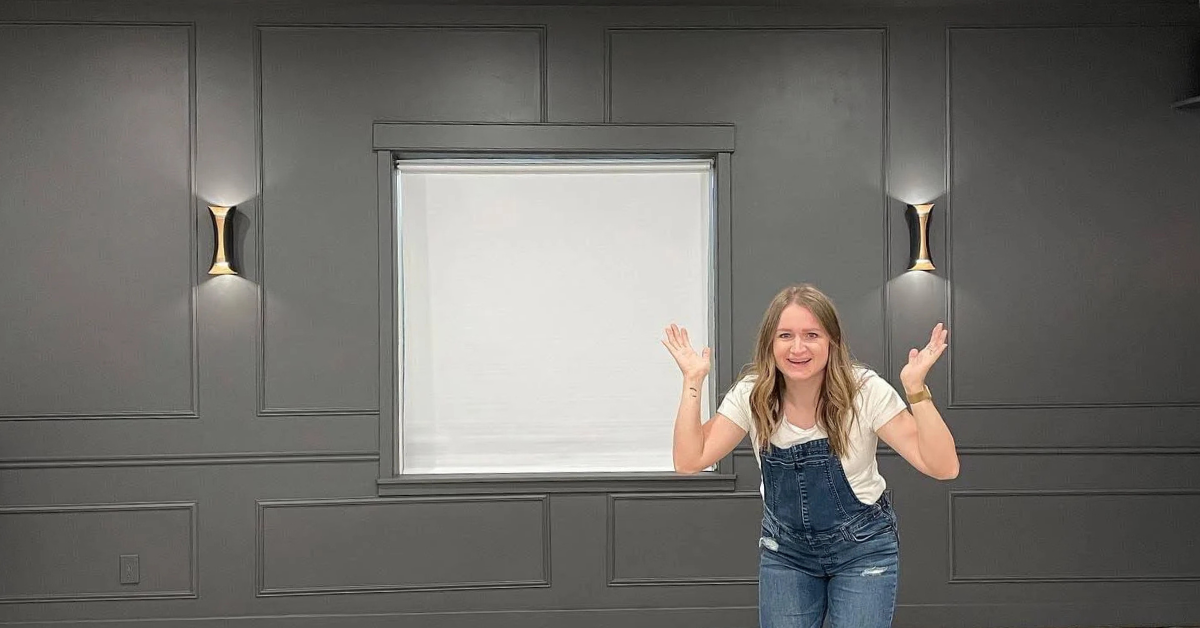
Basement Home Theater Part #3: Theater Room Walls
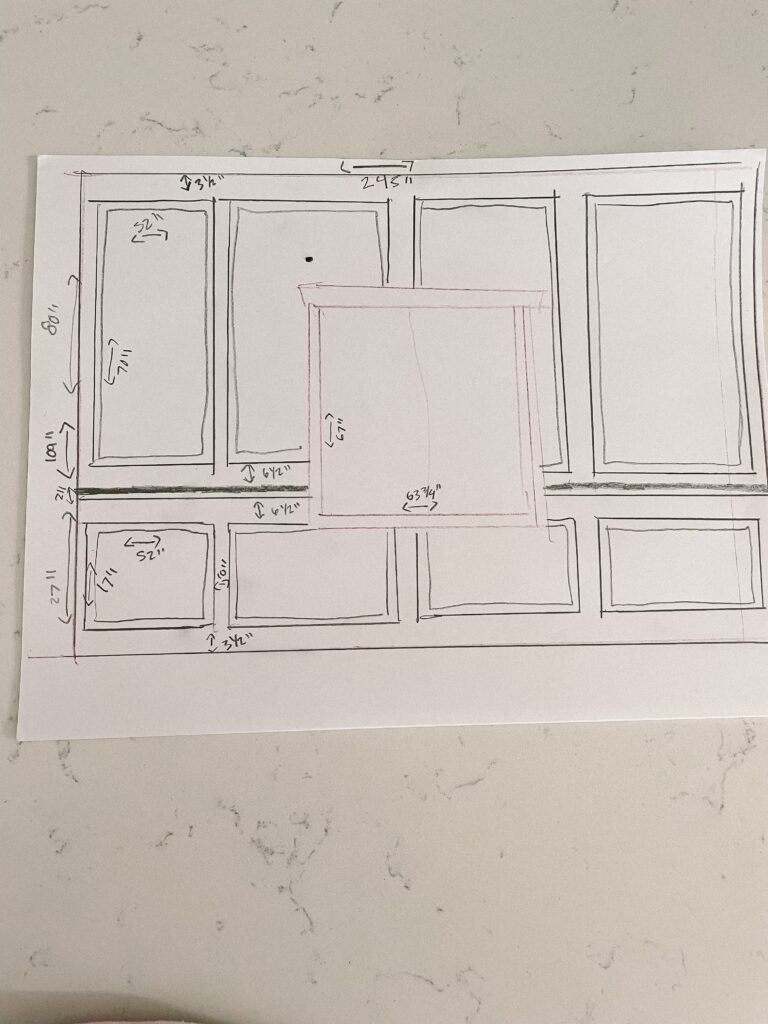
Determining Picture Frame Moulding Spacing
To start the theater room walls, I used painter’s tape to come up with a design and spacing that I liked. Then I used my measuring tape to see where it hit. For example, when I measured from the baseboard to the bottom of the picture moulding, it was really close to 3.5″ but not quite. So I just went with 3.5″ because it’s a nice even number. I’m a visual person, and so this really helped me to visualize this space. Be sure to write down everything you decide and make a picture of it!
Painting Everything
The next step was to paint the walls, trim, and ceiling. You could tape everything off and use a paint sprayer to paint the entire room, but I didn’t want to deal with all of that and the fumes. So I decided to use an 18″ roller and extension pole, and it was so much better than the standard size!
Adding Picture Frame Moulding
After painting, it was time to put up the picture moulding. I used a miter box to cut all my trim pieces at 45 degrees, and it was so nice to be able to cut them in the same room I was in.
Using my handy picture of the design I wanted, I started measuring and attaching the trim. When attaching it to the wall, chances are you won’t always hit studs. I prefer not to use wood glue because it damages the wall when you try to take things off. I just angle the nails up and down to grab the drywall. In case you’re wondering how to get all of the picture moulding level, here’s a video explaining how I did it! You’ll need a long level, a pencil, and a measuring tape.
Basement Home Theater Part #4: Caulk & Paint the Trim
Is it necessary to caulk all the edges of this trim? Absolutely not. In fact, I only caulked the places that had big gaps or that I would notice. Nobody is going to come inspect your trim from all angles. If caulking is your jam and you want to caulk it all, by all means do it! There was a lot of trim, and it wasn’t necessary for me. I caulked the edges that I wanted, filled the nail holes in the trim, and then painted.
Part #5: Finishing Touches
The finishing touches are what make it feel like you are at the theater! I added some sconce lighting, and it totally took the room from a family room to a home theater room!
When I purchased the sconces, I thought that the gold was a little too bronzy-looking for me. So I just used some Rub-N-Buff to make it more golden. You don’t need to use a lot of that stuff—a little goes a long way! It made it look so much better.
I also bought some battery-operated lights that are controlled by a remote. That way, I didn’t have to worry about wiring up the sconce lights. You just glue the battery-operated light pucks into the sconces, and you have instant light!
Another finishing touch was to make speaker stands for the surround sound. I decided to use 1x2s and part of a wooden circle. I cut everything to the length I wanted for the shelf, and then screwed the 1x2s into the top of the shelf. Then, I screwed them into studs in the wall and painted them. The speakers sit there perfectly, and it looks like it was made for it—because it was!
Basement Home Theater Reveal!
I LOVE how this room turned out! It’s the perfect place for my family to gather and watch movies. It looks amazing, and I’m so proud to have created a space that my family will enjoy all the time!