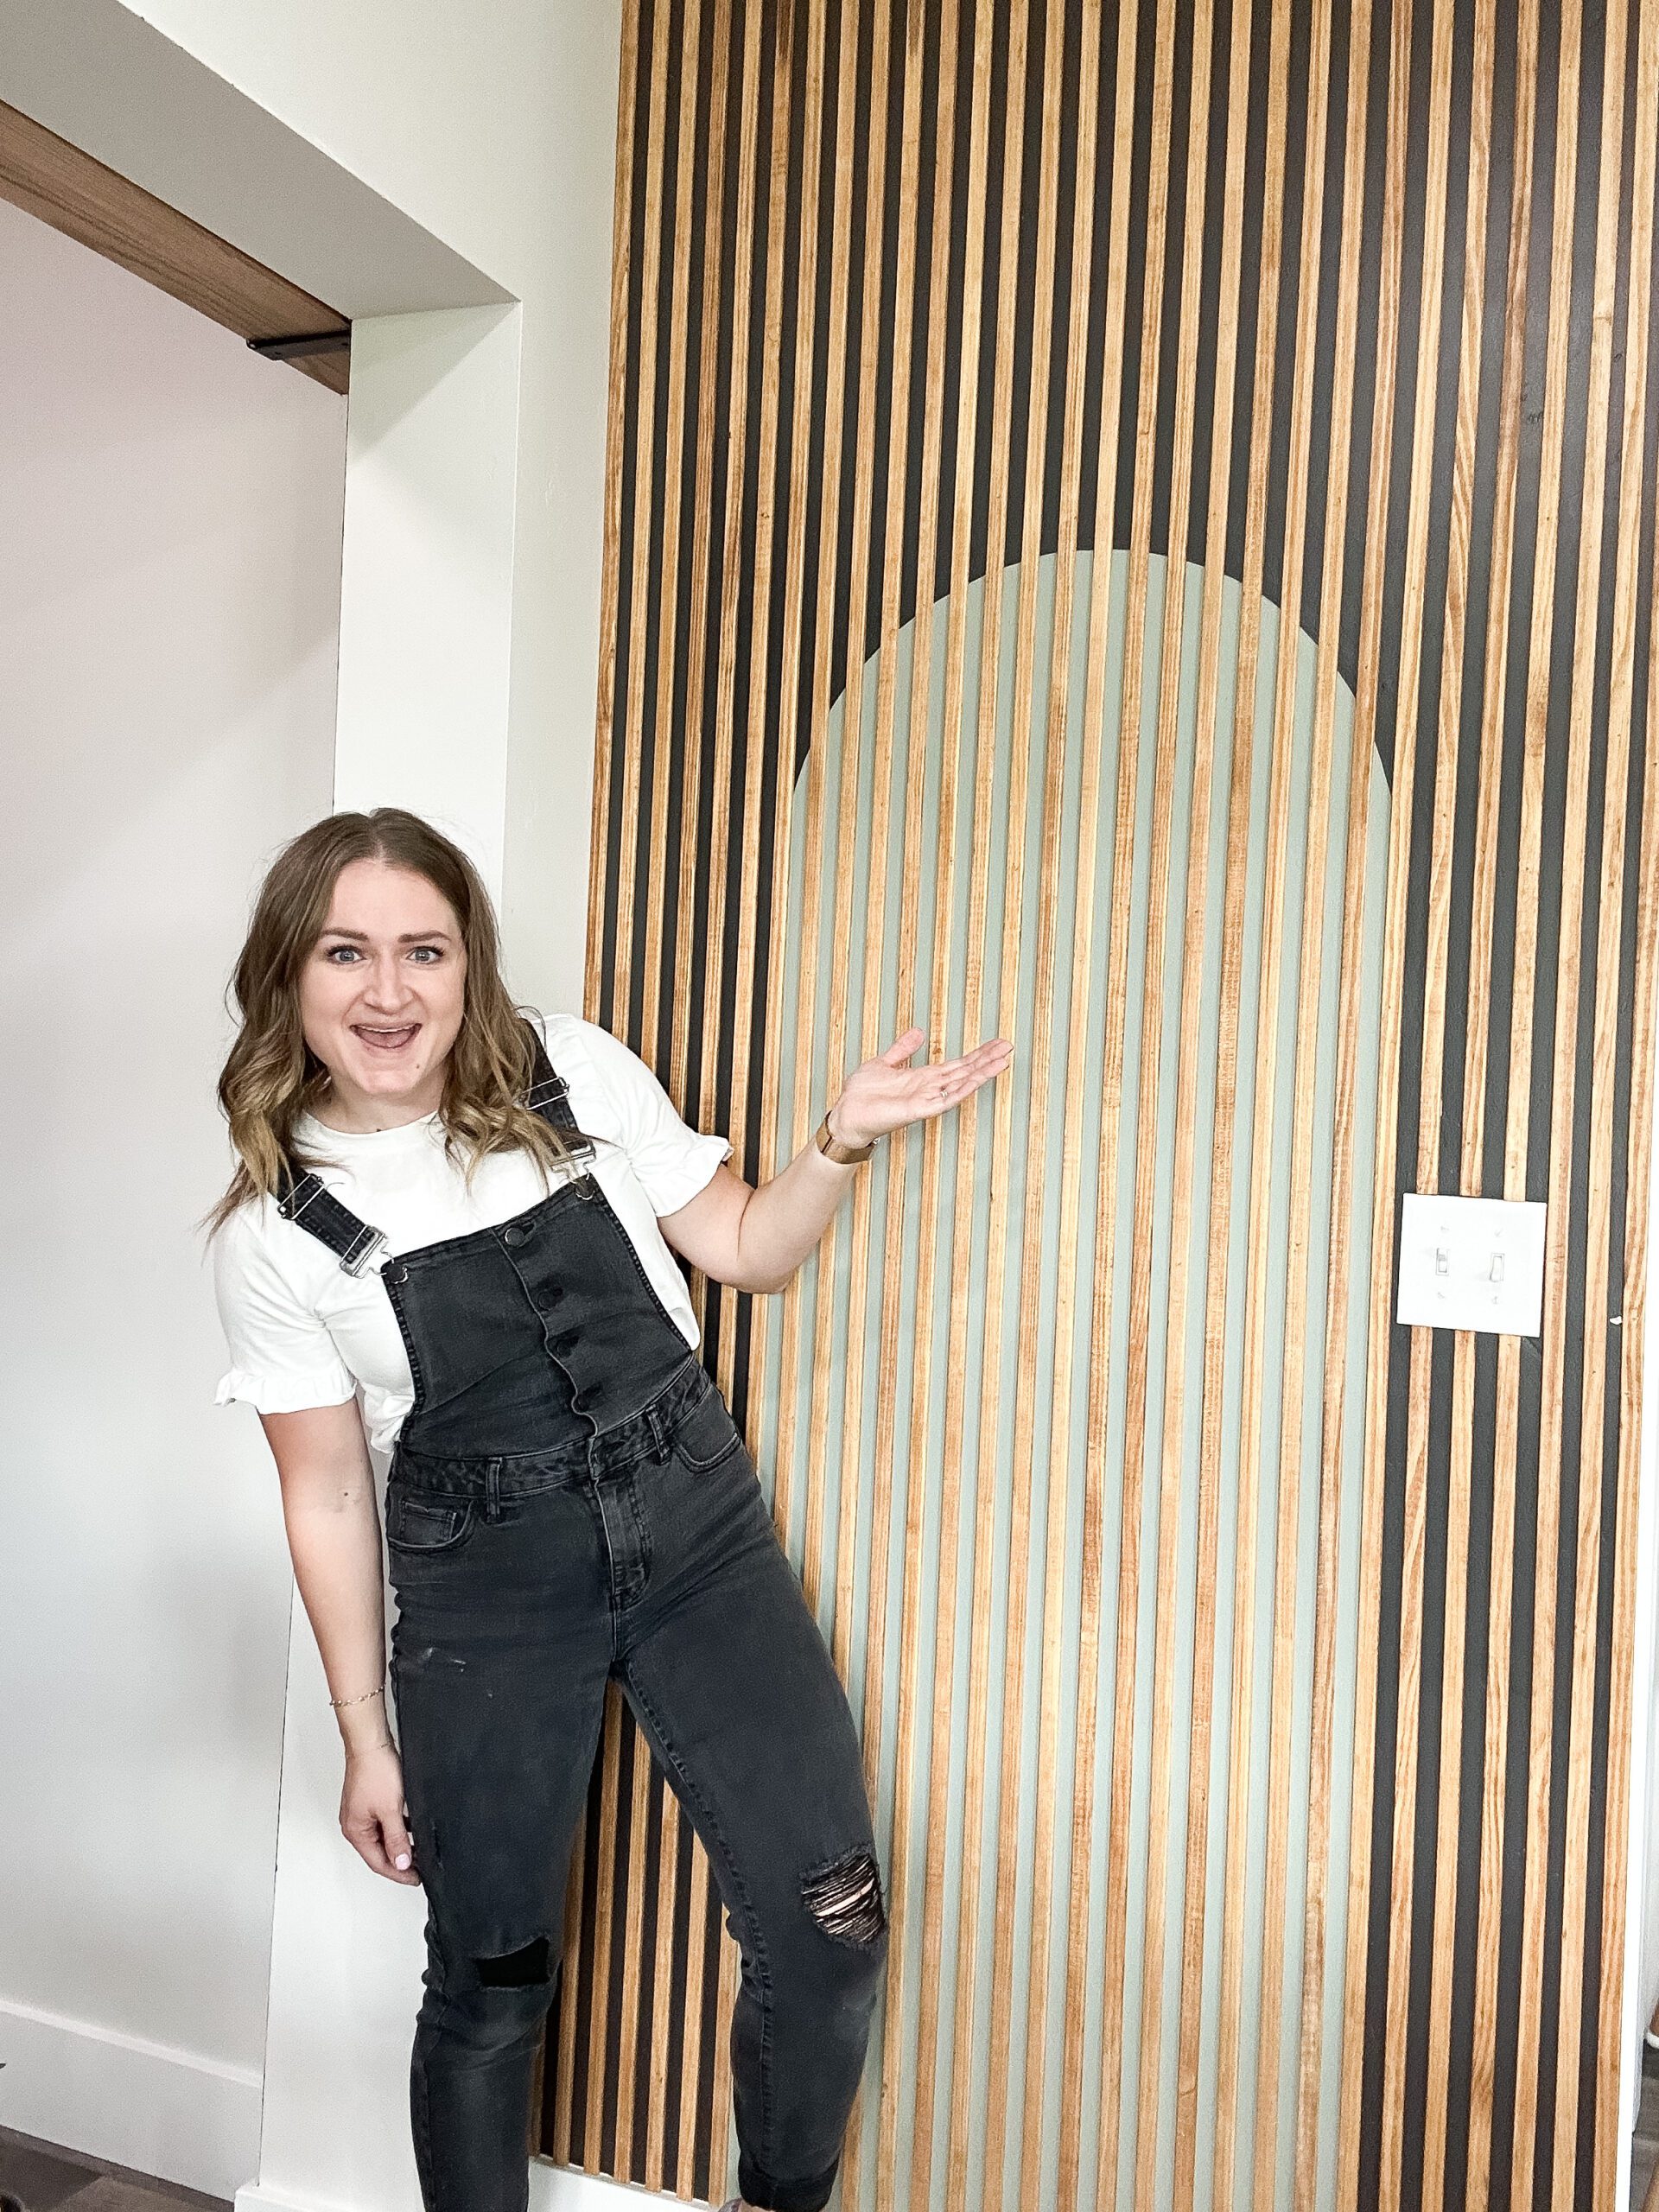
Slat Accent Wall: Easy Design for a Dramatic Impact

I have a wall in my kitchen that was begging for some attention. It was gathering clutter, and just felt very neglected. I’ve had this project in mind and decided this was the perfect wall to do it on! This slat accent wall makeover is very beginner-friendly, but still high in impact. What I love most about it is that it’s so easy to customize it to fit your needs. I did something very similar here without the wood slats. Here is how I installed this slat accent wall!
Note: This post contains affiliate links. I may earn a commission at no extra cost to you. Thanks for supporting my content! 🙂
Slat Accent Wall Supplies Needed:
- Long Level
- 2 Colors of Paint (I went with Evergreen Fog and Iron Ore by Sherwin-Williams)
- Angled Paint Brush
- Slat Wood Pieces
- Sandpaper
- Wood Conditioner
- Your Choice of Stain
- Finish Nailer
Slat Accent Wall Step #1: Draw a Half Circle for the Arch
To begin, draw a half circle for the top of the arch. Begin by taking your thumb tack and placing it where you want the center of the half circle to go. Tie your string on the tack, but keep it loose so it twists easily.
Tie your pencil to the other end of the string. Extend the string so it is tight and draw a half circle.
Step #2: Finish the Arch
Now that your half circle is complete, we are going to finish the sides of the arch. Using a long level, make straight, plumb lines. Simply align the level so it is level and use a pencil to trace the line, and continue that down both sides.
Step #3: Paint
Time for the fun part! Choose two different colors of paint: one for the arch and another for the space surrounding the arches. I prefer the Sherwin-Williams brand. I did two coats of Evergreen Fog for the arches and two coats of Iron Ore for the rest of the wall. This is my absolute favorite paintbrush!
Step #4: Prep Wood Slats
Find the perfect wood trim for your space. I wanted to use quarter rounds, but ultimately chose this. Sand, wood condition, and stain them, and then let them dry!
Step #5: Hang Wood Slats
Using a finish nailer, nail the slats on the wall. A finish nailer uses smaller nails, which makes it so you do not have to wood fill.
Tip to get the perfect spacing: Use a piece of the same trim between the pieces you are nailing on the wall. Run it up and down between the pieces as you nail them on the wall.
And with that, you’re done! Stand back and admire your work.
That’s it! Simple, yet impactful. Where are you going to add a slat accent wall in your home?
Follow along for more DIYs and fun at…