Clay Easter Eggs: An Egg-stra Cute Craft
After having so much fun using decoupage and air-dry clay recently, I was thrilled to find a project that combines the two: these adorable clay Easter eggs. Simple and wonderfully springy, you can use them as standalone decor or add ribbon to create a garland. Keep reading to discover different ways to make this fun springtime craft your own!
Note: This post contains affiliate links. I may earn a commission at no extra cost to you. Thanks for supporting my content!
Clay Easter Egg Supplies:
For the Eggs:
For the Decorations:
- Lace Ribbon
- Acrylic Paint
- Pastel Floral Napkins
- Dried Pressed Flowers
- Mod Podge and Foam Craft Brushes
- White, Pink, and Purple Ribbon
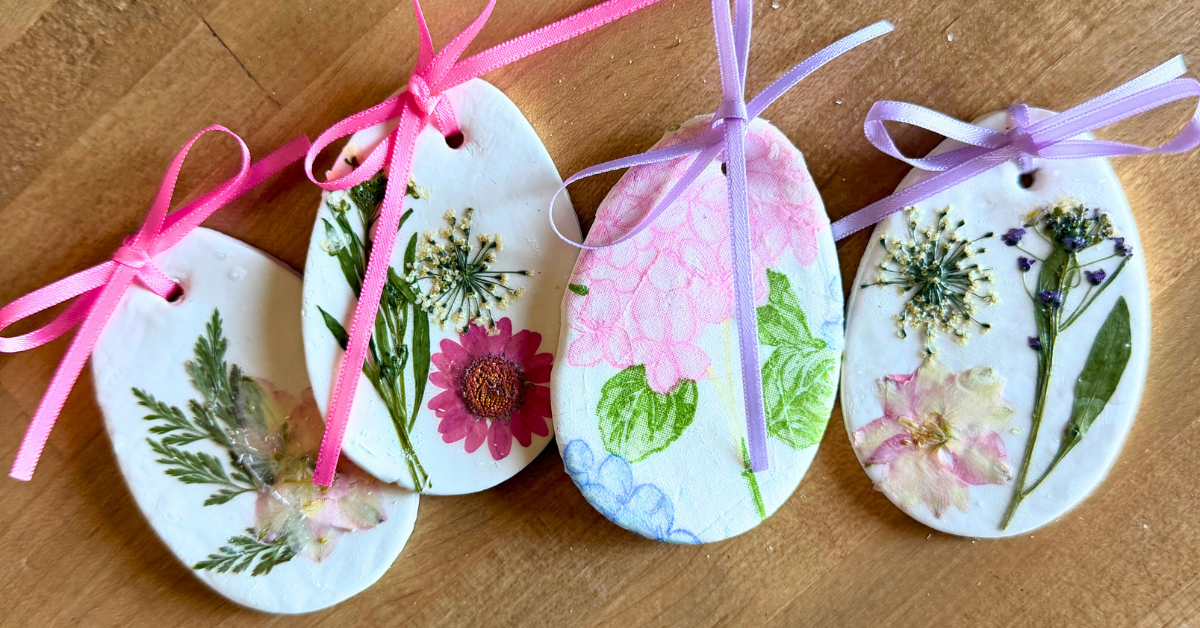
Clay Easter Eggs Idea #1: Lace Ribbon & Paint
After rolling out a slab of air-dry clay to about ¼ inch thick, press the lace ribbon onto the surface of the clay. Then roll over it with your rolling pin to press the pattern more deeply into the clay. Once the texture is imprinted across the clay, use your egg-shaped cookie cutters to cut out as many eggs as you’d like.
Air-dry clay can vary in drying time, but it’s generally ready after a couple of days. When it’s dry, you can paint the lace design! My lace eggs had a striped pattern, so that’s what I followed when painting them. So cute!
Idea #2: Decoupage Floral Napkins
I chose these beautiful pastel napkins for my decoupaged eggs. After rolling out the clay, I tore the napkin in half so I could use only the thin, patterned layer. Then I laid the napkin pattern-side up over the clay and used the egg-shaped cookie cutter to cut through both the napkin and the clay at the same time. Finally, I brushed a layer of Mod Podge over the top to seal everything in place.
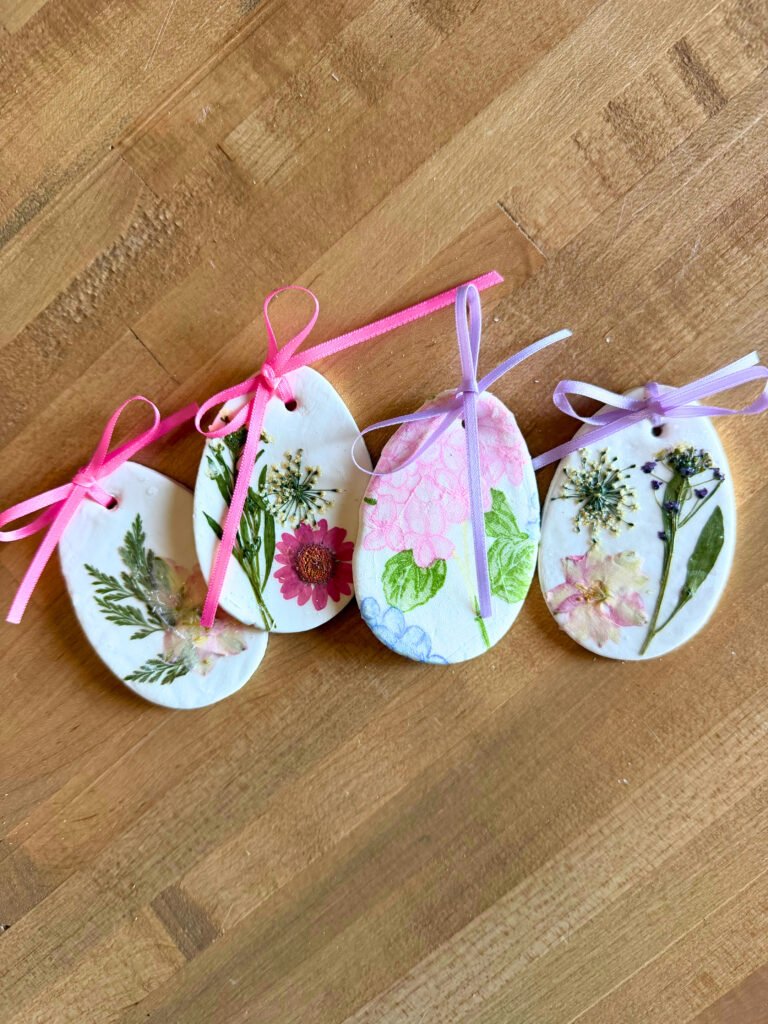
Clay Easter Eggs Idea #3: Dried Pressed Flowers
Spring is pretty much synonymous with flowers, so it just felt right to include some pressed blooms in my clay Easter eggs. Like before, you’ll cut out the clay with the cookie cutters and let it dry. Then, cover the eggs in Mod Podge and start placing the dried flowers on top. Once you have a design you love, dab Mod Podge on top of it to make sure the flowers stay where you want them.
Idea #4: Clay Easter Eggs Garland
If you want to make a garland like I did, be sure to make a hole at the top of each egg before the clay is dry. This is where the ribbon will feed through. I used these tools to make the holes!
I chose pink, purple, and white ¼ inch ribbon to tie bows to the top of each egg, and a long piece of ribbon to connect them all. This turned out to be such a fun way to display my new DIY decorations!
All done!
Watch the video below to see how it all came together! I love a fun, easy project that doubles as decor. What spring craft should I make next? Tag me in any fun ones you see on Instagram!