Updating My Kids’ Bathroom Tile on a Budget
I decided to upgrade my kids’ builder-grade bathroom with peel-and-stick tile. Best decision ever! I’m so happy with how this project turned out, and that it’s a budget-friendly way to upgrade your space. Follow along for my step-by-step kids’ bathroom tile tutorial!
Note: This post contains affiliate links. I may earn a commission at no extra cost to you. Thanks for supporting my content!
Supplies Needed:
- Tile (The original tile is no longer available, but I’ve linked a similar peel-and-stick tile.)
- Liquid Nails
- Mirror
- Light Fixture
- Caulk
- Caulk Gun
- Painter’s Tape
- Tile Spacers 1/16 inch
- Grout
- Shelves
- Trim (If you end up needing trim, you can get the wood from Home Depot or Lowe’s!)
- Faucet (Mine is out of stock, but I’ve linked a similar one!)
Step #1: Remove the Mirror and Existing Backsplash
The first step to the kids’ bathroom tile makeover: removing the mirror and backsplash. I put the painter’s tape crisscross on the mirror before removing it. It was just held on by a few screws and some glue on the wall, and it came off pretty easily. It’s just an awkward size to work with and a little heavy, so you can grab a helper if you need.
To take the backsplash off, I just scored the caulking with a razor blade and used a pry bar to get it off.
Step # 2: Attach the Tile
The peel-and-stick tile wasn’t sticking very well by itself, so I decided to use Liquid Nails. To cut the tiles, I just scored and snapped them using a razor blade and a straight edge. I used tile spacers to help space them evenly. Then, I used painter’s tape to hold the tiles on the wall while the glue set. After they all dried, I took off the painter’s tape.
Step #3: Grout the Kids’ Bathroom Tile
After the painter’s tape was removed, I grouted. I like to buy the premade grout. It’s less messy, perfectly mixed, and easier to work with. Just add the grout using a grout float and then wipe it off with a sponge! I like to do small sections at a time so the grout doesn’t dry too fast. It’s easier to wipe off the excess grout when it’s wet! Grouting it helps it to look more like real tile.
Step #4: Install a Trim Piece
Ceilings and walls are never straight. It’s just a fact of life. I had a gap on the left side of my wall where the tile didn’t meet the ceiling. To solve this little problem, I just got a piece of trim, painted it, and installed it. I used wood glue and my nailer to install. Now, it looks nice and clean along the top of my tile!
Step #5: Change the Light Fixture
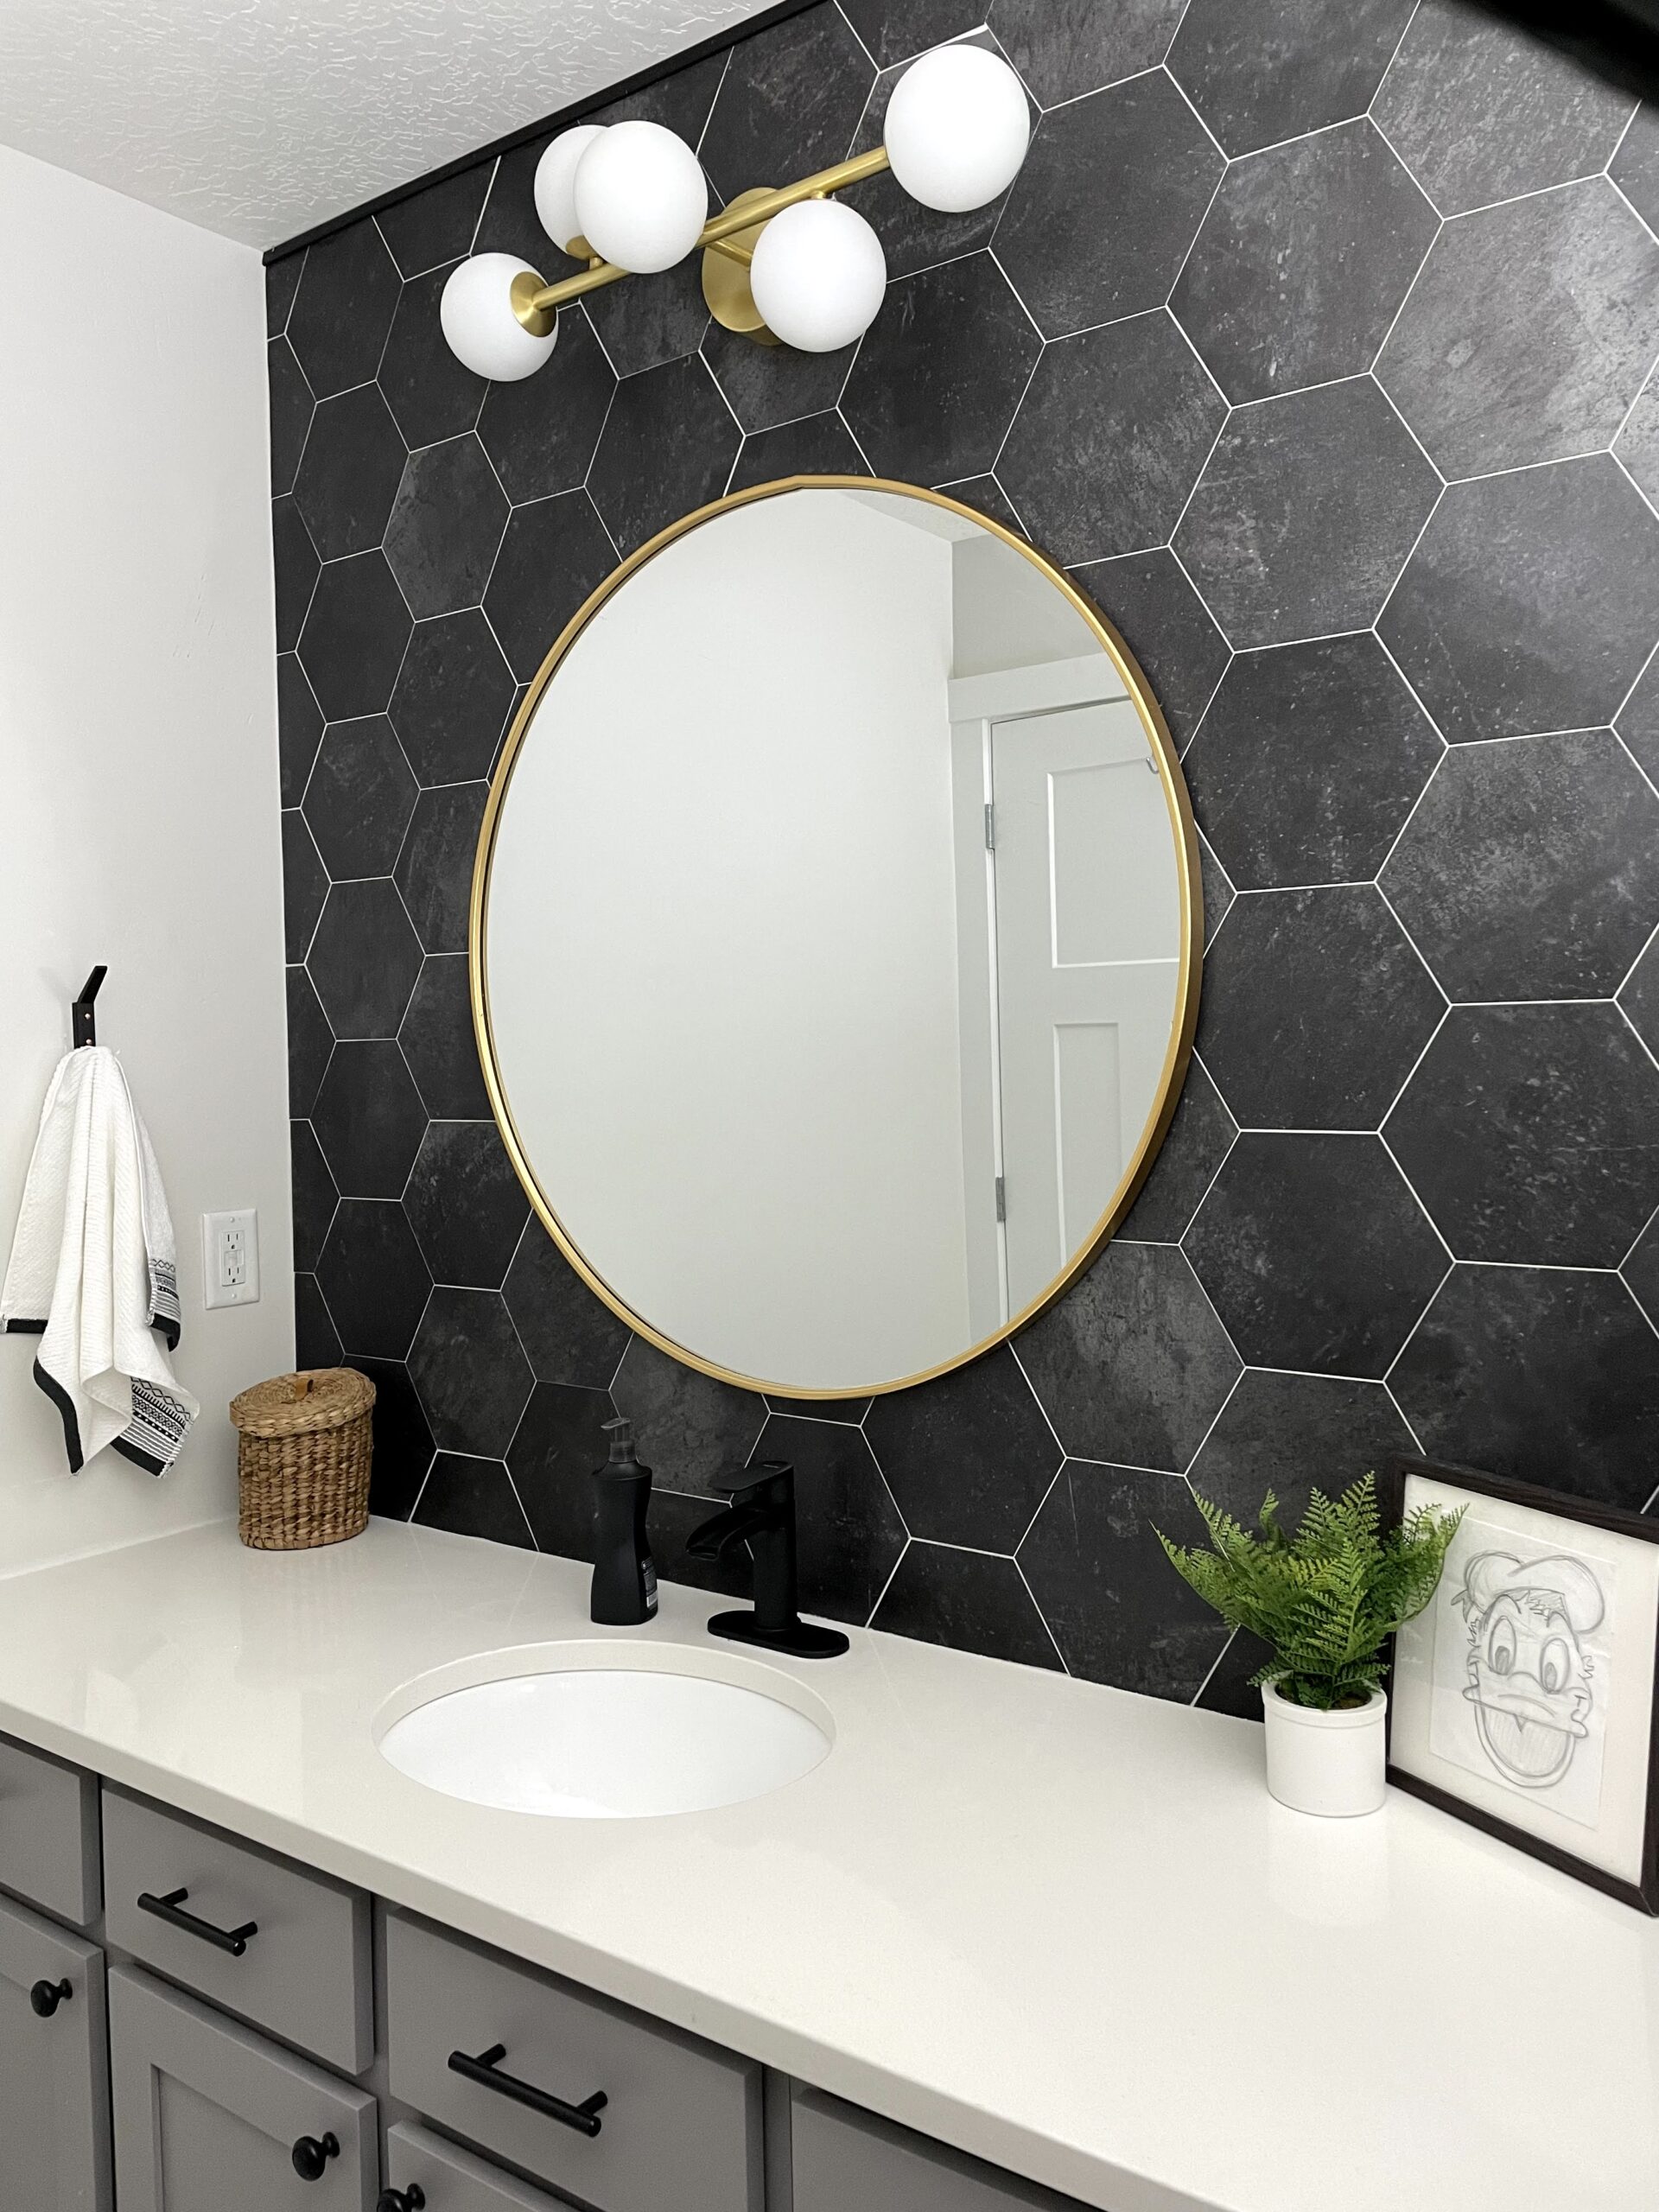
I switched out the light fixture for a more modern-looking one. I love the contrast of the gold with the dark tile. If you need some tips on changing out a light fixture, check out my blog post here!
Step #6: Add Shelves
I installed floating shelves on the wall for both storage and to add character. The shelves weren’t too hard to install. Because it was peel-and-stick tile, I was able to easily drill through the tile to hang them.
Step #7: Switch Out the Faucet
I switched out the previous faucet and installed a new one (similar). It’s actually pretty easy to do yourself! Most faucets come with installation instructions, but I also have instructions on how to do this below!
How to Add a New Faucet
- Turn off the water. It should just be a quarter turn on the valves under your sink. When the valve is perpendicular to the water line, it should be off. You can test it by turning the handles on your faucet and seeing if any water comes out.
- Detach the water lines from the old faucet.
- Remove the old faucet. You may have silicone or caulking around the edge of the old faucet. You will need to score that with a razor blade first to get the faucet off.
- Attach the water lines for the new faucet, hot to hot and cold to cold.
- Turn on the water and check under the sink for any leaks. If it does leak, chances are that you didn’t tighten the water lines good enough and just need to tighten them a little bit more
Step #8: Add Decor to Finish Your Kids’ Bathroom Tile Makeover
The last step was to add the finishing touches. I added this beautiful gold mirror. I love how it matches the light fixture and stands out against the black! Then I added some cute decor and baskets around the bathroom.
I love how it all turned out. It looks so much better than it did before. It has been years now since I initially did this kids bathroom makeover, and it still is holding up perfectly!
Follow along for more DIYs and fun at…