Modern French Country Part 4: Planter Fences
I’m at the finish line of this exterior home makeover, and boy, does it feel good to be (almost) done! The final project is to build planter fences around the foundation of my home to soften and hide the concrete. You can complete this quick, simple project in just a few hours, and the transformation is everything. Follow along to see the step-by-step process!
Note: This post contains affiliate links. I may earn a commission at no extra cost to you. Thanks for supporting my content! 🙂
Supplies:
- Circular Saw
- Cedar Fence Pickets
- Brad Nailer
- Square Dowels (Or any small, thin pieces of wood)
- Gel Stain (I used Golden Pecan)
- Paintbrush
How to Build Planter Fences
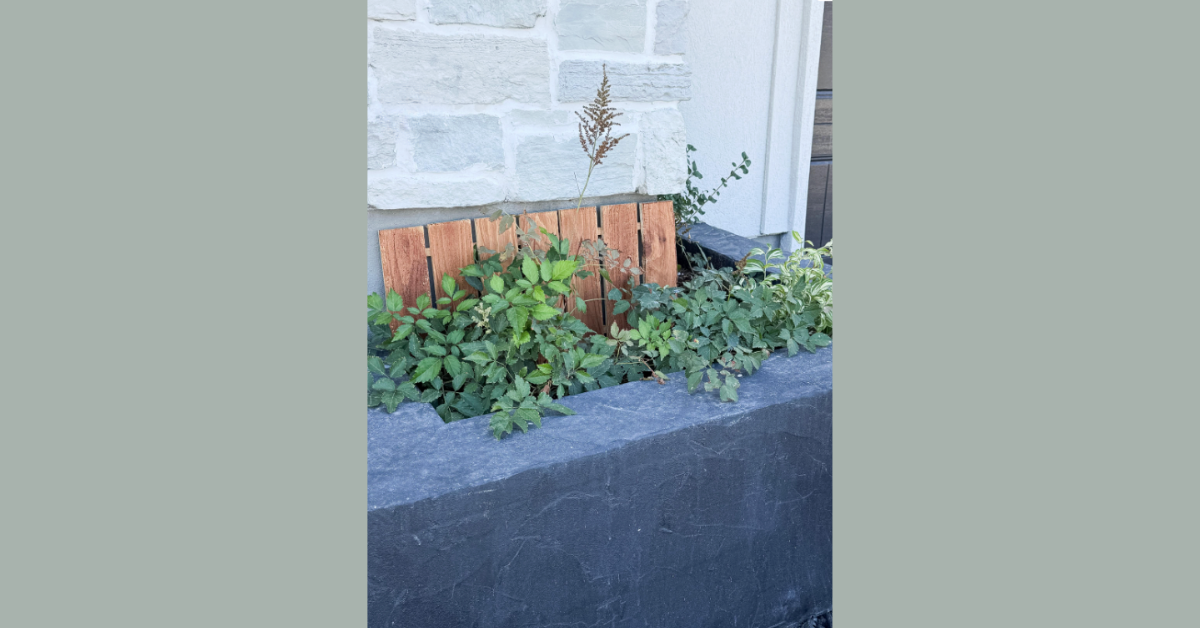
First, a little backstory. The original purpose of the cinderblock planters I built years ago was to help hide the concrete foundation at the front of my house. But unfortunately, the plants just weren’t growing enough to cover the foundation. So, I decided to build these planter fences.
Let’s begin! Start by cutting your fence pickets to the length of your foundation.
Next, take the square dowels (or any small, thin pieces of wood) and lay them across the back of the fence pickets. Nail the dowels to the pickets, attaching them. I did 2-3 dowels per fence section.
Last step! I wanted the foundation fence and faux wood door (which we’ll get to in a minute) to match, so I used the same color of stain for both. After they were dry, I put the pickets in the ground around the front of my house, covering the gray foundation. Such an easy fix!
Finally, I’ve finished my Modern French Country makeover!
Now this exterior home makeover is officially done! This was a multi-phase process that took a few months to accomplish, but I have to say, I love the results! It’s exactly what I was envisioning. Check out parts 1-3 of this makeover below!
- Part 1: White Paint & A Clean Slate
- Part 2: Overgrouted Stone
- Part 3: Concrete Stain & Faux Wood Door
Are you going to implement any of these projects to add curb appeal on a budget? Let me know in the comments! 🙂 And be sure to follow along on Instagram to see what I’m up to next!