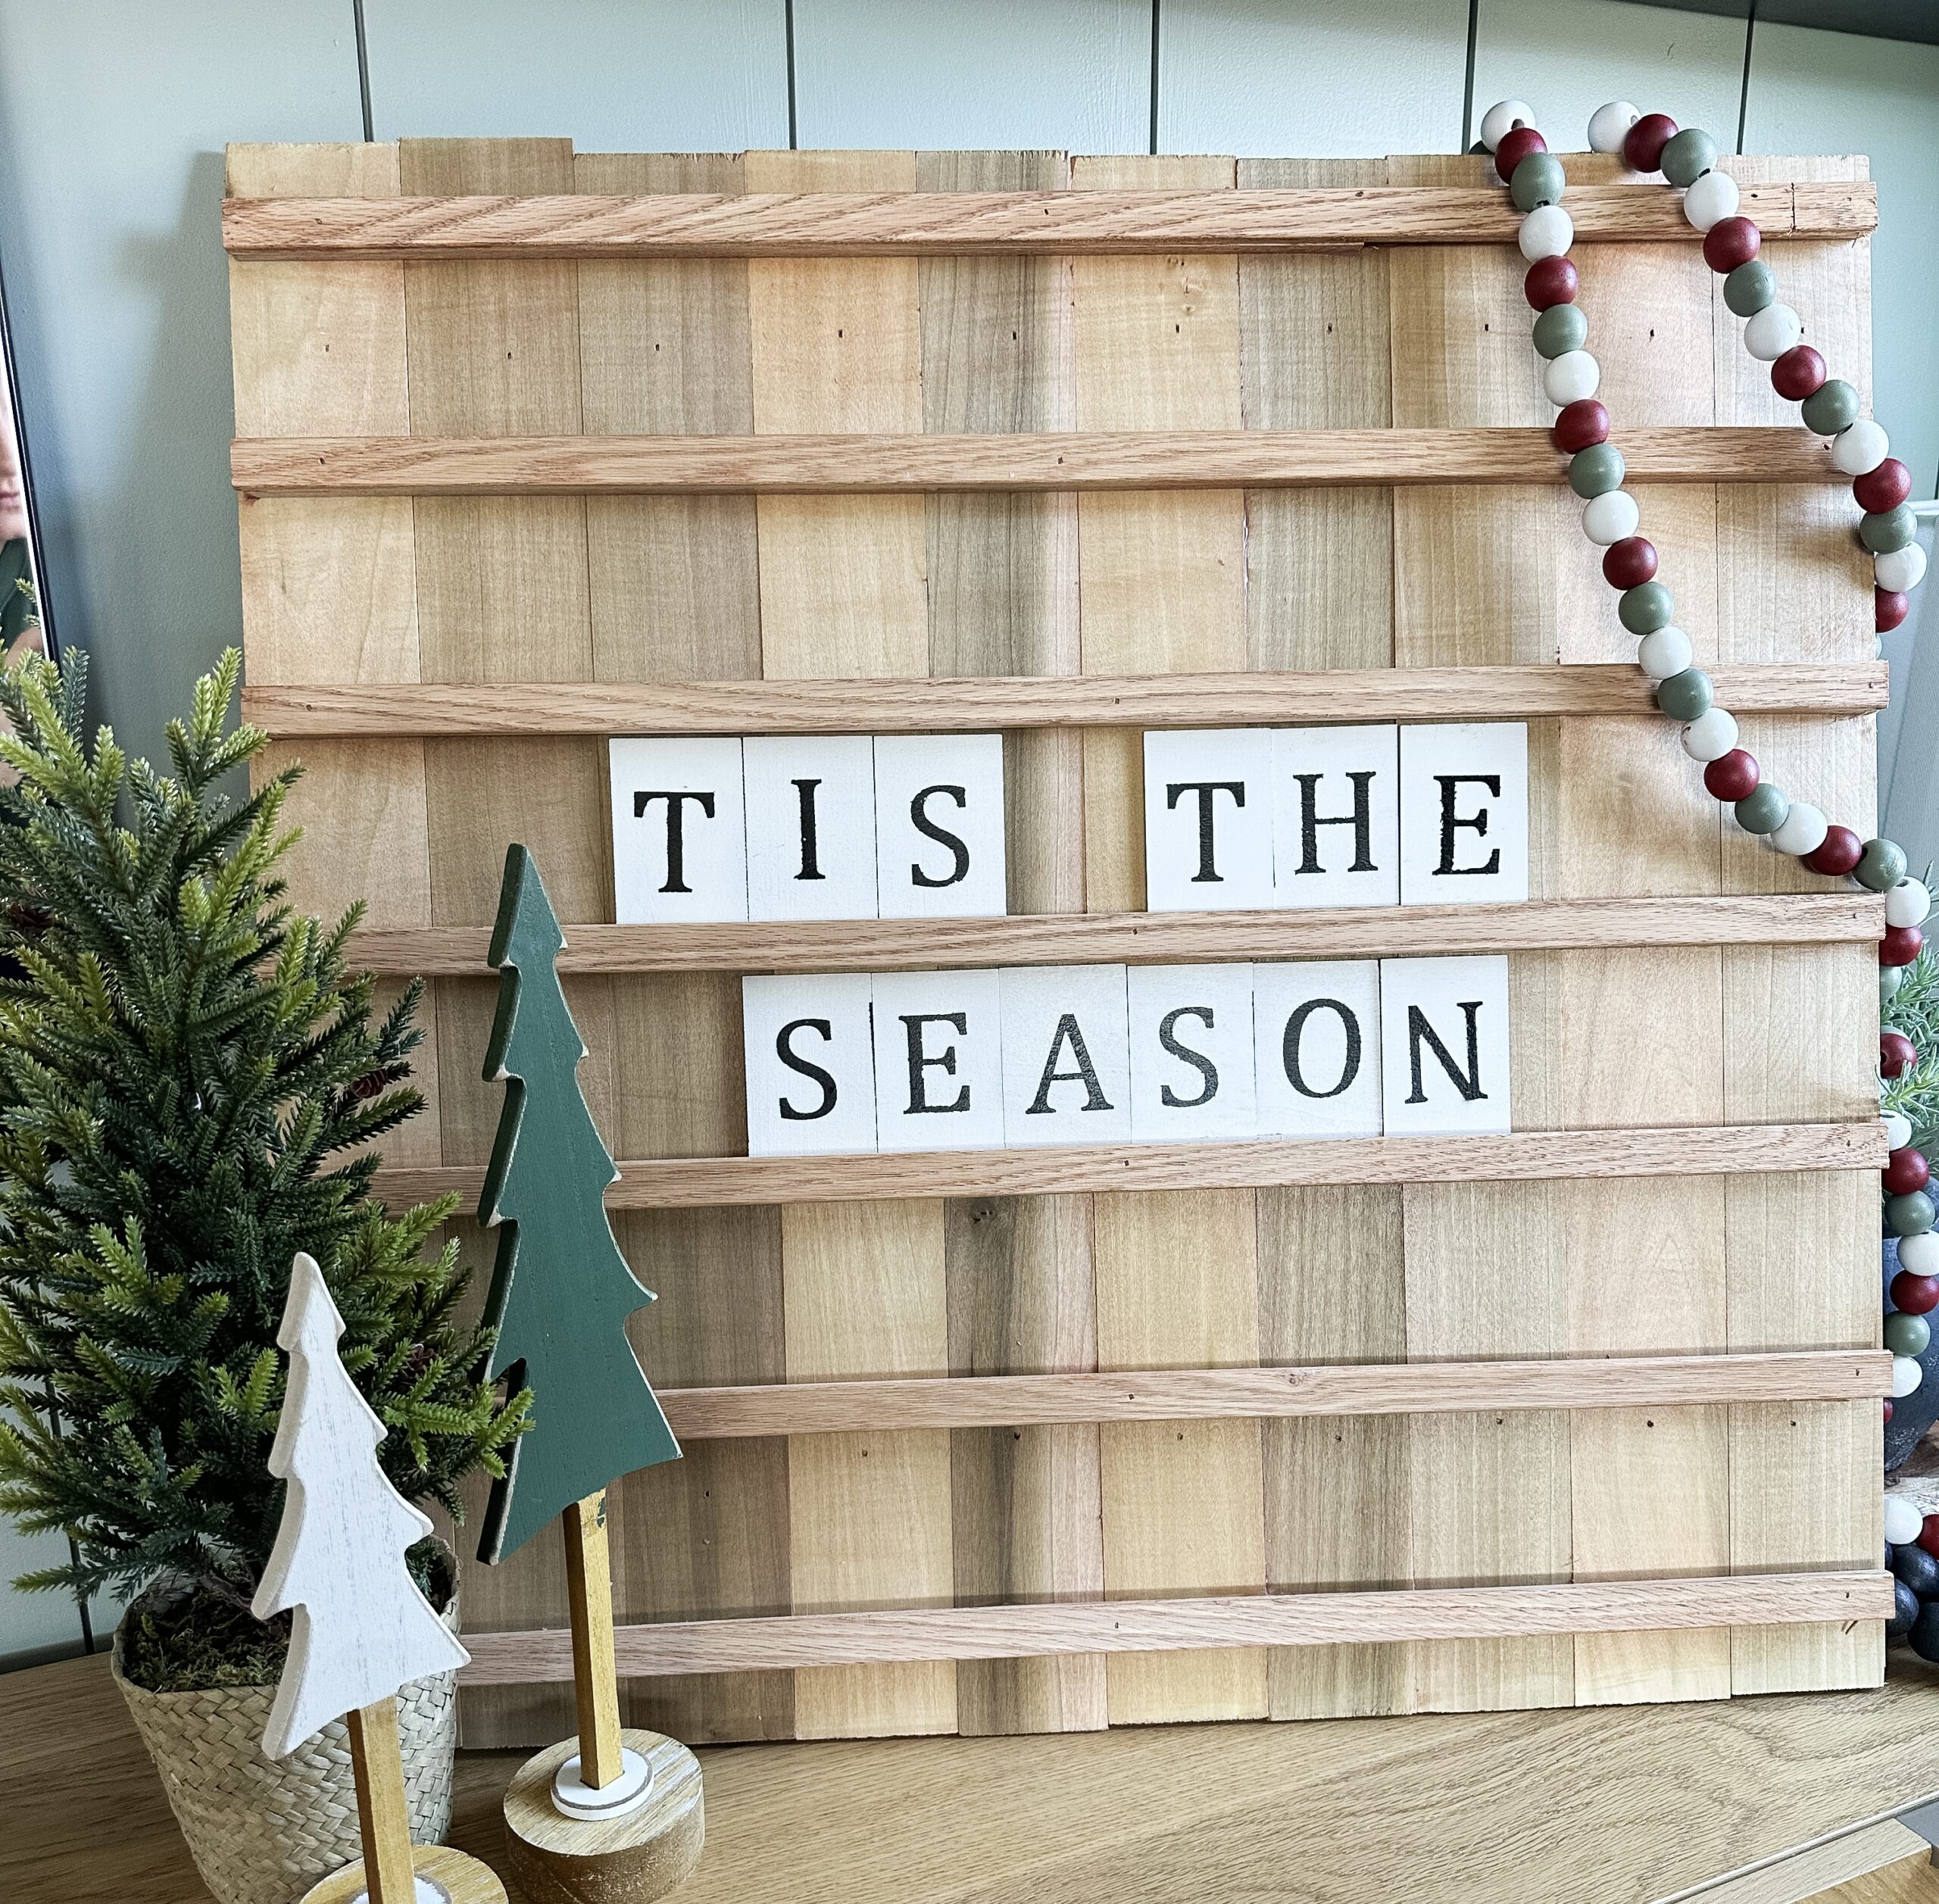
DIY Letter Board Magic: Crafting a Custom Letter Board at Home

Are you looking for a last-minute Christmas gift? Or maybe you have always wanted a letter board, but never got one. Well, now is your chance to make a DIY letter board! I swear it’s so easy! You can even do this with NO power tools. And, depending on how much time you have, this can easily be a one-day project! Are you ready? Let’s go!
First, run to the nearest Home Depot or Lowe’s and grab these supplies. Or dig through your scrap pile and see if you have anything similar that will work. See if they will cut the wood for you at the store. Some stores will, some won’t. If they don’t, you will need a saw for this.
You could also check your local hardware store. Some have precut wood, which would work perfectly for this!
DIY Letter Board Supplies:
- 1×2
- Thin Poplar Boards
- Square Trim
- Thin Trim
- Wood Rectangles
- Vinyl Letters
- Wood Conditioner
- Your Choice of Stain (This is similar to what I used)
- Polycrylic or Polyurethane
- Spray Paint
- Wood Glue
DIY Letter Board Step #1
Lay the 1×2 out about 5 inches shorter than the length of the poplar boards.
Step #2
Place a bead of glue along the top of the 1×2 and put the poplar boards across them, leaving about a 2.5-inch overhang on each side of the 1×2.
DIY Letter Board Step #3:
Using your wood rectangles as spacers, glue the square trim pieces on. Make sure you can easily slide the rectangles between the trim pieces, so they are evenly spaced. If you want to add a couple of nails here, you can, but that is totally optional. I did, because I have a nail gun, so why not?
Step #4:
Now you will take the thin trim piece and glue it on top of the square trim, aligning the bottom so that there is a little lip on one of the tops, so the letter pieces do not fall off.
Step #5:
Time to seal it all up! First, apply wood conditioner to your board. Remember, wood conditioner is like a primer for stain. It creates a clean, even surface for the stain to sit on. Then, stain it whatever color you want. Finally, seal it with polycrylic or polyurethane. Some stains also have built-in polycrylic or polyurethane, which would also work!
Letter Board LAST STEP:
While the letter board part dries up, we are going to start on the letters. I painted the wood rectangles white with spray paint.
Once that was dry, I applied the vinyl letters. I suggest giving the letters a nice, clear coat to seal it all up. Then, just arrange the words/letters on it however you want, and you are all done!

Is this something you would try? Would you make this letter board as a gift, or for yourself?
Follow along for more DIYs and fun at…


One Comment