Trash to Treasure: Repurposed Nightstand into DIY Desk
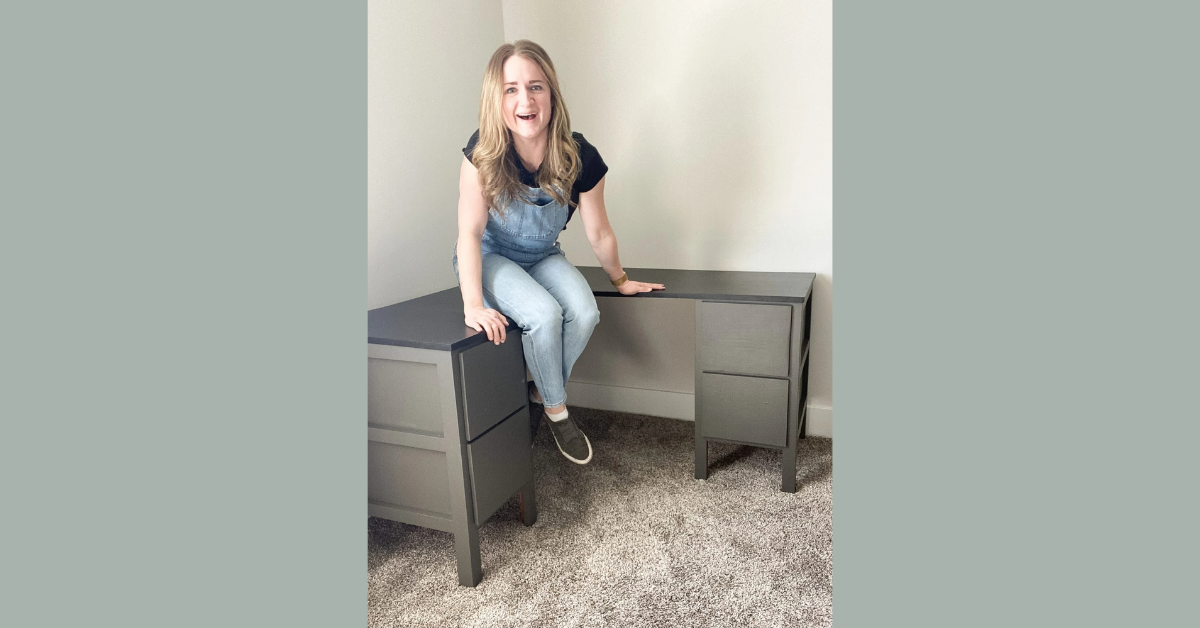
Creating a DIY desk from old nightstands is a fun and fairly simple furniture repurpose project! Even if you cannot completely recreate this exact project, I hope this post inspires you to look around at what you have and see how you can repurpose it into something you need. Let’s get started on this DIY desk build!
Note: This post contains affiliate links. I may earn a commission at no extra cost to you. Thanks for supporting my content! 🙂
DIY Desk Supplies:
- Measuring Tape
- Plywood
- Angle Finder
- Painters’ Tape
- Circular Saw
- Woodworking Clamps
- Pocket Hole Jig
- Wood Filler
- Primer
- 220-Grit Sandpaper
- Your Choice of Paint and Hardware
- Cabinet Hardware Install Guide
Step #1: Lay Out & Measure Your DIY Desk
Before you can get started, you need to decide the size and shape you want your desk to be. I was making my desk a corner, L-shaped desk. I placed the two nightstands where I wanted them and measured how big I needed the top to be. Which brings us to step two of this DIY desk…
Step #2: Cut & Assemble the Desk’s Top
Using the measurements from step one, cut your plywood to the correct size. I am making an L-shaped desk, and I already had two pieces of wood that I was going to use. I cut the ends at a 45-degree angle so I could connect them into the L-shape.
Using my digital angle finder, I found and marked the 45-degree line on the wood. Then, I put some painters’ tape on the line so that when I cut it, it would not splinter.
The best trick I have found to get a straight line using a circular saw is to clamp a long, straight piece of wood on and run the edge of the saw along it as you cut. I cut both pieces and connected them using pocket holes on the bottom.
Step #3: Wood Fill, Prime, & Paint the Top
Once the top is assembled, use wood filler to fill all seams. When that is dry, prime the wood.
After the primer is dry, use 220-grit sandpaper and give it a quick sanding to smooth out the bumps. Paint the top with your favorite paint and let it dry as we move onto the drawers.
Step #4: DIY Desk Drawer Fronts
I wanted to make new drawer fronts because I did not like the curved edges on the existing drawers. To remove the existing drawer fronts, you simply unscrew them from the inside. I used the original drawer fronts as a template for the dimensions on the new ones.
Then, I primed, sanded, and painted the drawer fronts before reattaching them.
Step #5: Paint Everything Else
Now it’s time to pull the desk together by painting the nightstands the same color as the drawer fronts.
Step #6: Add Hardware to Your DIY Desk
I think choosing the hardware was the hardest part of this project! So, I picked up several different options, and ended up going with THESE pulls. Once I decided which hardware option I wanted, I used THIS guide to drill holes, then installed the pulls.

And that is it! Simple and fun! I love that I was able to repurpose the nightstands that would have otherwise been thrown out or donated. What furniture do you have that you could repurpose?
Follow along for more DIYs and fun at…

