Faux Brick Wall: Tips, Tricks, and Pinterest Fails
Pinterest FAIL, or the most amazing story of redemption? I am going to say it was the best story of redemption! This project challenged me the entire way, but the end product is better than I could have hoped for. When I took on the faux brick wall treatment that I had seen floating around Pinterest, I was super hopeful. I thought it would fit in perfectly with my boys’ superhero bedroom, and everything I had seen made it look so easy. Hang the faux brick, apply spackle, and have a great-looking wall treatment. WELL… That was not my experience. Perhaps it was simply a matter of preference, or perhaps it just did not work for me. Regardless, I am going to lay it all out for you! Ready?

Step #1: Install the Faux Brick Wall
First things first: you need to get the faux brick on the wall. When putting two pieces together, I recommend cutting along the “mortar” line, so you can puzzle-piece the sheets together rather than having a harsh line. It’s way easier to hide the seam when you do it this way.
I used Liquid Nails and regular nails to hang the faux brick. You can do a combination of both, like I did, or just use regular nails. It depends on how permanent you want the faux brick wall to be. If you plan to take it down in a few years and do not want to have to replace drywall, you should probably opt for regular nails.
Pro Tip: How to Cut Around Outlets
- Take the outlet plate off, turn it around, and put it back on backward.
- Run some paint or toothpaste along the frame.
- Place your piece of faux brick on the wall were it will go and press it on the wet paint/toothpaste. When you remove it, you will have an outline of exactly where the outlet goes.
- Use your jig saw to cut it out. I recommend cutting it about 1/2 in smaller than that, so your plate completely covers the hole. Seamless!
Step #2: Caulk
Next, I caulked around all the edges of the faux brick and where it met the side walls, ceiling, and baseboards. This gives it a nice, finished look.
Step #3: Cover the Faux Brick Wall
This is where things got a little tricky for me, so I’m leaving a disclaimer here: Keep in mind that the red from the faux brick shows through the spackle. In my room, it looked kind of pinkish-orange. If you are not going for that look, keep reading for the techniques I found to cover it (found after step 4)!
Once your faux brick is up, it’s time to cover it. The color you want will determine how you do this step. I will tell you how I wish I had done it, and then I’ll go over the other options below. Because at the end of the day, there is no right or wrong way to do this. Only what you want and like!
I wanted it white, and I did not want the red from the brick to show through. What I should have done was prime the wall with WHITE primer first, and then go back over it with the spackle. For the record, my favorite primer is B-I-N shellac-based primer. It is, hands down, the best at hiding colors. So, if you’re going for a white faux brick wall, go ahead and prime the space, then spackle it.
Be sure to use a putty knife, as it makes this part much easier!
Step #4: Paint! (Optional)
Another thing I noticed is that the spackle was really chalky once it dried. And I can only imagine the mess it would have made in my boys’ room. So between the reds and oranges showing through and it being chalk-y, I ended up just painting the whole wall white. I actually really liked how it looked, so I am okay with it!
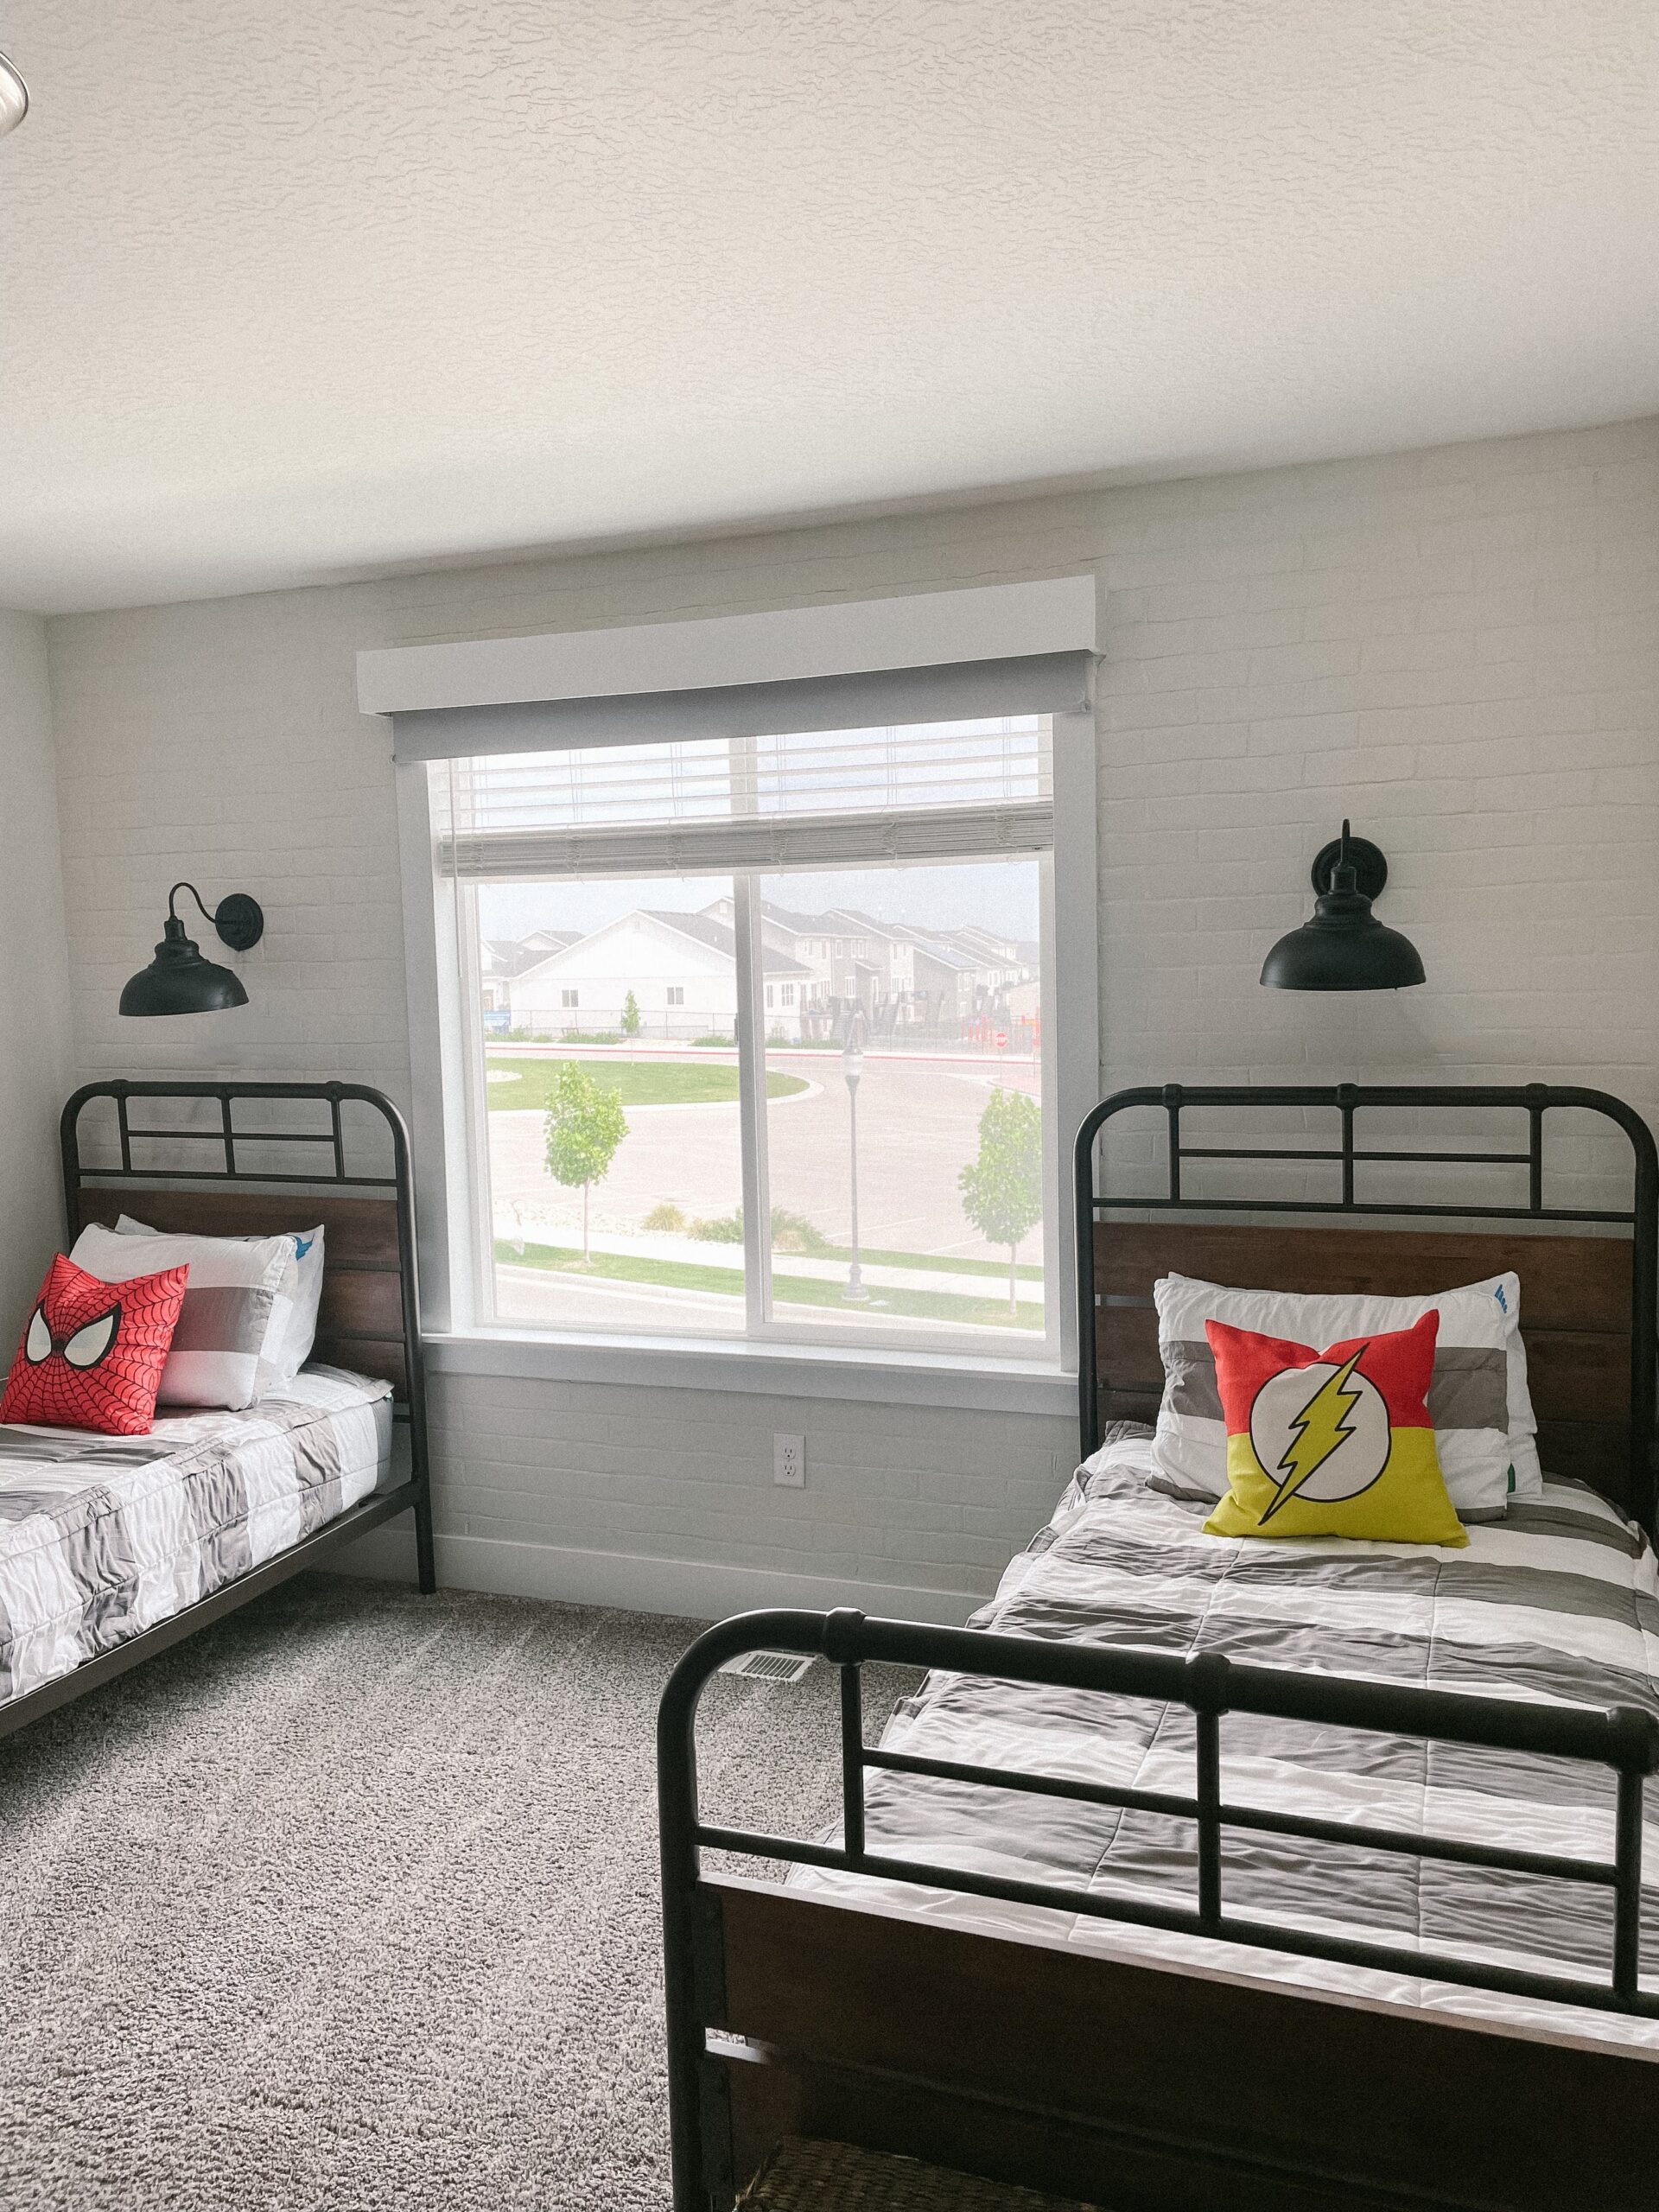
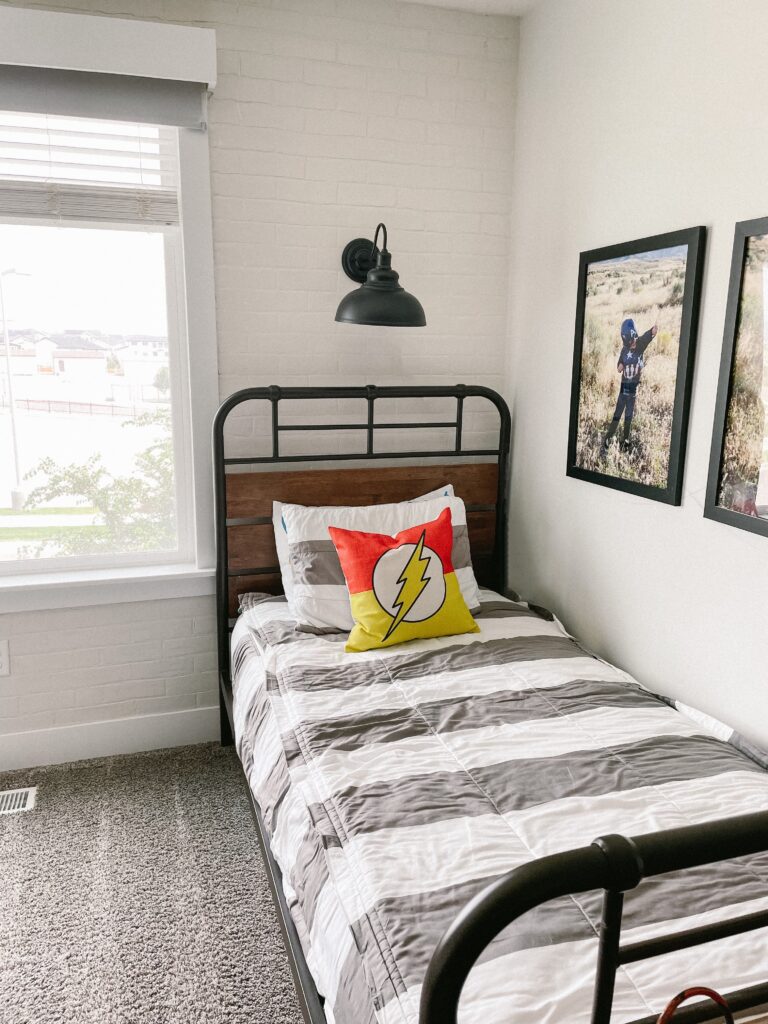
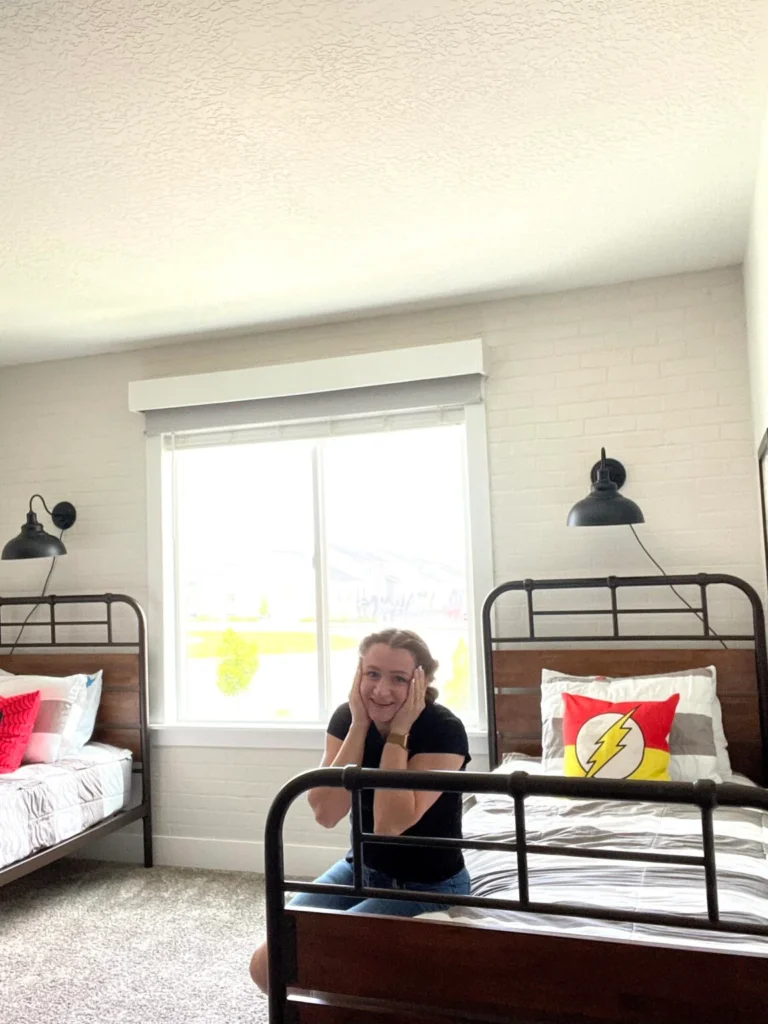
The Final Faux Brick Wall
And to finish off this faux brick wall, I got plug-in sconces and hung them above both beds. The exact ones I got are sold out, but these are similar. I just love how it turned out!
Now, are you ready for the experiment on different applications and base coat vs no base coat?
The Faux Brick Wall Experiment
For this experiment, I tested different base coats with spackle and with joint compound. Here are my results.
Something to note: The photo does not do the colors justice. However, it does give you an idea of the different application methods and how they look dry without anything on top.
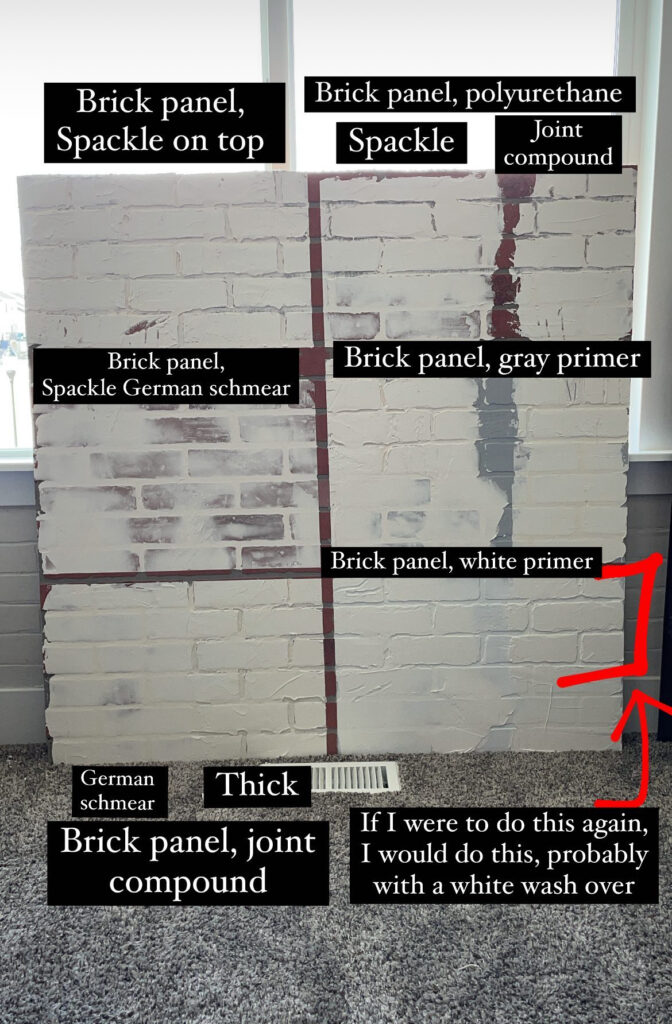
- Brick panel with spackle on top, no base coat: You can see the orange color coming through at the brick seams.
- Adding polyurethane directly to the brick, then spackle or joint compound on top: You could still see the orangish color coming through, and there was not much difference between how the spackle and joint compound looked.
- Gray primer: I could still see the orangish-red color coming through. I expected it to really cover the red, but it did not. If you want a pinkish-orange tint, use a polyurethane or gray primer.
- German schmear: I think that is a style that you either like or don’t like, but it was basically exactly as I expected. I just wanted more definition of the individual bricks. German schmear tends to fill in the mortar lines and make it more of a flat surface. If you like to see the red brick and don’t mind there being less definition of the lines, do German schmear.
- White primer: Definitely hid the red and orange the best. If you want it completely white, use a white primer, then spackle and paint it white.
Regardless of what you do, I am sure it will look amazing in your space, and I cannot wait to see what you do!
Follow along for more DIYs and fun at…