Office Makeover Part 3: Shiplap Ceiling
Summer and early fall were filled with travel, sickness, fun, and outdoor projects. But the chill in the air has me headed back inside to work on completing a project that’s been on the back burner for the last few months: my office! After building these gorgeous built-ins and installing a peel-and-stick wallpaper mural, it’s time to turn my attention to the ceiling. I may or may not have damaged it when building my shelves, and rather than touching it up with some paint, I decided it was the perfect opportunity to try something I’ve been wanting to do for a while: installing a shiplap ceiling. Follow along as I share how you can recreate this project on your own, and everything that trial and error taught me on the way!
Note: This post contains affiliate links. I may earn a commission at no extra cost to you. Thank you for supporting my content! 🙂
Shiplap Ceiling Supplies:
For the Beams:
- Stud Finder
- Wood for Beams
- 2-in x 4-in x 2-ft (Anchor)
- 1-in x 6-in x 12-ft (Bottom piece)
- 1-in x 3-in x 12-ft (Sides)
- 1/4-in x 2-in x 4-ft (End cap trim)
- Stain
- Glue
- Nails
- Screws
- Nail Gun or Drill
- Wood Filler
- Paintbrushes for Touchups
For the Shiplap Ceiling:
Part #1: Install the Beams
This wasn’t my first time installing beams—I added some to our primary bedroom a few years ago! This blog post gives a comprehensive tutorial (plus videos!) on how to do that, but I’ll share an overview here too.
Heads up: Ceilings and walls often aren’t completely level, which is common, but it makes projects like this a little tricky. I had to make lots of cuts to make sure everything fit correctly. Still, I’d take doing all that work again for my ceiling to look this beautiful!
Find the Studs
First, I found the ceiling studs. This is important because screwing the beam into the studs is the best way to ensure it is solid and secure. I used a stud finder, then put a piece of tape to mark the spots where the studs were. Tip: Mark the stud a few inches away from where you will actually install the beam, so you don’t cover the line and then not know where the studs are.
Install an Anchor
I used a 2-in x 4-in x 2-ft board as the anchor piece for each beam, screwing the wood into the studs that I marked.
Build the Beam’s Side Pieces
There are a few ways to make a beam, but I settled on my tried-and-true technique I’ve used in the past. I glued and nailed the 1-in × 3-in × 12-ft boards for the beam sides to make a U shape.
Hang the Beam
Once your anchor is installed and the beam is assembled, it’s time to put the beam together. You can either use a nail gun and nail the beam to the anchor, or you can use a drill and screws. If you do screws, I recommend pre-drilling the screws into the beam, so once you have it in place, you just finish drilling them in, instead of having to get the screw started. After repeating it on the other side, I had a long “U” shape open at the bottom.
Attach the Bottom of the Beam
Next, I used a 1-in x 6-in x 12-ft board for the bottom face of the beam, nailing it in place.
Stain
And finally: staining! Watch the video below for a fun DIY staining hack.
Part #2: Adding the Shiplap Ceiling
Mark the Studs & Prep the Shiplap
Now that the beams were installed, it was time for the main event: shiplap ceilings! After marking the studs in the ceiling again, I cut the shiplap boards and stained the wood to match the beams.
Install the Shiplap Boards
Next, I installed each piece with my nail gun, using a rubber mallet to make sure all the wood fit just right. I got so excited when it all started taking shape. There’s nothing like seeing your DIY visions come to life!
Add Trim to the Endcaps & Do Touch Ups
I wanted the beams to have a little extra character, so I used the ¼-in × 2-in × 4-ft pieces for decorative trim on the end caps. It’s a simple detail, but it really made the beams look more intentional.
And of course, no project is complete without a bit of finish work! In this case, that meant touching up the trim around my built-in bookcases.
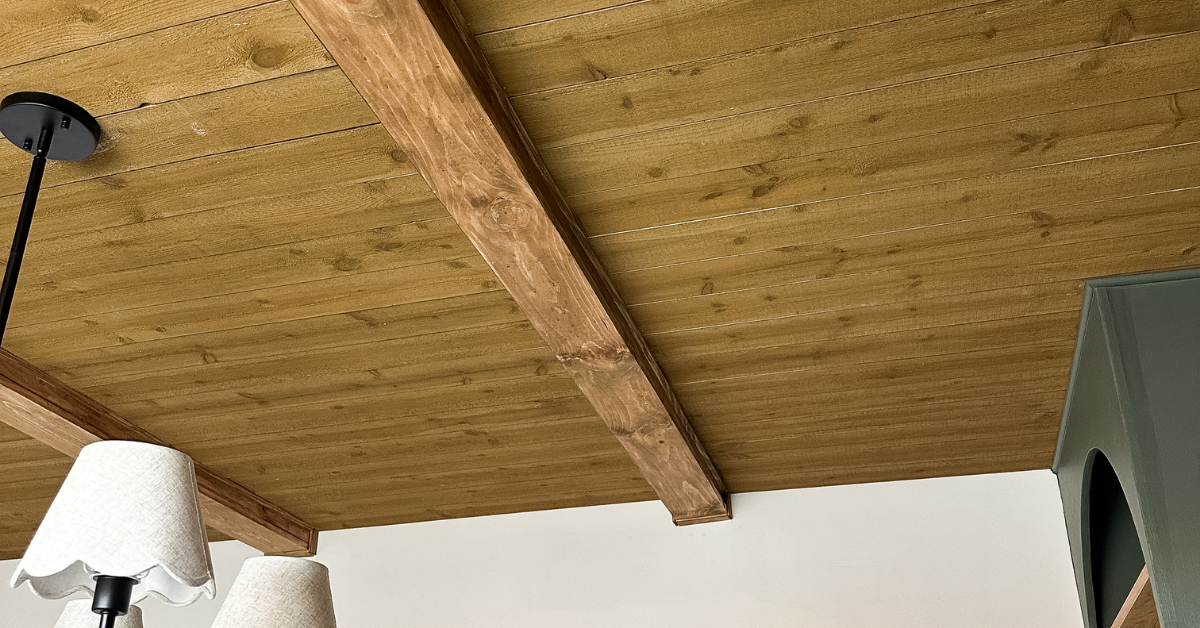
Shiplap Ceiling Reveal
This project made such a difference in helping me achieve that cozy home office vibe I was after. I love how the wood looks with the dark green cabinets. And this cute chandelier is the icing on the cake!
I’m already thinking about other areas of my home that I can add a shiplap ceiling to. Are you going to try this project too? Let me know how it goes in the comments! And if you haven’t already, be sure to check out part 1, part 2, and part 4 of this home office makeover!
Follow along for more DIYs and fun at…