Garage Makeover Part 1: Preparation
I have wanted to do a full garage makeover for as long as I have been DIYing. It was always something that I put off and said I would do later, but later never comes. And THEN the saga of the mice started. Our neighborhood was experiencing an increase in mice. I started seeing them in my yard and tried not to overreact. But when I started seeing their droppings in my garage, that was it!
The thought of those pesky little animals being in my garage and working their way to my house was enough to make me start the garage makeover! I had so many other projects I was excited to do, but it was now or never on this garage, so I just started! I’ll get into everything I did along the way, and I cannot wait to show you the final results at the end. It is so good! Better than anything I could have imagined.
Note: This post contains affiliate links. I may earn a commission at no extra cost to you. Thanks for supporting my content! 🙂
Garage Makeover Step #1: Clean Out the Garage
After years of project materials, kids’ toys, tools, and yard equipment piling up in my garage, I knew I needed to get the entire thing cleared out and cleaned up really well before starting any projects. So, the first thing was to clear out the entire garage. As I cleaned it out, I also sorted through things and threw away or donated anything I no longer wanted or used. This is my least favorite part of this project.
Once everything was cleared out, I cleaned it… Like bleached everything, top to bottom! The thought of mouse poop being in here grossed me out! So nothing was safe from the bleach.
Step #2: Paint
No garage makeover is complete without painting your drywall walls. And my garage was no exception. The biggest tip I have when painting a large space, like the garage, is to get the extra-wide paint rollers! The 18-inch rollers make the job go so much faster.
I painted all the walls and ceiling white. Honestly, the only reason I picked this color is because I had so much left over from other projects that I only had to buy a little bit, which was really nice!
I was originally only planning on painting the walls, but then I could not unsee the ceiling, so I decided to just paint it all. I am glad I did, but my neck and shoulders were not happy. It took forever and was a pain, but I am glad I did it.
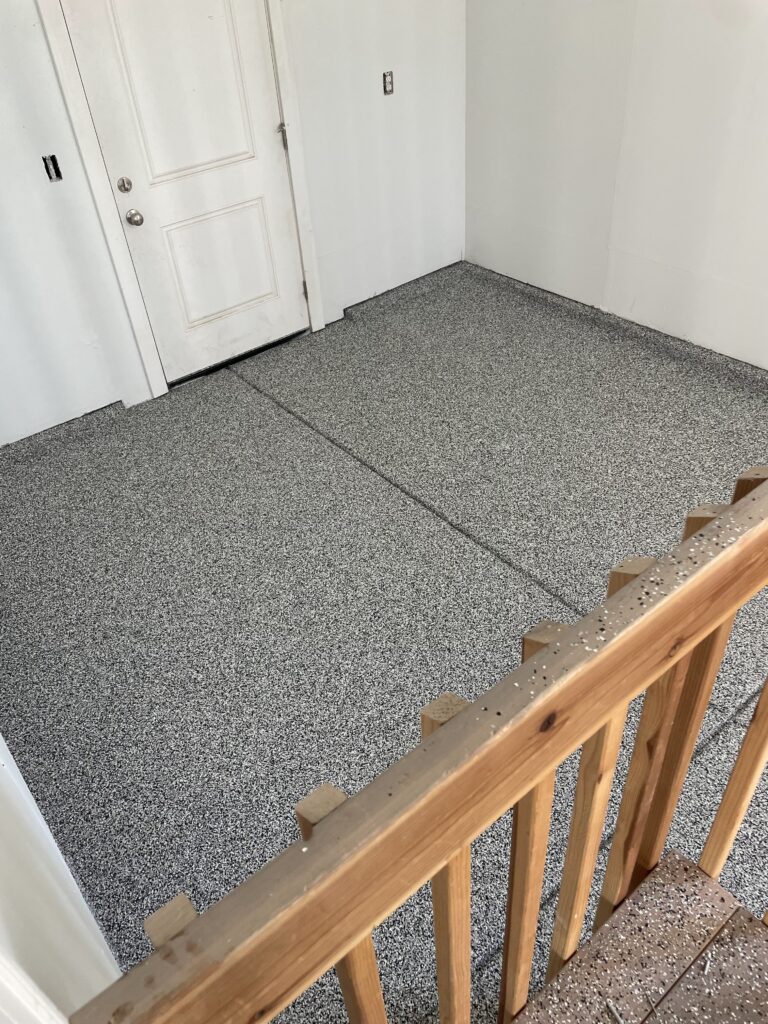
Step #3: Floors
Even though I am a DIYer and I could have absolutely done them myself, I decided to hire out the floors. We had a lot going on at that time, plus, it was starting to get cold, and I needed to get this project done ASAP. It would have probably taken me a week or more to do, but the local company that did them for me had them done in just a few days! They did a great job, and my kids loved being able to help!
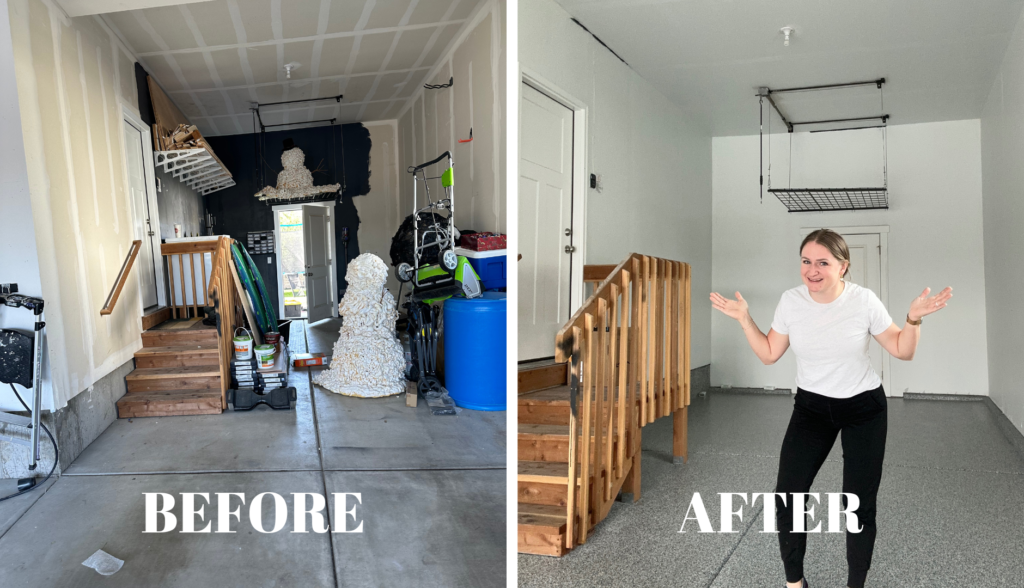
Phase 1 was not the most fun phase. I did not love painting the walls, and cleaning was also not very fun. But I think the transformation is incredible! What do you think?
Phase 1 of the Garage Makeover Reveal

Now that phase one of the garage makeover is complete, it’s time to move on to the fun stuff! Click HERE to see phase two of the Garage Makeover. And don’t forget to follow along on Instagram to see the latest DIY project I’m up to!
Follow along for more DIYs and fun at…