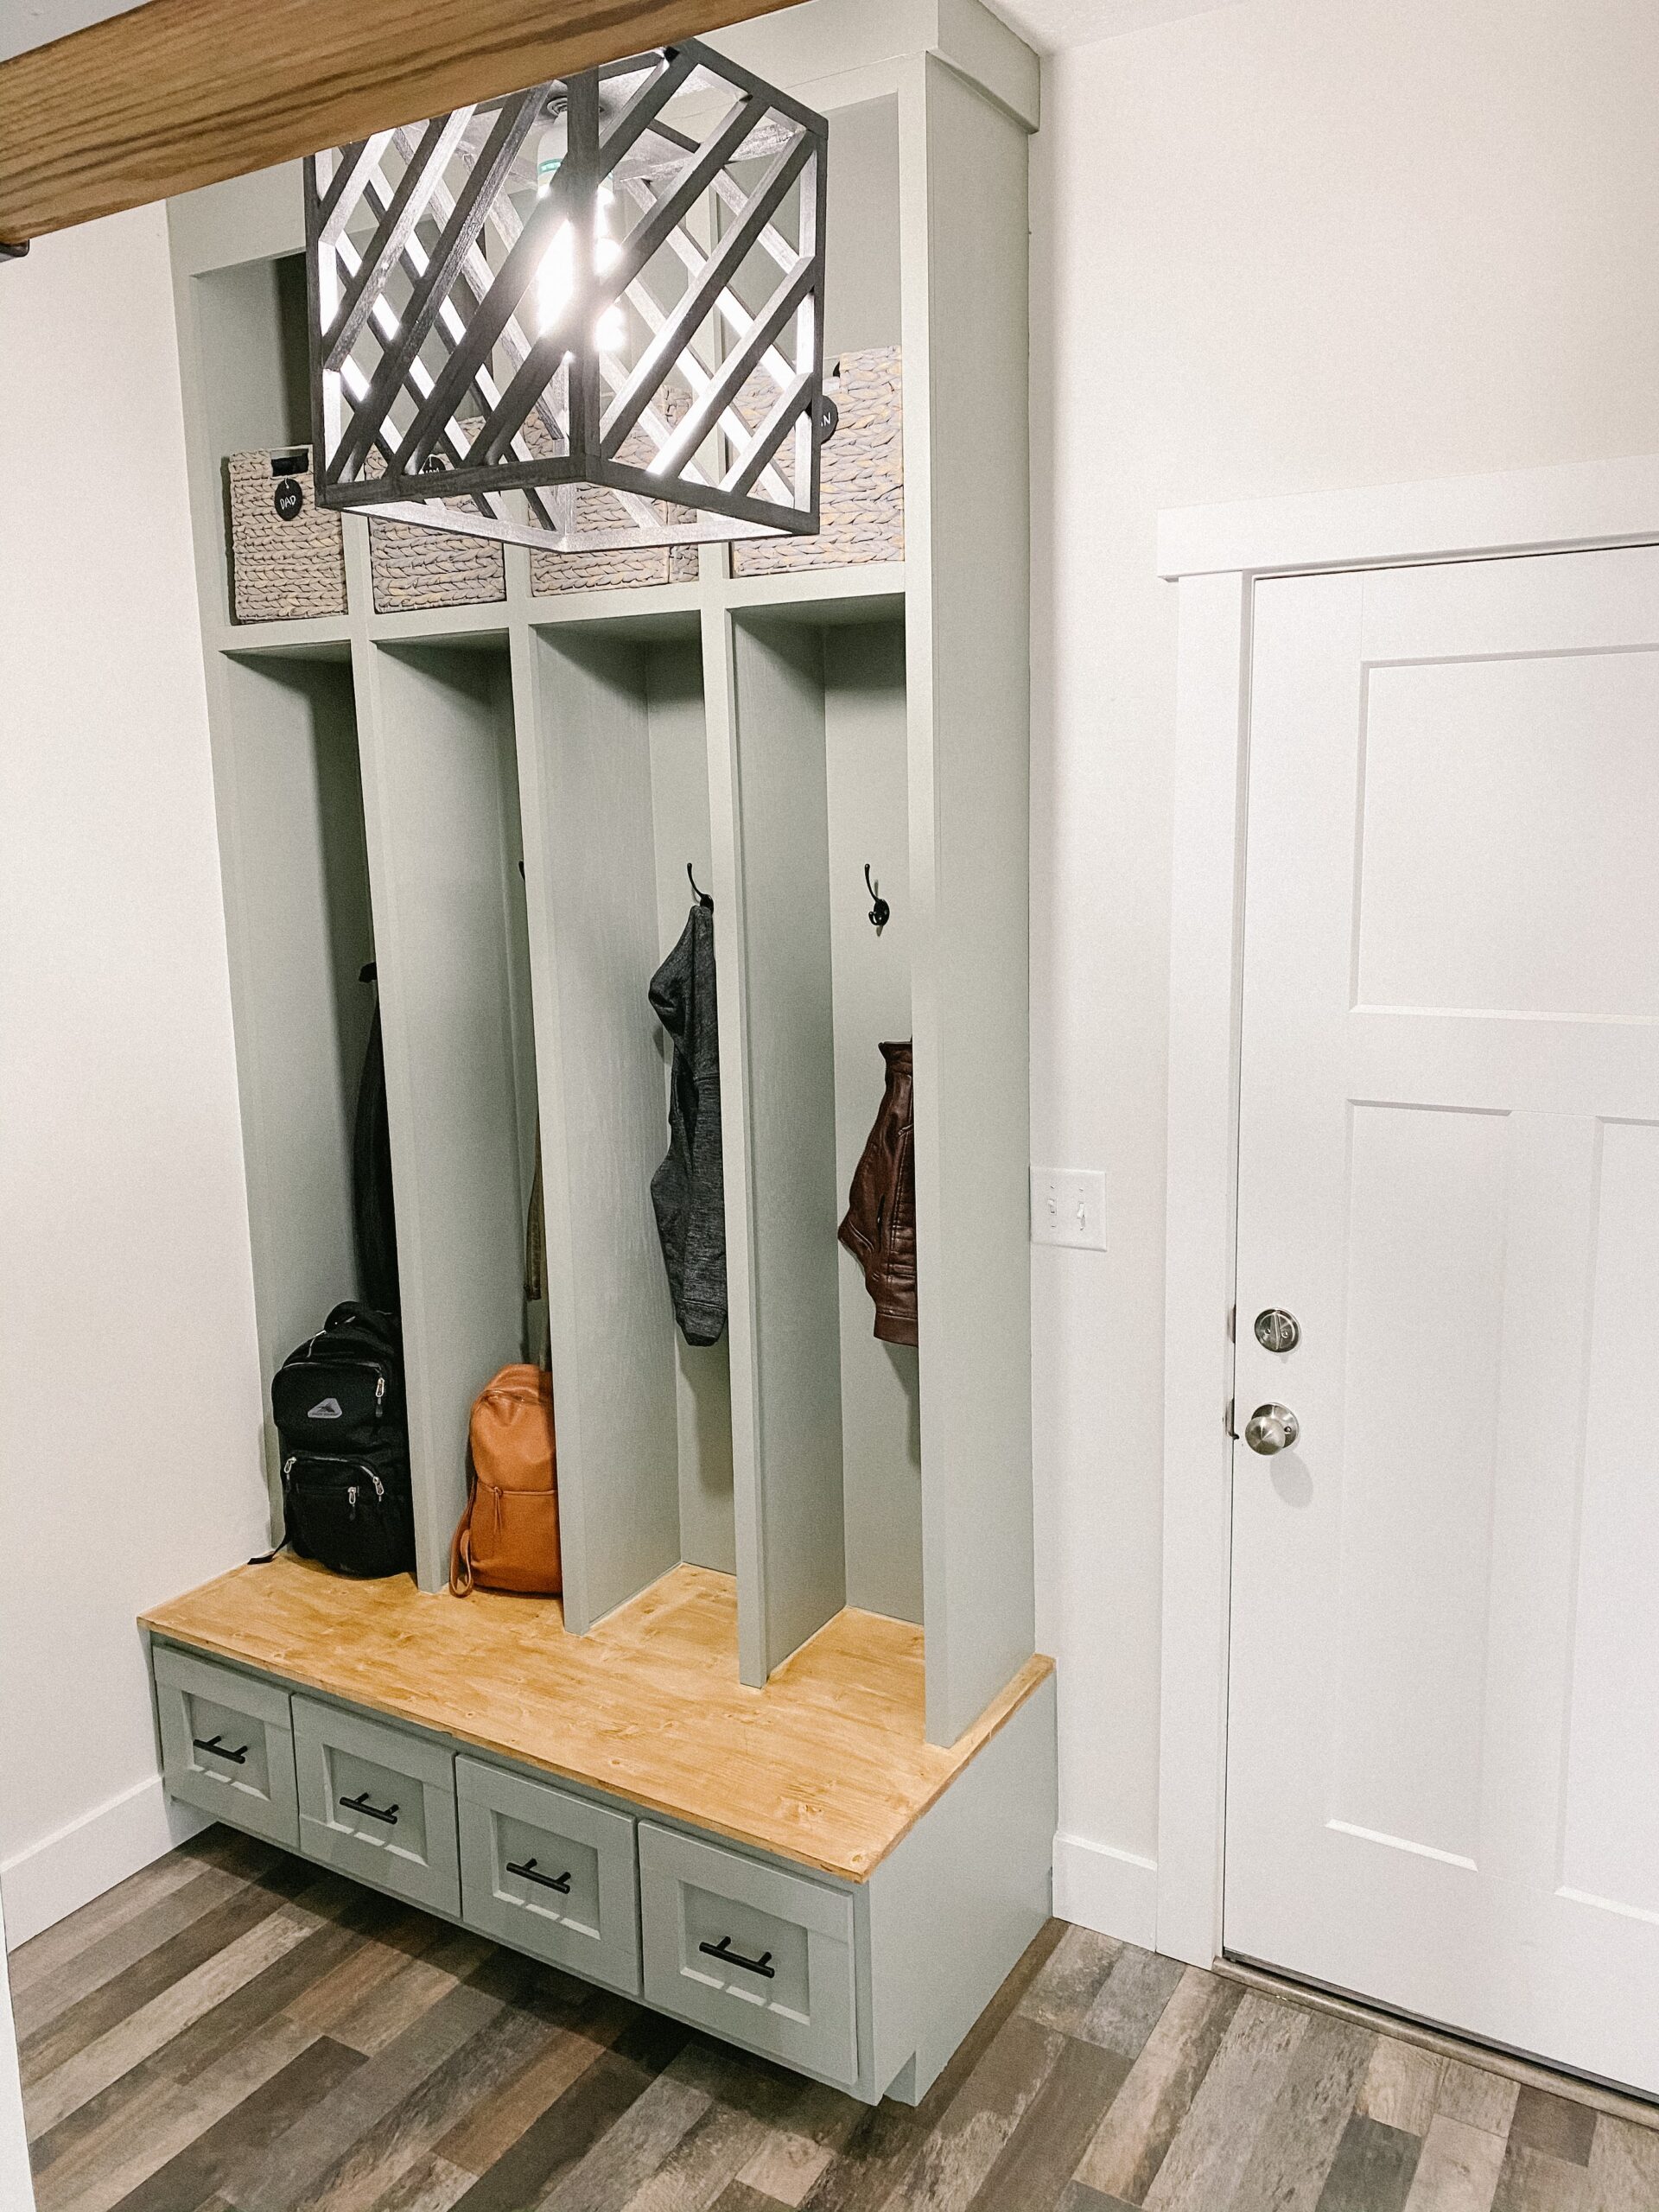
Creating a Functional Mud Room – Part 2 – Locker Cabinet
When I updated my mudroom from the builder-grade mudroom, I split the project into two parts. Part one was the shoe cabinet, which you can read about HERE. Part two is all about the locker cabinet. I say it often, but when doing a large project, split it up into smaller, more manageable sections. This helps you not get as overwhelmed and allows you to celebrate wins along the way. If you have not read part one, do that first. Then come back here for part two!
Locker Cabinet Supplies:
- Plywood
- 1×2 (for the trim)
- Shelf Pins
- Wood Filler
- Caulk
- Primer
- Sandpaper
- Your Choice of Paint
- Drawer Pulls
- Hooks
Tools for Locker Cabinet:
Step #1: Build the First Locker Cabinet
I won’t be providing measurements, because each space is different! Measure your space and determine how many lockers you want. Then determine how large each piece of wood needs to be. We will start with the first locker. Cut two sides and one back piece. Remember, if you do not have a table saw, you can have your local hardware store cut the plywood for you.
To assemble them, I used pocket holes on the OUTSIDE of the cabinet, and secured the three pieces together to form a U shape.
Once it is assembled, put it in place on the shoe cabinet. I really struggled getting it in place, but I was determined, and finally got it! If you want to see me struggle, watch the video, haha!
Step #2: Assemble the Remaining Cabinets
Now that the first cabinet is in place, you can begin the next cabinet. Attach the back piece to the first cabinet, then put the side on. Repeat for all the cabinets.
Step #3: Install Shelves
If you want to add shelves, you will cut your plywood to size. I used THESE brackets. All you have to do is drill a hole and press them in. Put one on each of the four corners and then sit the shelf on top.
Step #4: Add Trim
Time to trim it out and clean it up! I got some 1×3 and installed it with pocket holes at the top of each locker. This will provide stability to the lockers. Then, I added some trim to it to cover it up.
Get some nice 1×2 and install it on all the edges of the lockers and shelves the same way you did on the shoe cabinet. Using a nail gun, nail the trim directly into the raw edges.
Step #5: Finish Work
Time to get that wood filler and caulk out and do all the finish work. Yes, it will take a while, it is a pain, and it will make you question your life choices… but it is worth it!
Once it is all wood-filled and caulked, sand everything down.
Step #6: Prime and Paint
Remember that every time you paint raw wood, you need to prime it first! This is my favorite primer. Put one coat of primer on, then sand it with 220-grit sandpaper and put another coat of primer. You will also need two coats of paint (this is what I used).
Instead of painting the top of the shoe cabinet, I stained it.
Step #7: Install Hardware and Complete the Locker Cabinet
The final step in your locker cabinets is to install the hardware. I used THESE for the drawers and THESE hooks in the lockers.
I was so proud of these lockers! It was exactly what I envisioned. Is it perfect? Nope. But I made it, and I am so proud of that!
Here are links to a couple of other projects in this mudroom! Check out the light fixture and the magnetic chalkboard wall.
Follow along for more DIYs and fun at…


2 Comments