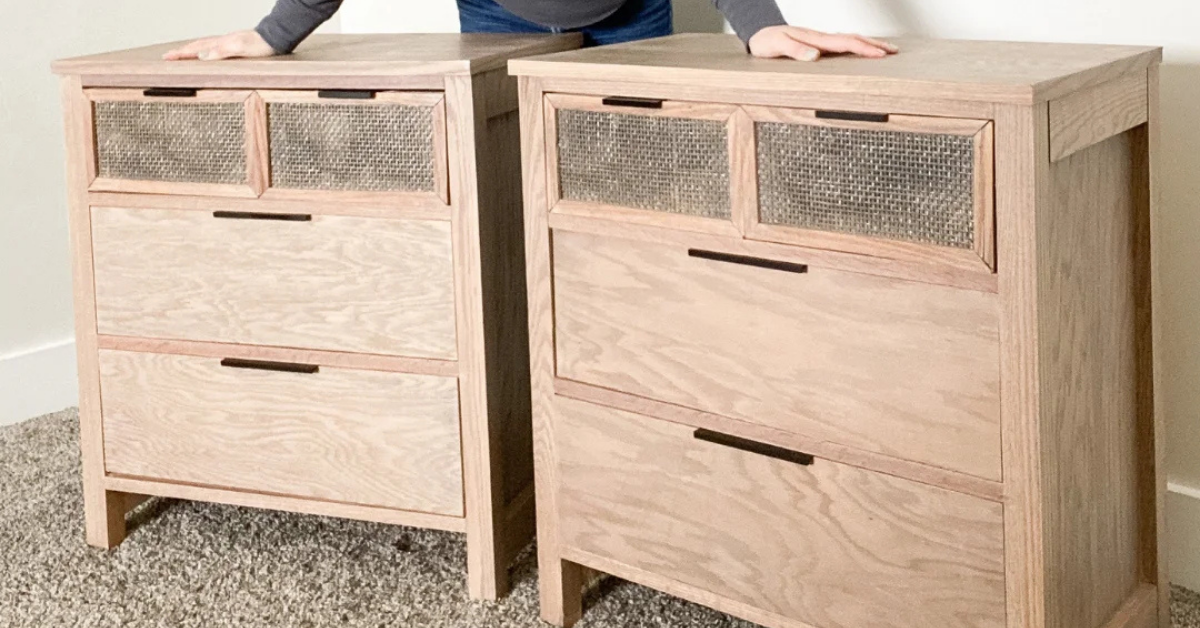
DIY Nightstand Tutorial: Build a Stylish Bedside Table on a Budget
I always wondered why high-quality furniture is always so expensive. Then, I made two nightstands on my own, and now I understand. It is hard work! However, after getting these nightstands with a little sweat equity and at nearly half the price, I think it was worth it! I know this looks intimidating, but it is not as bad as it may seem. I will walk you through the entire DIY nightstand tutorial so you can do it too!
Note: This post contains affiliate links. I may earn a commission at no extra cost to you. Thanks for supporting my content! 🙂
DIY Nightstand Supplies:
Wood Products (I got them all from Lowe’s!)
- 1 2×2, 120” board
- 1 1×2, 96” board
- 1 1×3, 96” board
- 1 1×8, 72” board
- 1 edge-glued finger–joint pine board, 16in x 3ft board
- 1 3/4” thick, half sheet, plywood
- 1 1/2” thick, half sheet, plywood
If you are going for the raw wood look, I recommend oak or pine. Pine will be cheaper, but I love the look of oak, so that is what I did. If you are going to paint it, you can use any wood you want. But be sure to get a nice, smooth wood, without a lot of knots.
Hardware/Supplies:
- Table saw or circular saw
- Saw attachment
- Nailer
- 1 ¼” pocket hole screws
- 1” pocket hole screws
- Pocket hole jig
- 1 ¼” nails, 18 gauge
- 1” nails, 18 gauge
- Drawer pulls (similar to mine)
- 2” wood screws
- Wood glue
- Wood filler
- Sandpaper
- Drawer slides
- Edge banding that matches your wood
- Stain or paint
Step #1: Choose Your DIY Nightstand Plans
I found these plans on Kreg’s website. They were great as a starting point, but I decided to change them up a bit to work for what I wanted. I decided to add a third drawer and no apron. So I adjusted my measurements and created a cut list. This is what Kreg suggested, but I adjusted my list for my project.
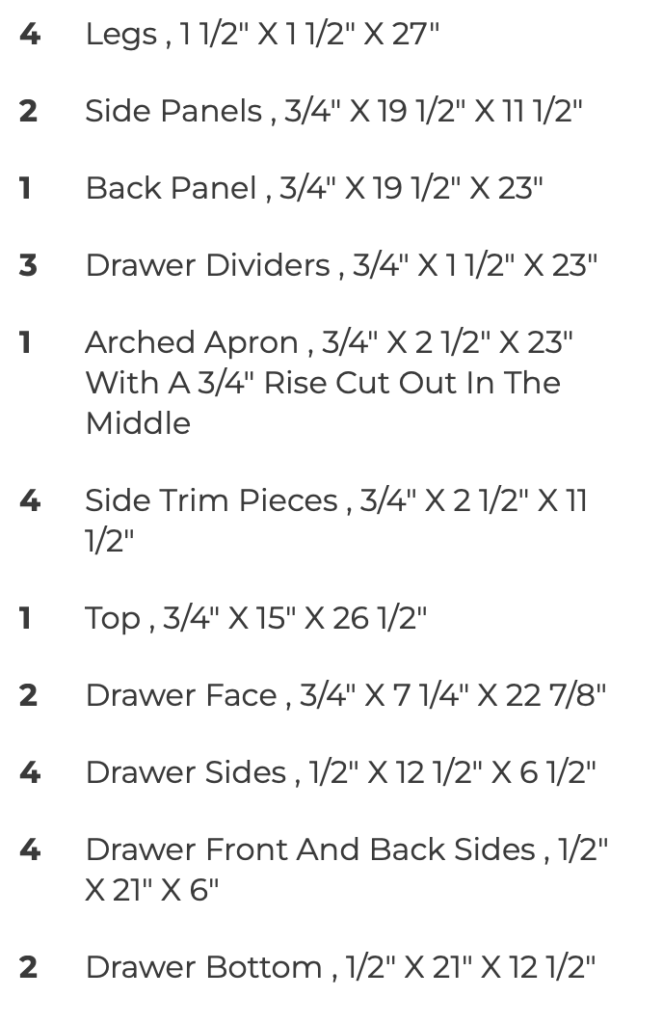
Step #2: Make the Cuts for Your DIY Nightstand
If you do not have a table saw, you can still do this project with a circular saw. I picked up this cool measuring tool to help make the lines, and this saw attachment to keep the lines straight. It made the cuts so much easier. I finished with my table saw, but you don’t have to.
Step #3: Create Pocket Holes
If you are going for the raw wood look, you really need to use pocket holes. They allow you to attach the wood from the inside, so the screws are hidden without using wood filler.
You will need a pocket hole jig for this. They usually come with a special pocket hole drill bit, and you will need to get pocket hole screws.
Create the following pocket holes…
- 3 on the inside of the long sides of the side and back pieces
- 2 on the inside of the top of both side pieces.
- 2 on the bottom of each side of the drawer dividers
- 2 on each side of the OUTSIDE of the drawer front and backs.
Step #4: Start Assembling Your DIY Nightstand Frame
I started by attaching the front and back legs to the side pieces. Then, I connected the back to the front. Once the back and sides were assembled, I added the drawer dividers on the front. I also added a couple of trim pieces to the sides. Then, finally, the top. And with that, the frame was complete!
It is important that you make sure everything is perfectly square and even. You can use clamps to help hold everything in place as you screw it all together.
Instead of buying extra wood, I just screwed two smaller pieces together to make the back. It worked perfectly!
Step #5: Add Edge Banding to the Raw Edges
The top of my nightstand had rough edges that you cannot typically paint to look clean. I used edge banding to cover them up. What I love about edge banding is that it is super easy to install, is paintable, stainable, OR it can be left raw. There are several different colors, so you can get one that matches the color of your wood perfectly! All you do is iron it on the edges, and it finishes it so nicely.
Step #6: Assemble the Drawers
As you assemble the drawers, make sure that you keep your corners at a perfect 90 degrees. Screw the backs to the sides using pocket holes. Make the side pieces 1/2 inch taller than the front and back, so the bottom piece will fit snug between them. Then, attach the bottom with glue and a nail gun.
Step #7: Install the Drawer Slides
I recommend following the instructions on the slides you bought. They are super helpful and informative. Don’t forget to set the slide back enough so that once you add the face frame, it will line up flush with the front of the nightstand.
Step #8: Add the Drawer Face Frames
Once the drawers are installed, it’s time to add the face frames. Be sure to have it evenly spaced on all sides of the opening. Glue and nail the face frame to the drawer.
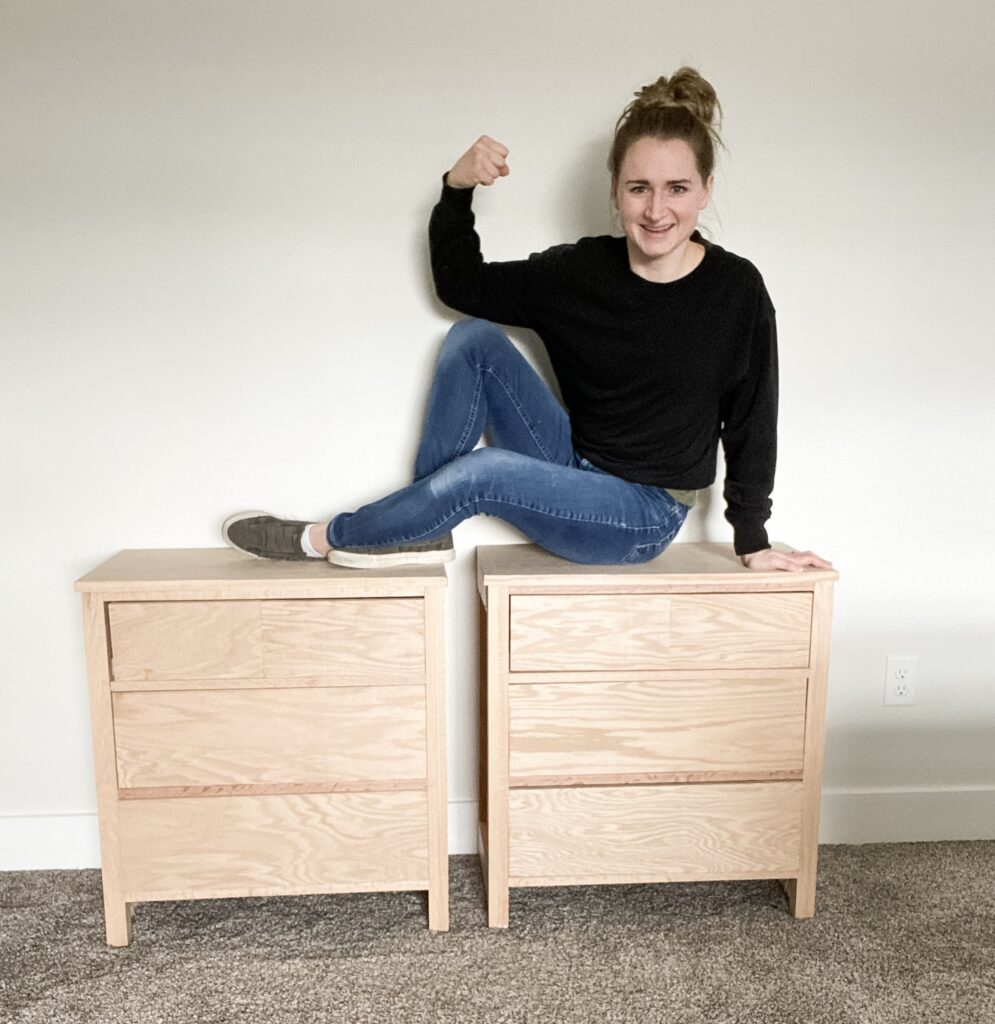
Step #9: Sand it Down
Because this is raw wood and I wanted to keep the raw look, I gave it a really good sanding. Using 220-grit sandpaper gives it a smooth finish. If your wood is rougher or needs a little more sanding, check out this post to get more info on which sandpaper to use.
Step #10: Seal or Paint
The last step is to paint or seal your DIY nightstand. Because I wanted to leave it natural, I did a natural stain combo that I do on basically everything I leave natural.
First, make sure you always use wood conditioner on anything you will be staining. This is like a primer for stain, and it provides a smooth surface for the stain to sit on and even coverage. My favorite stain combination is 40% Early American, 20% White Wash, and 40% Weathered Gray stain. Once that is dry, I seal it with Polycrylic in ultra-flat.
Step #11: Add Hardware
Decide on what hardware you want and install it according to the instructions. These drawer pulls are similar to what I chose!
And… you’re done! Unless… you want to be a little extra (like I was). If so, you can keep going; otherwise, you can stop here and have an incredible custom DIY nightstand.
Step #12: Customize the Drawers
I wanted to give the illusion that the top drawer was two drawers instead of one, so I chose trim and cut it in half. Then, I mitered the ends to 45-degree angles to make a frame.
I got this cane webbing to put in the center of the frame.
When using this, you need to soak it for 15-20 minutes to loosen the fibers. Then, I stained it to match the colors of the dresser.
After it was dry, I nailed it to the front of the drawer and then put the frame around it. I love the look of this, and it gave it just the texture it needed!
And now you really do have a beautifully custom nightstand that YOU MADE BY YOURSELF! Will it be perfect? Absolutely not—you are not a mass manufacturer, a robot, or a machine. But that is what makes these kinds of projects the best. It is perfectly imperfect! Now, go celebrate your hard work! You deserve it!

Follow along for more DIYs and fun at…


One Comment