Decoupage Picture Frames: Adorable & Easy DIY Decor
Outside of big DIY projects, I also really love crafting! Some recent favorites include painting life-size nutcrackers for Christmas and making fingerprint heart magnets ahead of Valentine’s Day. I intended for these decoupage picture frames to be Valentine’s Day decor, but honestly, they’re so cute that I may just leave them up year-round, or put them in my girls’ room!
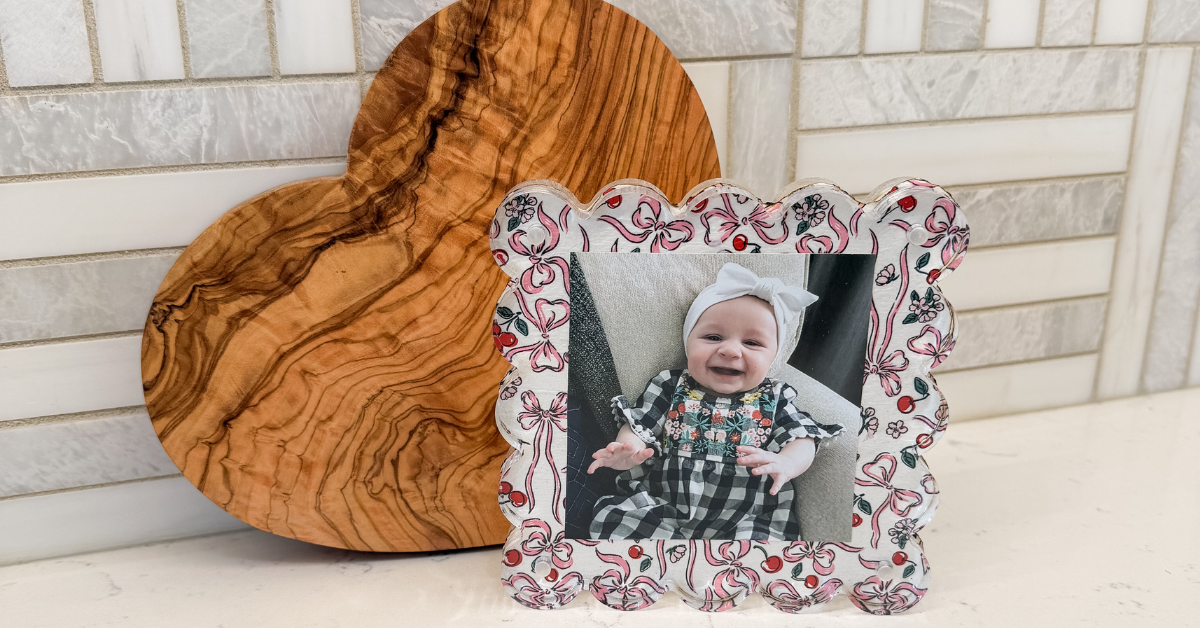
Keep in mind that since I used these adorable acrylic scalloped frames for this project, the steps are specific to that style. But don’t worry, you can absolutely use these same tips on other frames too. You may just need to tweak the process slightly depending on the material and shape.
Note: This post contains affiliate links. I may earn a commission at no extra cost to you. Thanks for supporting my content!
Supplies:
- Acrylic Picture Frames
- Napkins (Some cute options below!)
- White Spray Paint
- Mod Podge
- Foam Craft Brushes
- Scissors
- Lighter
Decoupage Picture Frames Step #1: Spray Paint
First, grab your frames and some white spray paint. Spray just the back piece of each frame, keeping the front piece clear and unpainted.
This helps the frames look nice and finished from the side that won’t be covered with paper. Let everything dry completely before moving on.
Step #2: Add Mod Podge & the Napkin
Next, fully unfold the napkin and gently open it, starting from the top. Set it aside for a moment and add Mod Podge to one side of the acrylic frame. Then, lay the napkin down on the Mod Podge-covered frame and smooth it so there are no air bubbles or bumps.
Decoupage Picture Frames Step #3: Remove Excess Paper
Trim the extra paper from around the sides of the scalloped frame. Don’t worry about being too precise with the scissors, because that’s where the next part of this step comes in!
Once you’ve rough-cut around the frame, use a lighter and lightly touch the flame to the edge of the paper. The fire will burn the excess paper so that it’s shaped to the edges of the frame. Pretty cool! Be sure to be extra careful with this step.
Step #4: Add Another Coat of Mod Podge & A Photo
We’re using Mod Podge again, but this time, you’ll paint it on the front of the napkin. Then, place the picture you’ve chosen in the middle of the frame and press down gently to make sure it sticks to the napkin.
Step #5: Finish Your Decoupage Picture Frames
Finally, while the Mod Podge is still wet, carefully place the unpainted acrylic piece on top of the napkin-covered base. Make sure the edges line up perfectly before pressing them down.
And that’s it!
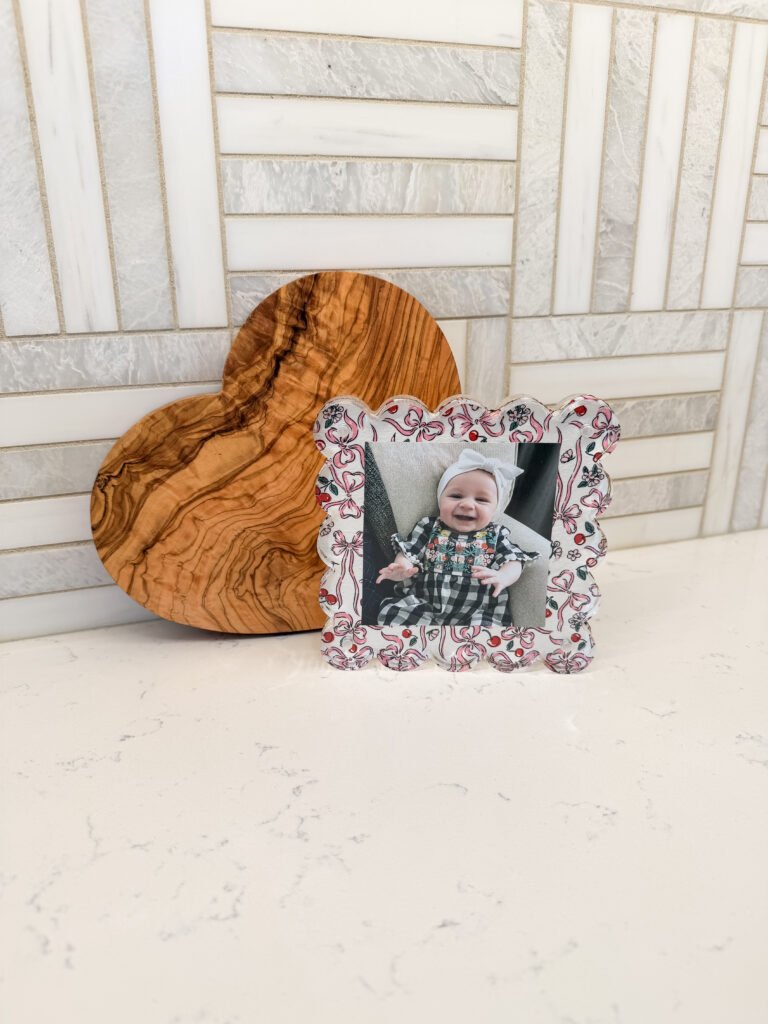
These decoupage picture frames would make such a fun girls’ night craft, and the supplies are all super affordable. I styled one of my frames on my counter next to this cute heart-shaped cutting board to give my kitchen some Valentine’s Day flair!