
DIY Sliding Barn Door: An Affordable & Stylish Home Upgrade
Don’t you just love the look that a barn door adds to a room? I do too. I needed some new barn doors for my kitchen and decided to build them! It completely changed the look of the room. I’ve got it all figured out now, so just follow along and you can make a DIY sliding barn door of your own!
Note: This post contains affiliate links. I may earn a commission at no extra cost to you. Thanks for supporting my content! 🙂
DIY Sliding Barn Door Supplies:
- 1×6 Primed Pine Boards
- 1×3 Primed Pine Boards
- 3/4″ Wood Trim
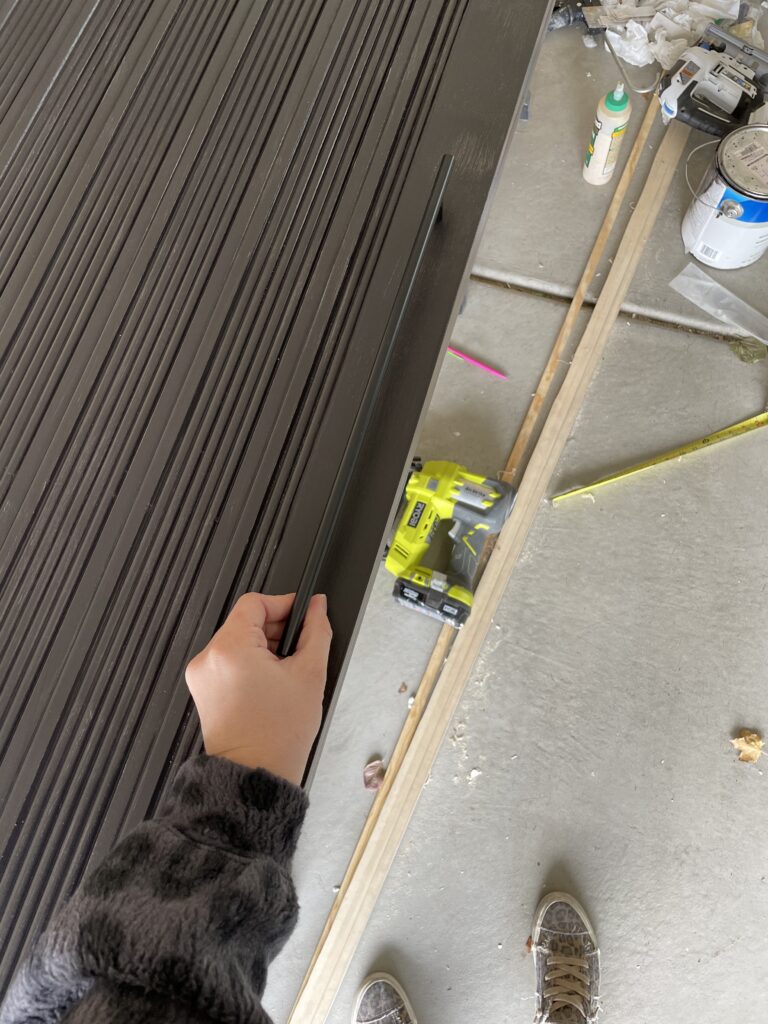
- Fluted Door Trim
- 3/4″ Maple Plywood
- Wood Glue
- Nail Gun
- 18-Gauge Nails, 1″ Long
- Sander
- Red Devil Spackle
- Primer
- Your Choice of Paint (I chose Sherwin-Williams Black Magic)
- Handle
- Sawhorses
- Barn Door Hardware
Step #1: Cut, Glue, & Nail
First, cut your sheet of plywood to the size you want. When it’s at the correct size, go ahead and lay it on the sawhorse. 1×6 boards are going to be on the top and bottom, and the 1×3 boards are going to be on the sides, with the fluted trim going in the middle. I used 3/4″ wood trim to go between the fluted trim and the top and bottom boards. The molding around the sides ended up being unnecessary to me, so I didn’t use it. I just filled it in with some spackle, and it looked great!
Next, lay your top and bottom pieces on first, along with the 3/4″ wood trim, and then cut your fluted trim to the correct measurement to go in the middle. Using 1″ nails and wood glue, attach all of the boards to the plywood.
Step #2: Add Putty
After you glue and nail all your boards on, you can go ahead and putty all the nail holes with this amazing spackle. I like to put it on and then wipe it off with a wet wipe or water. Pro tip: Spackle the edge of the door as well, and then sand it smooth.
Step #3: Prime Your DIY Sliding Barn Door
When all the holes are filled, you can prime the door. After the primer dries, don’t forget to prime the other side. This door is heavy and big, so it’s hard to flip it over alone. Grab a friend or partner to help you flip the door over!
Step #4: Paint
After priming, it is time to paint. This is the part where the DIY sliding barn door starts looking so good! You will have to paint one side, then grab a friend again to help you flip it, and paint the other side.
Step #5: Add Hardware
Once the door is painted and has dried, you can attach a handle to it. This is the handle that I used, but you can use any style and size handle that you would like. After the handle is on, it’s time to attach your barn door hardware and hang it up. I took the existing barn door hardware off of my other door and just used that, but this should also work great. There are so many different styles and sizes, you can definitely find one that works for you and your space.
Your DIY Sliding Barn Door is Done!

I love the way this barn door transforms the room. It looks so good with the rest of my kitchen! I am so glad that I decided to redo these barn doors. My husband even approved of the change! Follow me on Instagram for more easy home DIY projects!


