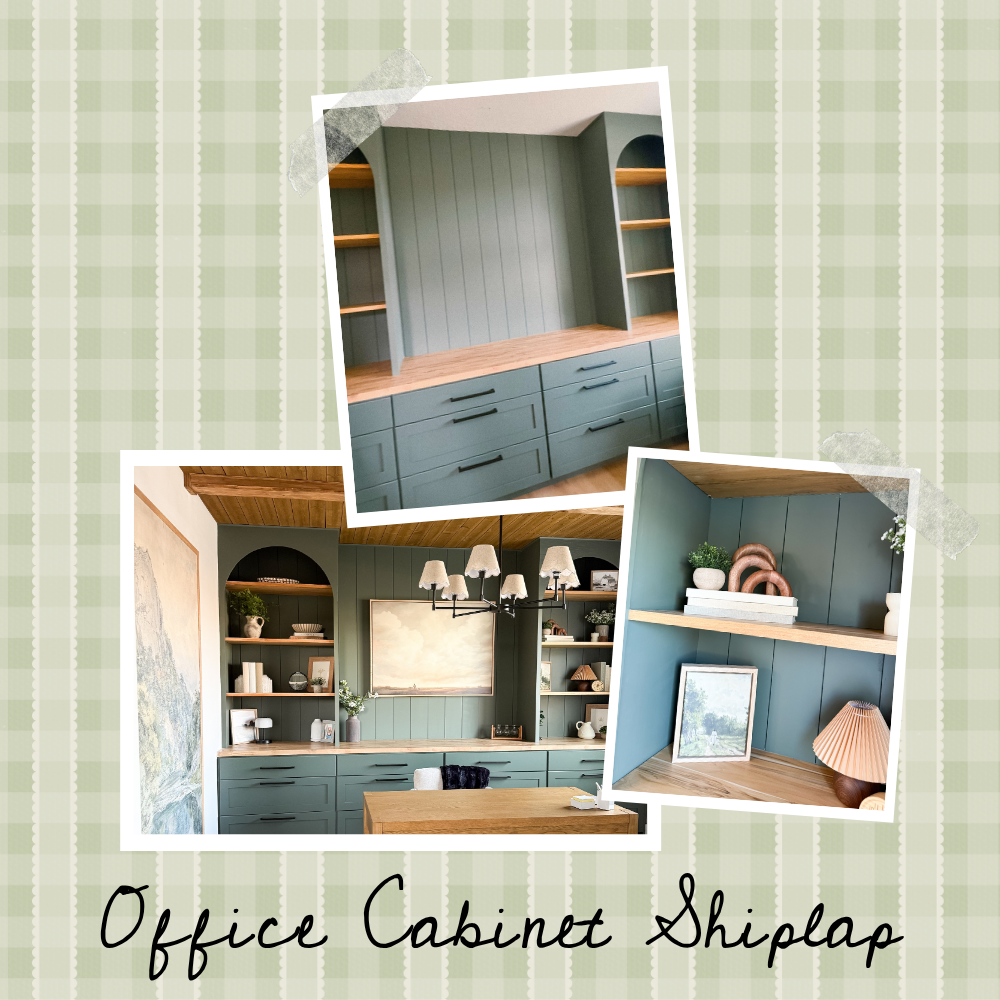
How to Install Shiplap on a Budget
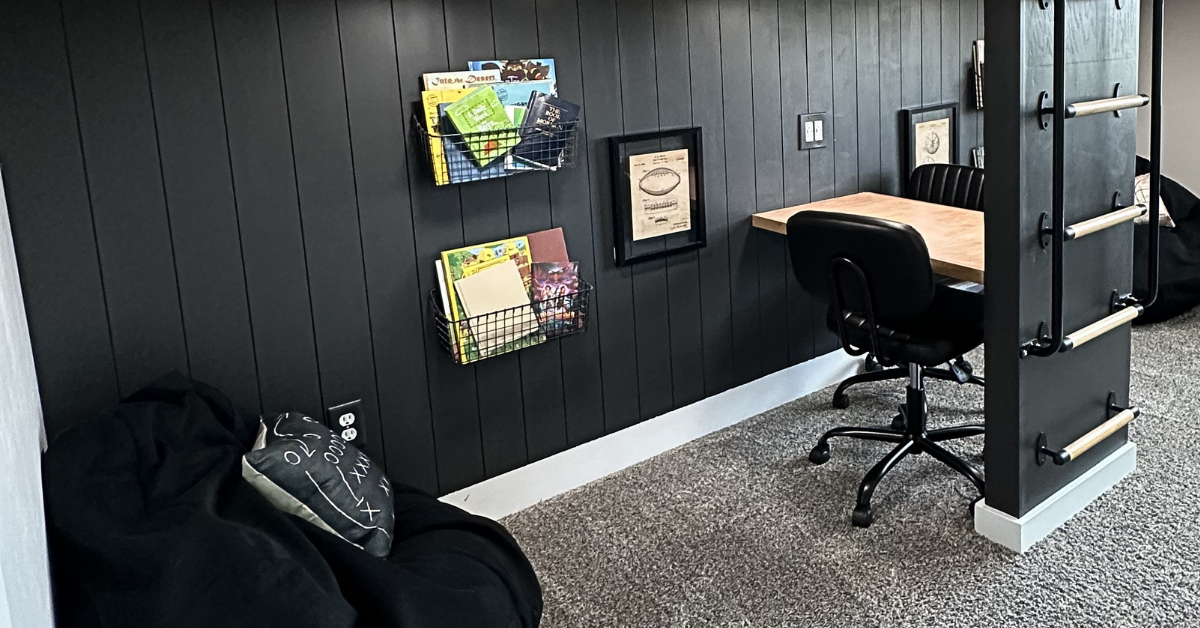
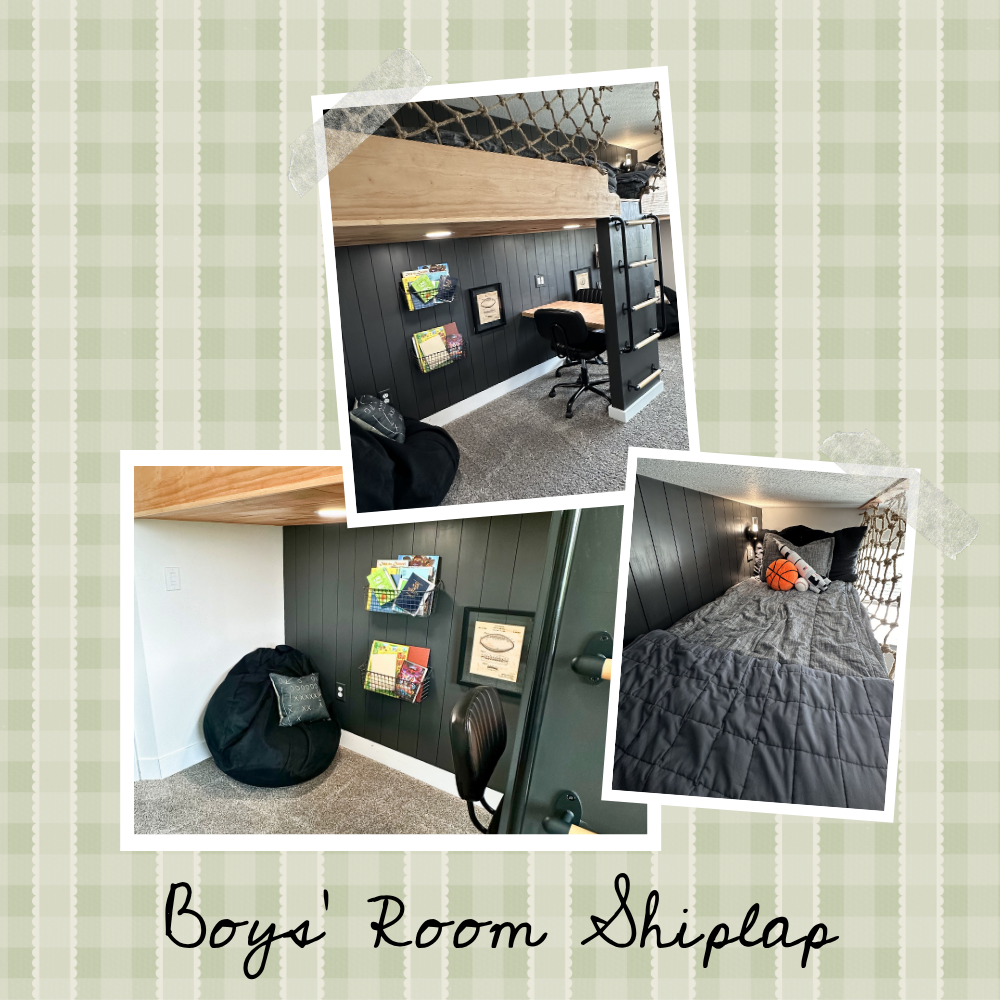
Shiplap works in a lot more design styles than people give it credit for! And although it’s one of those upgrades people assume requires a contractor and a big budget, I’m here to tell you that’s not the case. I’ve installed shiplap in my boys’ room and in my office (on both the walls and ceiling), and I’ve picked up some tips along the way. Here’s how to install shiplap – on a budget!
Notes: This post contains affiliate links. I may earn a commission at no extra cost to you. Thanks for supporting my content!
Supplies Needed:
- Stud Finder
- Shiplap Board
- Sandpaper
- Primer
- Your Choice of Paint (These are my favorite paint rollers!)
- Nail Gun
- Nails
- Laser Level
- Caulk Gun
- Caulk
- Outlet Spacers
- Wood Filler
How to Install Shiplap Step #1: Prep the Wall
First things first, find the studs in the wall before you get started. You’ll be nailing the boards into the studs, so this step is important! A stud finder makes this process pretty easy. Once you’ve located them, mark the stud locations at the top and bottom of the wall so you have a reference point as you install.
If you’re painting the wall behind where the shiplap will go, now’s the time to do it! Whatever color you plan to paint the shiplap, paint the wall behind it that same color first. Or, you can paint the edges of each board as you install them in step #3. Either way works! Just don’t wait until everything is up to deal with it, because getting paint into those shiplap gaps after they’re installed is tricky.
How to Install Shiplap Step #2: Measure & Cut the Boards
Measure the wall space first, then plan out your board sizing before you start cutting. In my opinion, the thinner the board cut, the more modern the feel. Thick-cut shiplap has more of a rustic, lived-in quality. Either option is great – just make sure it fits the vibe you’re going for.
How to Install Shiplap Step #3: Install
Before nailing the first board in place, use a laser level to make sure it’s perfectly straight – this is the most important board of the whole install since every row above it follows its lead! Once the first board is level and secure, place your spacers on top (if you’re using them – I usually just eyeball it), set the next board, and nail it in. Repeat that process, checking with the laser level every few rows to make sure nothing is drifting. It’s much easier to catch an error early than to fix it later!
If you decide to paint the edges of the boards as you go, like I did, this is the step to do that.
For outlets and switches, cut the board slightly oversized, hold it up to the wall, and trace the outlet box from behind with a pencil. It gives you a more accurate cut line than measuring alone. When adding the outlet covers back, use an outlet spacer to account for the added thickness of the shiplap. It helps the cover sit flush against the wall.
How to Install Shiplap Step #4: Finish Work
Once all the shiplap was installed, caulk in between it to eliminate any uneven gaps. I also like to caulk where the wall meets the ceiling and floor. It just gives it a more finished look.
Finish up by filling nail holes, then sanding, priming, and painting.
And just like that, you’re done!
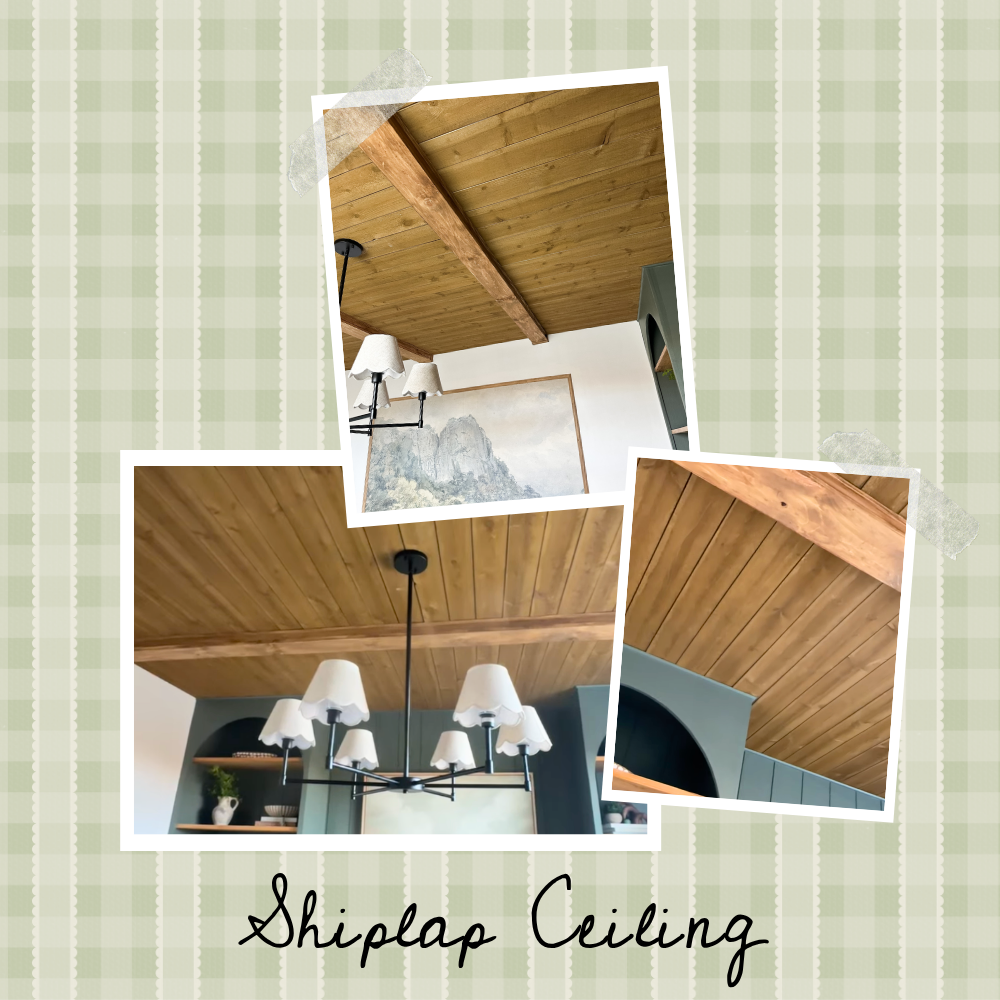
Shiplap Ceiling
Installing shiplap on a ceiling varies from installing it on a wall. Check out this blog post for the shiplap ceiling breakdown!
What do you think? Are you going to give installing shiplap a try?
As your resident DIY cheerleader, you definitely should! It’s an affordable, relatively easy way to elevate a space. You’ve got this!