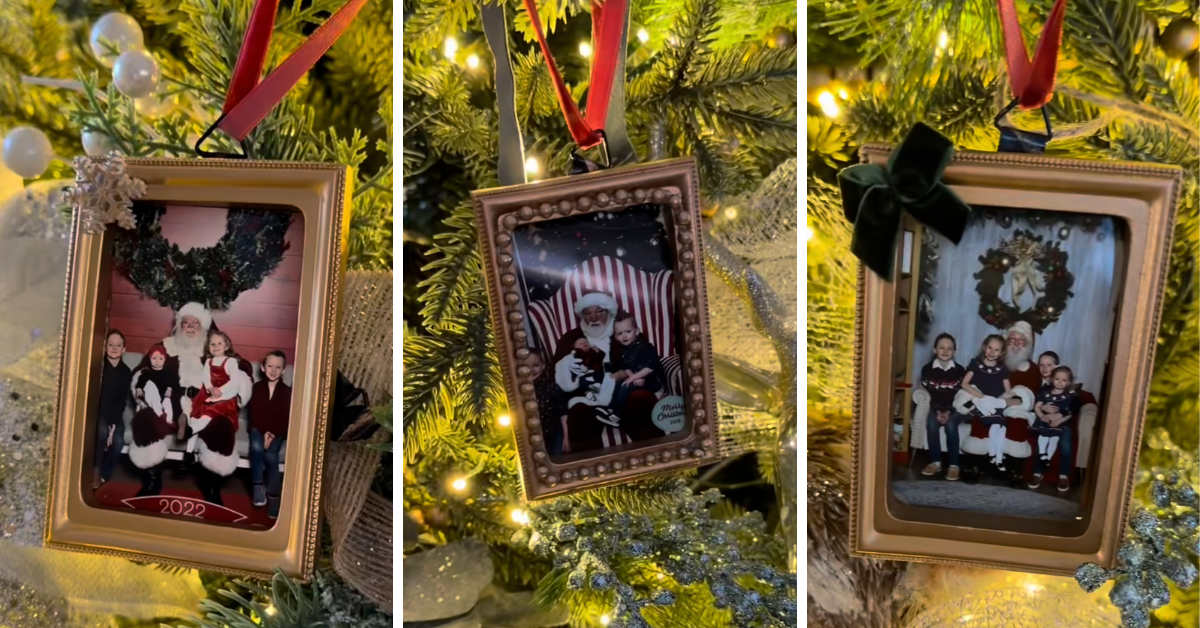
Showcasing Merry Memories with Santa Picture Frame Ornaments
One of my favorite Christmas traditions is taking the kids to visit Santa each year. And of course, the trip to the North Pole (AKA the mall) isn’t complete without snapping a picture to commemorate it! It’s so fun seeing how the kids have changed and grown over the years, and I love these photos too much to keep them sitting in a box. That inspired today’s 25 Days of Christmas DIY project: making Santa picture frame ornaments!
Note: This post contains affiliate links. I may earn a commission at no extra cost to you. Thanks for supporting my content! 🙂
Santa Picture Frame Ornaments Supplies:
- Frame Ornaments
- Rub ‘N Buff Gold Wax Finish (If you want to adjust the color of the frames)
- Hot Glue Gun
- Ribbon
- Mini Bows
- Mini Snowflakes
- Mini Gold Bead Garland
Step #1: Decorate Your Santa Picture Frame Ornaments
This first part is optional, but very worth it if you don’t love the color of your frames! I didn’t, so I painted them with Rub ‘N Buff. After letting those dry, it’s time to decorate!
You can customize the embellishments you use to match your Christmas decor, or go with a totally new theme. I wanted the frames to have a little something extra, so I glued on these tiny gold bead garlands around them. Then, I added these adorable mini bows and snowflakes.
Step #2: Add Ribbons to Hang Your Ornaments
Ribbon is an inexpensive trick that instantly makes your ornaments look more elevated and festive. So after adding our Santa pictures to the frames, I tied ribbons to each and placed them on our tree.
I’m having so much fun with these 25 Days of Christmas DIYs! Follow along on Instagram to see what Christmas craft I make next.
Follow along for more DIYs and fun at…